Cookies, Desserts, Recipes

Monster Cookies

Monster cookies
there's nothin' scary about these monsters...

So, I have this problem. It’s really really really hard for me to pick my favorite kind of cookie. I mean seriously. How can I choose between peanut butter, or chocolate chip, or oatmeal cranberry? And what about M&M cookies? Or cookies with peanuts? I’ll pick all of the above, please. But thankfully… sometimes problems have happy endings. Sometimes you can have your cake [cookie?] and eat it too. Now is one of those times.

To me, monster cookies are so great because they combine the best of the best. A peanut butter, oatmeal based cookie dough with bits of chocolate and nuts and dried fruit and candy. Ohmygoodnessdeliciousamazement. Plus, they can be totally customized to your desires and tastes and preferences without changing the integrity of the cookie. So, honestly, there isn’t much to say about these fantastic treats other than make them now. Because you know they’ll be good. As your custom creation they better be! 🙂

Monster Cookies [from Brown Eyed Baker]

Ingredients:

  • 3 eggs
  • 3/4 cup sugar
  • 3/4 cup light brown sugar, packed
  • 1 teaspoon vanilla extract
  • 1 teaspoon corn syrup
  • 2 teaspoons baking soda
  • sprinkle salt
  • 1/2 cup unsalted butter, melted
  • 1 1/2 cups chunky peanut butter
  • 4 1/2 cups rolled oats
  • 1/2 cup all-purpose flour
  • 1/2 cup honey roasted peanuts
  • 1/2 cup pretzel M&Ms
  • 1/2 cup plain M&Ms
  • 1/4 cup butterscotch chips
  • 1/4 cup white chocolate chips
  • 1/4 cup semi-sweet chocolate chips
  • 1/4 cup dried cranberries

Directions:

Add eggs, sugars, vanilla, corn syrup, baking soda, and salt to the bowl of a stand mixer. In a small bowl, whisk together butter and peanut butter. Fold into the egg mixture, then add flour and oats and mix to combine. Finally, fold in the add-ins [peanuts, M&Ms, chips, and cranberries]–I used a wooden spoon to do so because the bowl of my mixer was practically overflowing! Cover and refrigerate for 1 hour to set.

Preheat oven to 350 degrees. Remove from fridge and scoop dough onto cookie sheets in rounded tablespoons, using the spoon to press down slightly on each ball of dough to flatten it a little. Bake for about 10 minutes or until cookies are golden brown.

Note:

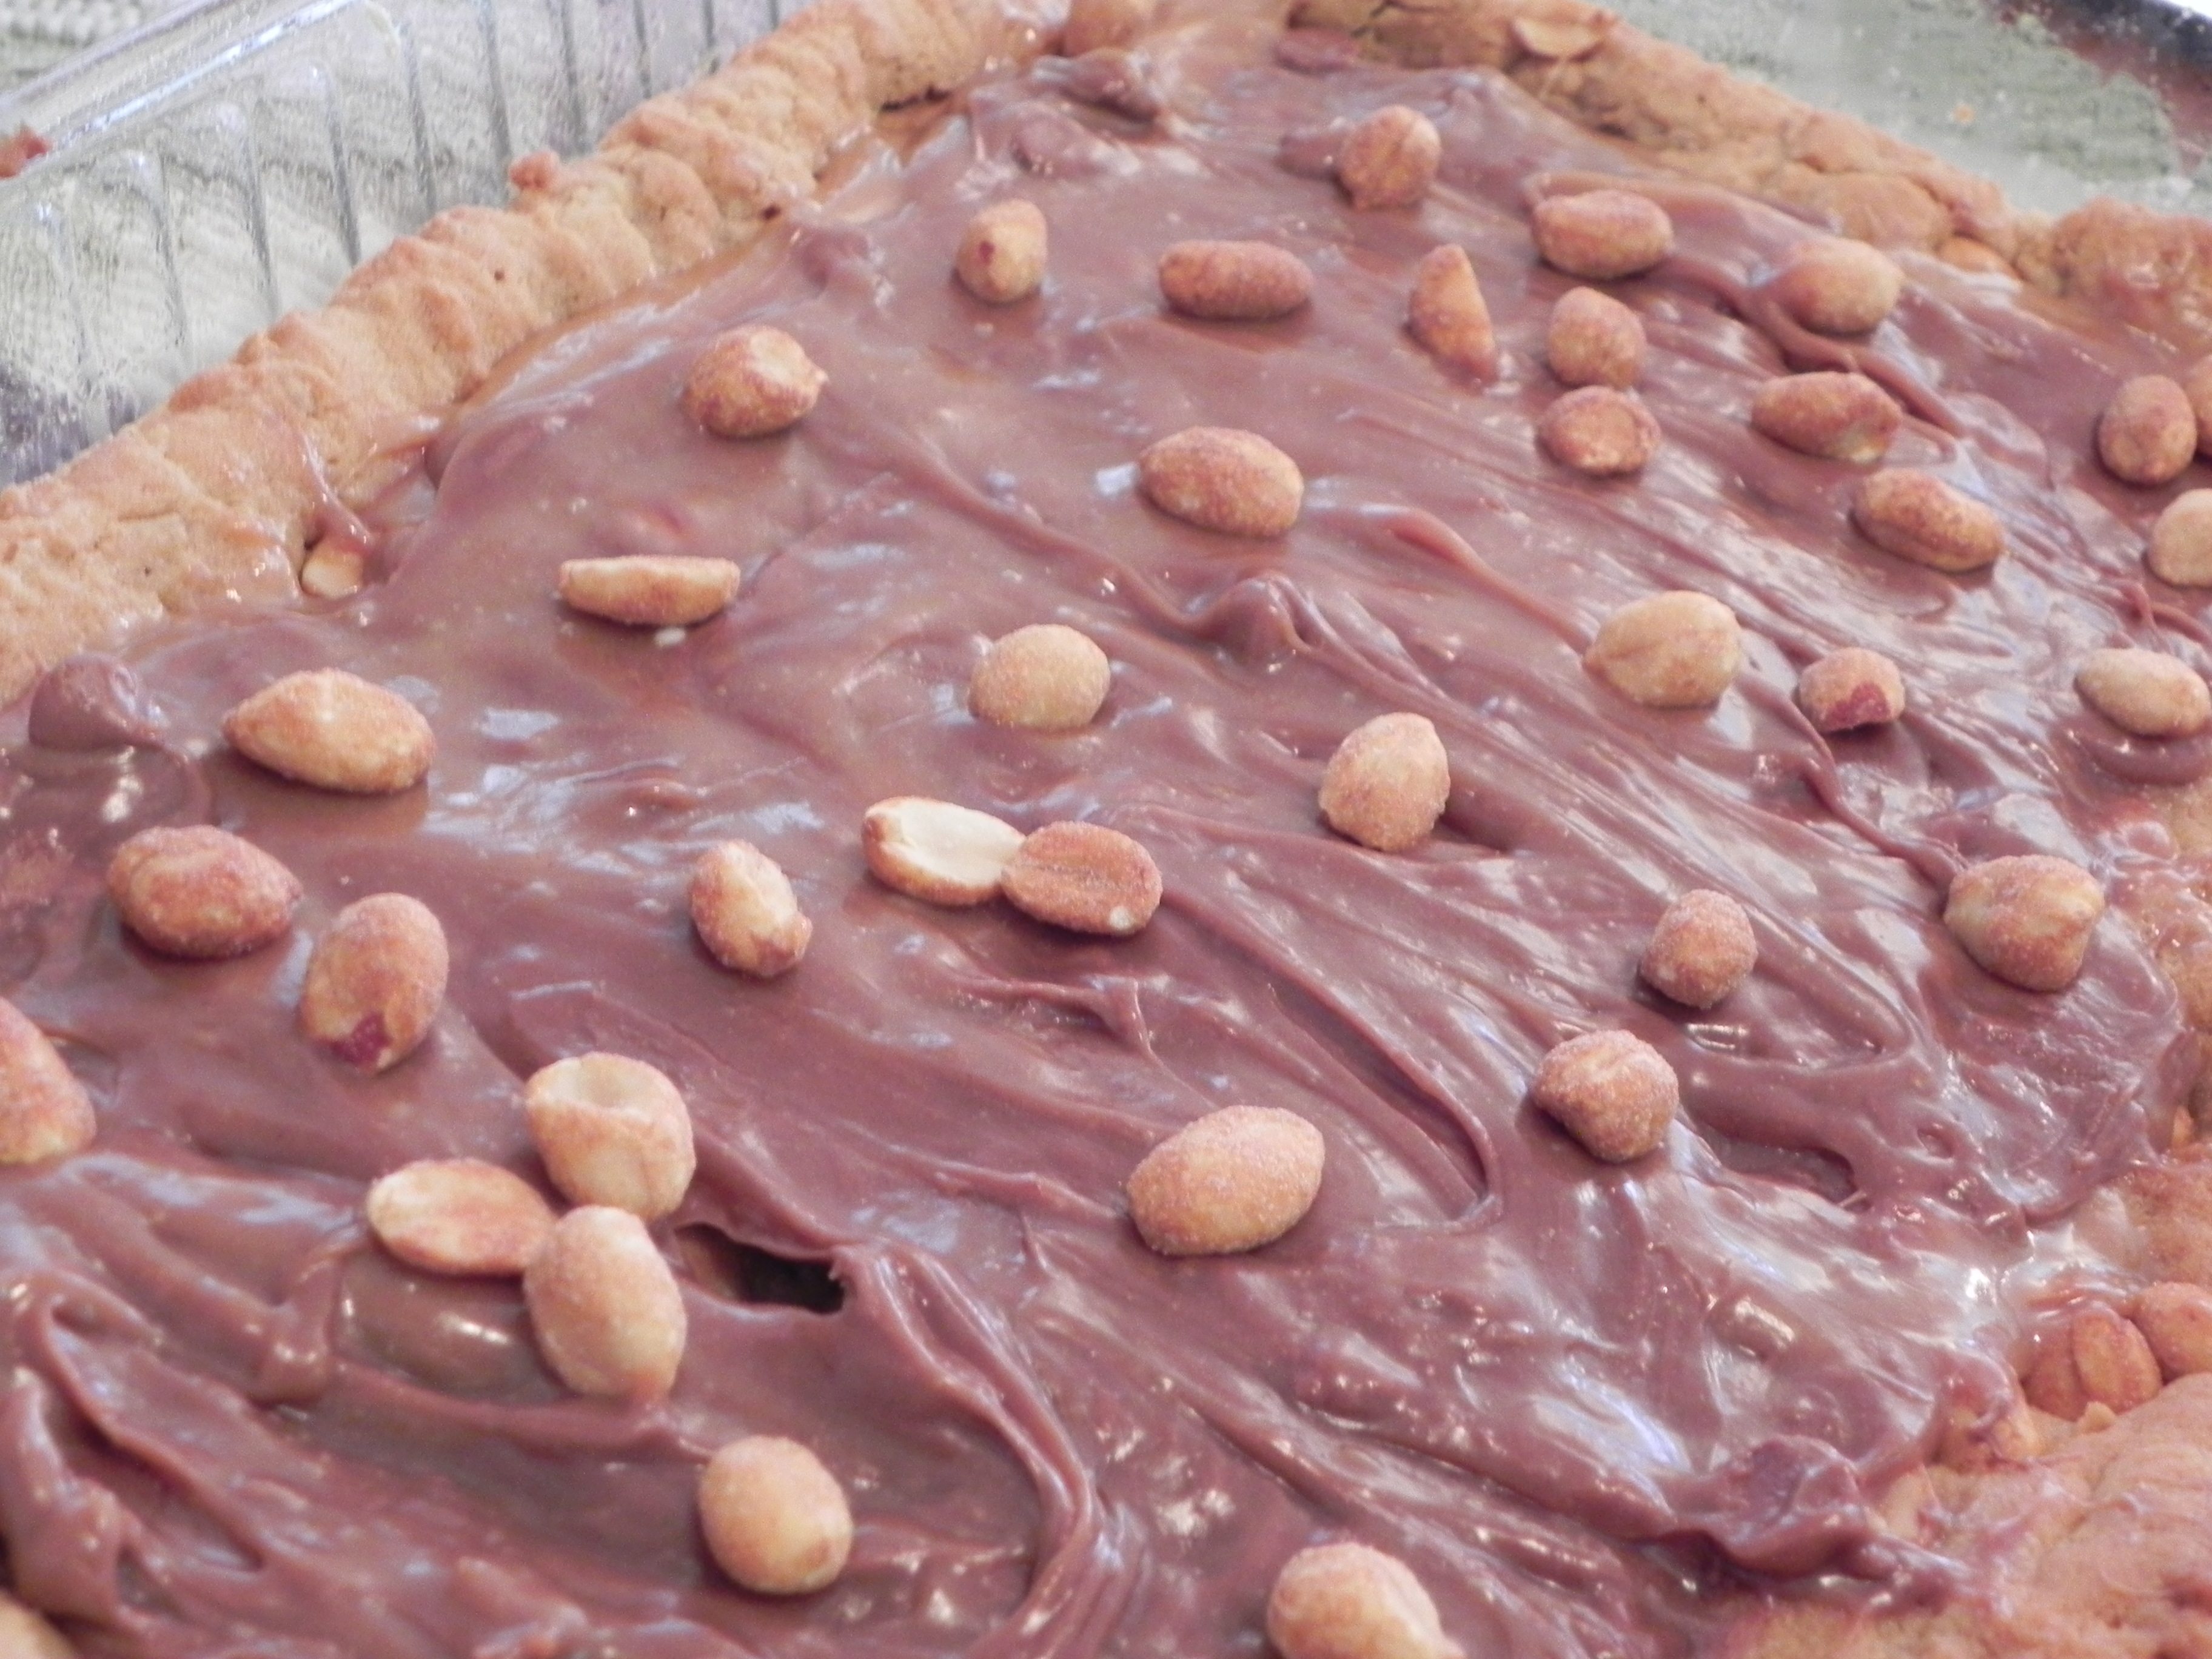
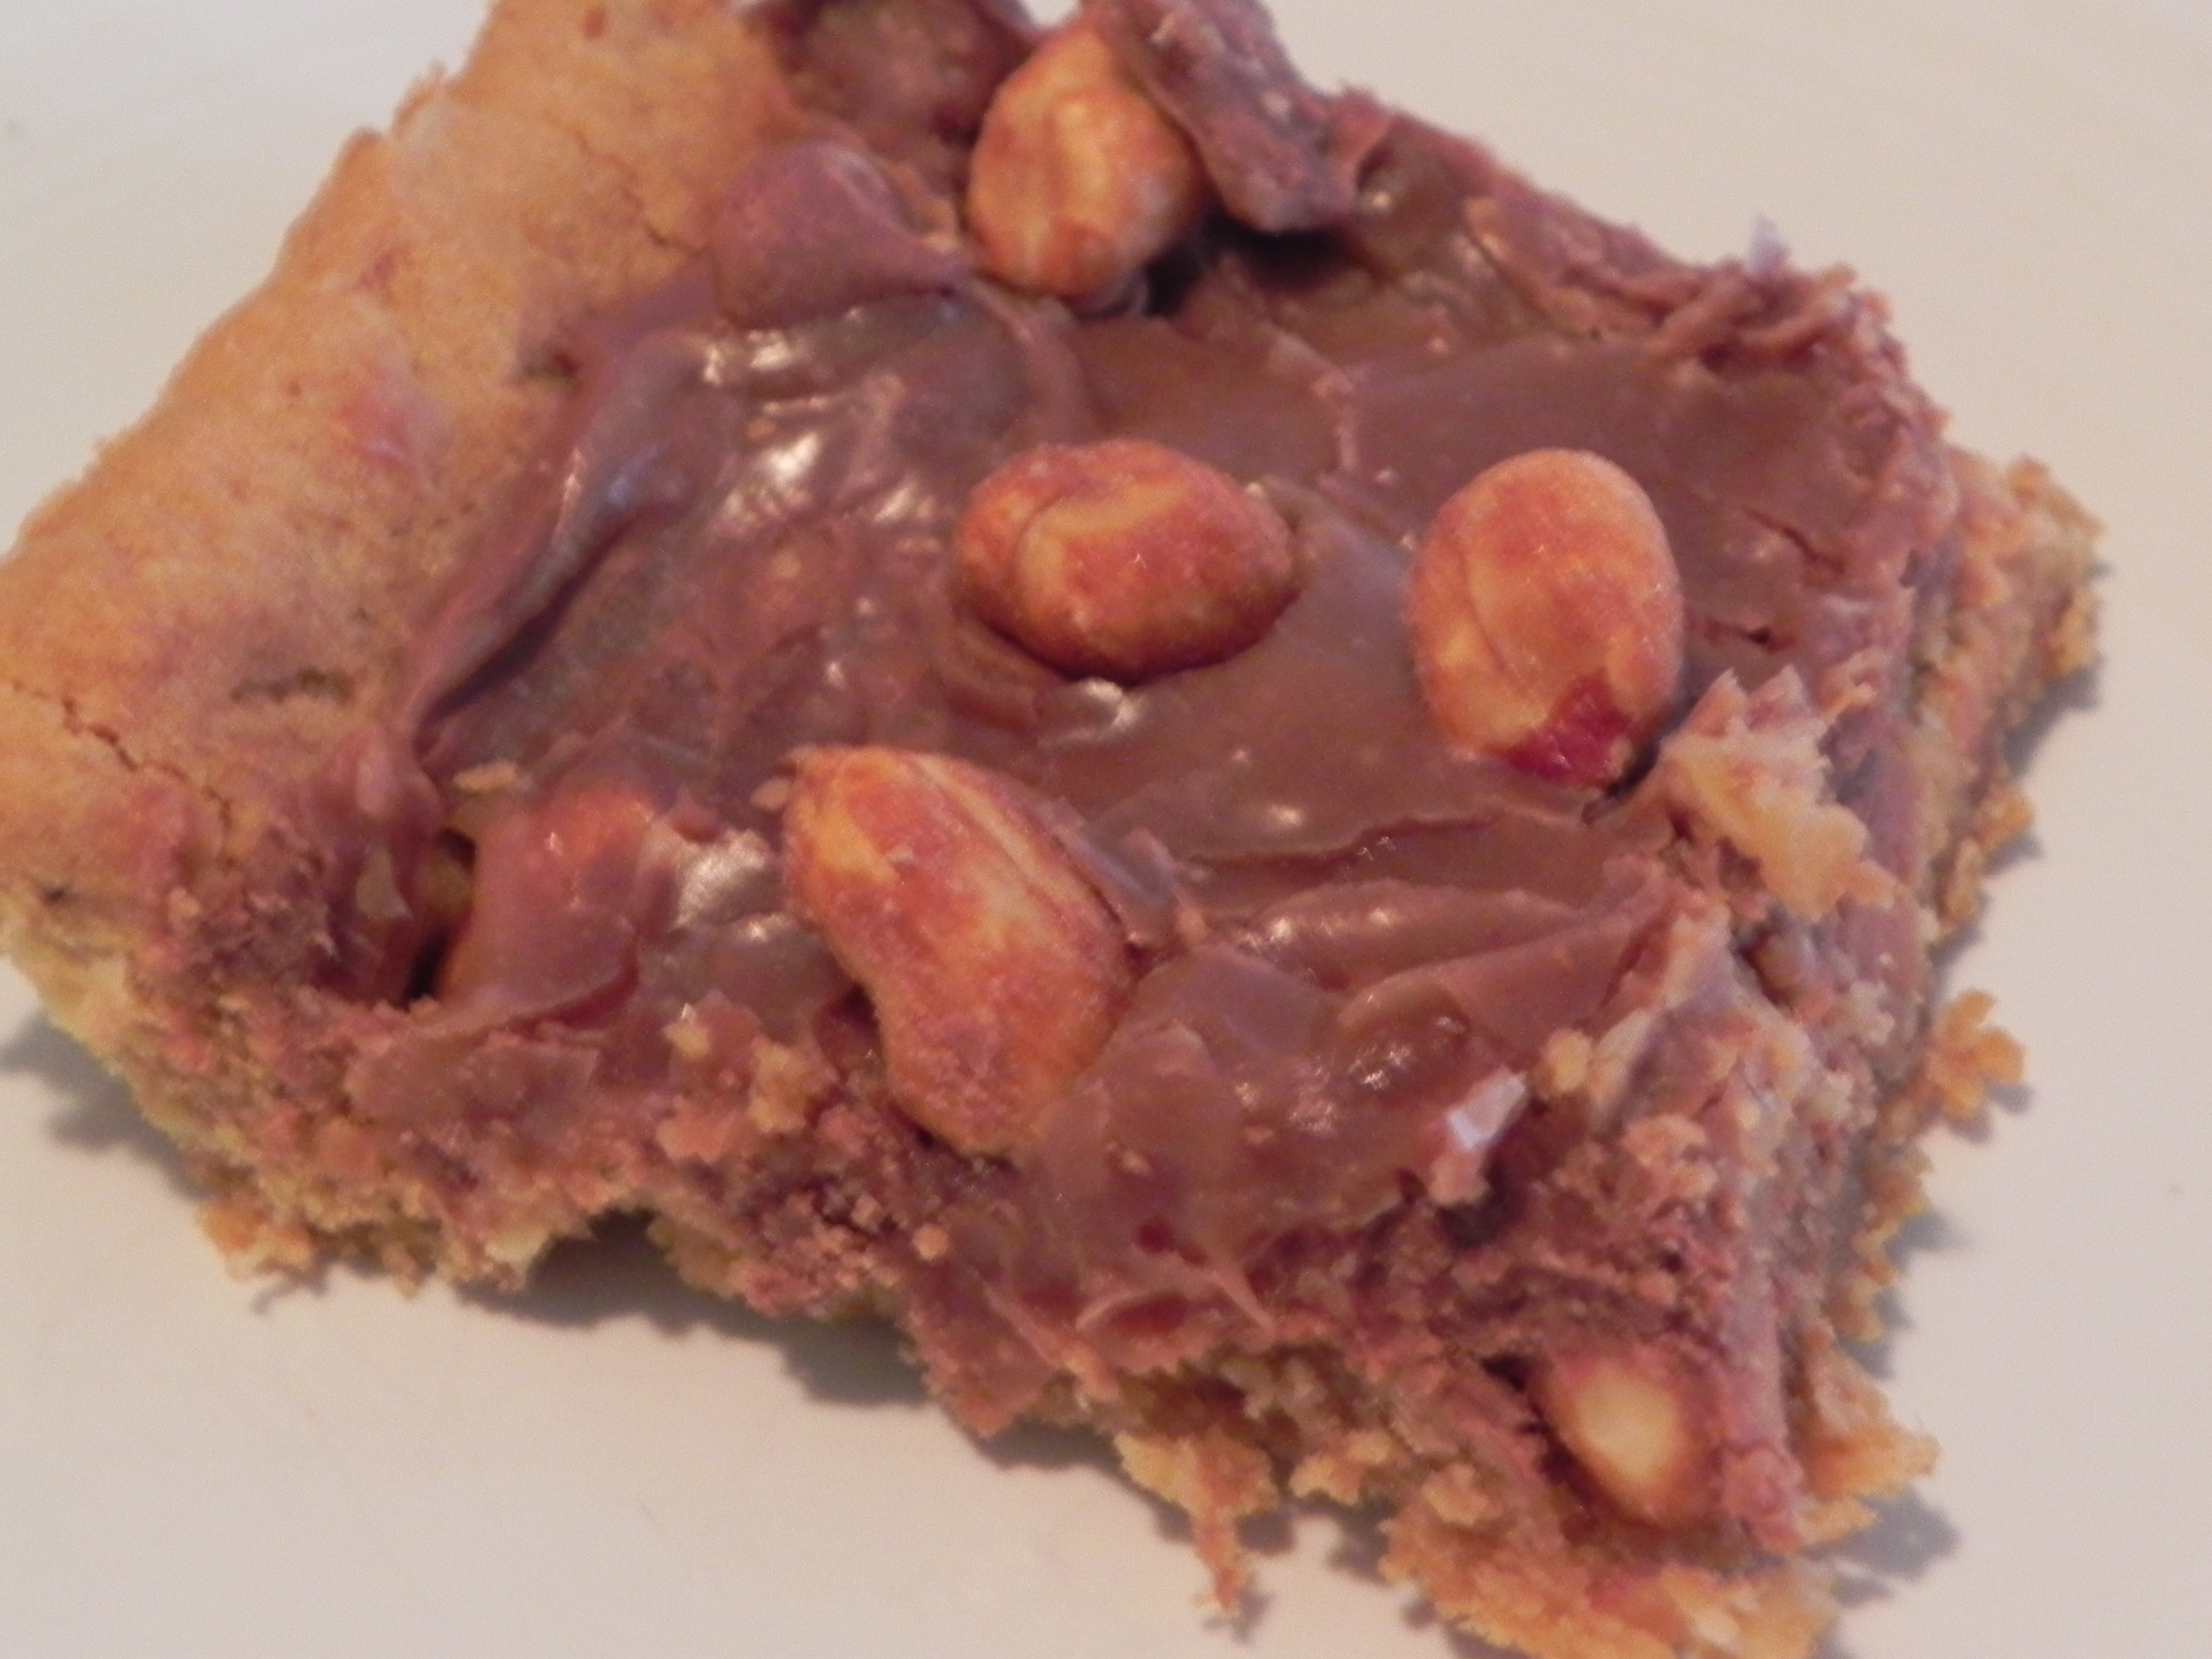
I made 24 cookies and one 8-inch cookie cake in a pie pan. The cookie cake was the result of an abundance of add-ins; I just pressed all the extras into the remaining dough. It was yummy!

Click here for the printable version: Monster Cookies

Question of the Day: What’s your favorite kind of cookie?

Pasta, Recipes, Sides

Sweet Asian Pasta Salad

Planning my lunch during the week is one of biggest stresses of my day. This is mostly because I have to take a packed lunch. Since I don’t always have access to a microwave [and never have access to a fridge], I have to get creative about packing filling and tasty cold lunches. I can only eat so many sandwiches! One of the ways I’ve been able to mix up my lunches and ensure that I actually enjoy what I eat is by making creative pasta salads. I used to just pour some ranch dressing and BBQ sauce on my pasta and call it a day. But now, I’ve become a little more grown-up with my cold pasta toppings, and have found a few combinations that I absolutely love! This Sweet Asian mix is one of them.

I love the burst of flavors in every bite. Garlic and onion mixed with the sweetness of honey and peanut butter. The tang of cilantro mellowing with the spice of red chili peppers. Plus veggies for some crunch! Add some apple slices, carrots, and crackers and you have yourself one tasty lunch!

Sweet Asian Pasta Salad - a fresh 'n flavorful pasta salad that I adore

Sweet Asian Pasta Salad

  • Servings: 6
  • Print

Ingredients:

  • 8 ounces whole wheat penne pasta, uncooked
  • 1/2 cup green pepper, diced
  • 1/2 cup broccoli crowns, cut into bite-sized pieces if necessary
  • 1/4 cup red onion, chopped
  • 1/4 cup loosely packed fresh cilantro, roughly chopped
  • 1 large clove garlic, minced
  • 2 1/2 tablespoons coconut milk
  • 2 tablespoons extra virgin olive oil
  • 2 tablespoons honey
  • 2 tablespoons soy sauce
  • 1 1/2 tablespoons natural peanut butter
  • 2 teaspoons lime juice
  • freshly ground pepper
  • red chili flakes

Directions:

Cook pasta according to package directions. While pasta is cooking, whisk together coconut milk, olive oil, honey, soy sauce, lime juice, and peanut butter. Combine green pepper, broccoli, onion, garlic, and cilantro together in a medium sized bowl (my one quart bowl was just barely big enough). When pasta is cooked to al dente, add to veggies, pour in dressing and toss with salad tongs to coat.  Serve immediately or refrigerate/ice pack until lunch time! 🙂

Do you pack your lunch? What are some of your lunchtime favorites?

Bars, Desserts, Recipes

The Last Chapter of Dessert Week

Finally.

The moment you have all been waiting for…. [drumroll, please!]

The exciting conclusion to dessert week 2K10!!!!

Sheba the kitty
Woohoo! Sheba is so excited, she’s even playing with her new toy. Take it down, Sheebs!

[I just had to throw that in. Isn’t she so cute? This is the only time I think she’s played with that new toy we got her recently. She has a toy that looks like that, but is falling apart and absolute d-i-s-g-u-s-t-i-n-g. It used to have feathers, and was attached to her scratcher. Now she has ripped it off the scratcher, destroyed the feathers that were once attached to it, and bats it around all the time. She also loses it everywhere. We thought we’d get her something new but it isn’t working. This new toy just doesn’t have the charm of the old one. 😦 My husband and I have dubbed the old toy the “dead animal,” because that’s what it looks like.  You can decide for yourselves, though!]

Sheba the kitty's favorite toy
What do you think? I think it’s UGLY!

On to something more pleasant. Such as the fact that this probably won’t be the last dessert week of the year because it’s still August [not for long though!] and even though school is starting on Monday [year 2 of 3 of my grad program], I will still love baking and will do it for my own sanity. Hahaha! Take that, classes! 🙂 As a refresher, last week I made an amazing Chocolate Cake and Creamy Lemon Squares. I decided to make these Peanut Butter Fingers as a last-minute replacement for the tasty-but-falling-apart Creamy Lemon Squares for two reasons.

1) You can’t go wrong with peanut butter and chocolate.
2) One fun blog I read is called Peanut Butter Fingers. You should check it out… it’s hilarious! 🙂

Scratch that–3 reasons.

Peanut Butter Fingers | thepajamachef.com
How delicious does this look?
Peanut Butter Fingers | thepajamachef.com
Or this?

Mmmm… maybe 4 or 5 reasons.

Peanut Butter Fingers | thepajamachef.com
Or that? YUM.

Okay, well, any way you view it… these are delicious and are highly recommended. They aren’t the best thing ever for you but they are oh so good.

Peanut Butter Fingers

  • Servings: 24
  • Print

from Jenn Cooks

Ingredients:

  • 1/2 cup margarine
  • 1/2 cup sugar
  • 1/2 cup brown sugar
  • 1 egg
  • 1/3 cup + 1/4 cup creamy peanut butter, divided [I did not use natural peanut butter… but you’re welcome to experiment with that if you’d like! I used regular PB like Jiff or Skippy or the Kroger store brand!]
  • 1/2 teaspoon baking soda
  • 1/2 teaspoon vanilla
  • 1 cup old-fashioned rolled oats
  • 1 cup all-purpose flour
  • 6 ounces chocolate chips
  • 1/2 cup powdered sugar
  • 2-4 tablespoons skim milk
  • 1/4 cup honey-roasted peanuts
  • cooking spray

Directions:

Preheat oven to 350 degrees. Use cooking spray to grease a 9×13″ pan.

In the bowl of an electric mixer, cream margarine, sugar, and brown sugar until fluffy. Add in the egg, 1/3 cup peanut butter [hint: grease measuring cup with cooking spray first–it will come out a lot easier!], baking soda, and vanilla. Mix until combined. In a separate bowl, mix flour and oats with a wooden spoon and gradually add to the batter in the electric mixer. When combined, use rubber spatula to turn dough into the prepared pan. Use your hands [washed, of course!] to press dough into the bottom of the pan. Lick your fingers if you want, then place pan in the oven and bake for 18 minutes. Not 17 or 19; 18. This. Is. Crucial. [You can also recruit a husband or wife or friend or sister or father or anyone to put the pan in the oven so you can lick your fingers completely, but this is totally optional. Feel free to bribe them with the beater or something, if you can share. ;-)]

Meanwhile, make the glaze. In a medium bowl, whisk together powdered sugar, 1/4 cup peanut butter, and 2 tablespoons milk. Add up to 2 more tablespoons of milk, but don’t make it too runny. You want the consistency to be spreadable but not super liquidy. I added an extra 1 tablespoon milk [total of 3 altogether], and this was good for me.

After those 18 minutes of baking, if the bars are baked almost to perfection [golden brown, yet still slightly under-baked in the center], dump the chocolate chips evenly over the peanut butter base and return to oven to bake for 2-4 minutes, or until peanut butter base looks good to you [base this on your desire: underbaked, crispy, or just right cookie bars].

Then, pour the glaze over top the chocolate goodness and swirl it around with a spatula or icing knife. Top with honey-roasted peanuts for extra peanut flavor and crunch!

And so concludes dessert week 2K10. I think I should plan another soon, k?

Bars, Desserts, Recipes

Triple Chocolate Peanut Butter Brownies

I love brownies. Absolutely love them. Typically though, I’m not the biggest fan of homemade brownies. For some reason, boxed brownies always taste better. However, this recipe has changed my mind. Totally easy, totally worth it. Hardly more effort than mixing up a batch of boxed brownies. And so much tastier…

A layer of rich chocolate + a layer of nutty peanut butter + a topping of chocolate chips = absolutely delicious!

Sweet and salty, with crisp edges and a chewy center.

A practically perfect brownie.

Triple Chocolate Peanut Butter Brownies | thepajamachef.com

And just as a side note… it is so hot and humid here in Indiana that when I stepped out on the porch to take this picture, the plate, chocolate chips, and my camera lens fogged up with condensation from the humidity. Oh. My. Goodness. Crazy. Yuck. And it was 8 pm. I will survive though, because I just ate Cheerios and brownies for dinner. Excellent choice? Yes, I do believe so!

Please make these now. You will be glad.

Triple Chocolate Peanut Butter Brownies

  • Servings: 16
  • Print

inspired by my cravings and this, this, and this
Triple Chocolate Peanut Butter Brownies | thepajamachef.com

Ingredients:

  • 2/3 cup flour
  • 1/2 cup granulated sugar
  • 1/2 cup light brown sugar, packed
  • 1/2 teaspoon baking powder
  • 1/2 cup canola oil
  • 2 eggs
  • 1 teaspoon vanilla
  • 1/2 cup chunky peanut butter, microwaved for 15-25 seconds to soften
  • 1/4 cup cocoa powder, sifted
  • 1 ounce good quality bittersweet chocolate, roughly chopped [I used Ghiradelli 60% Cacao]
  • 1/3 cup milk chocolate chips
  • cooking spray

Directions:

Preheat oven to 350 degrees. Grease 8″x8″ pan with cooking spray. Mix flour, sugars, baking powder, oil, eggs, and vanilla with a wooden spoon in a large bowl. Divide batter into two, spooning half into a medium bowl [this should be a little more than 1 cup measured]. In one bowl, add cocoa and bittersweet chocolate. Stir gently to combine. In the other bowl, whisk in peanut butter with a fork. Spoon chocolate batter into prepared pan, and then add peanut butter batter on top. This batter will be a bit thicker, so feel free to use fork to lightly swirl peanut butter batter on top of chocolate batter. Bake for 18 minutes, then sprinkle milk chocolate chips evenly over the surface of the brownies. Bake for an additional 8-12 minutes, or until toothpick inserted in the center comes out clean. Cool at least 10 minutes before cutting… if you can wait that long! 🙂

Note:

Cook longer if you are not a fan of gooey brownie center. The middle pieces were definitely not cooked all the way through. We like a combination of gooey and crispy, but not everyone does. If you do cook it longer, top with a piece of foil to prevent the top from burning. That just would make for a sad brownie.