Bars, Desserts, Recipes

Red Velvet Marshmallow Bites

Happy Valentine’s Day!

Valentine’s Day came a little early to our kitties! Ben and I had a little coffee/shopping/errands date last Friday night and went to the pet store for some kitty toys. Now, don’t get me wrong, our cats are spoiled little girls. They don’t get along so we have to keep them separated unless we are around, so we do have to have multiples of most cat items just to keep ’em happy. But we’re suckers for making sure they have exactly what they want [right down to the milk out of our cereal bowls], so when Misty’s favorite toy broke recently, we had to get her a replacement.

Misty

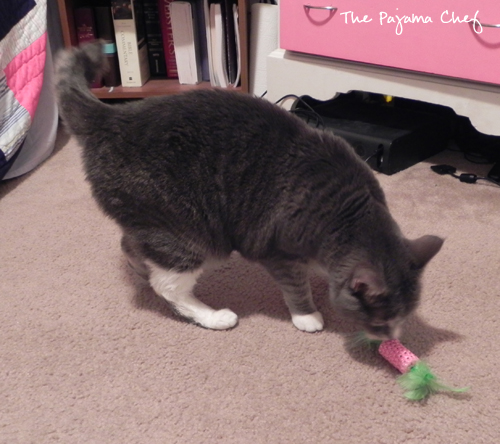
Of course, we had to get Sheba a toy too… how could we not? Yes, we are crazy cat people in case you were wondering. 🙂

Sheba

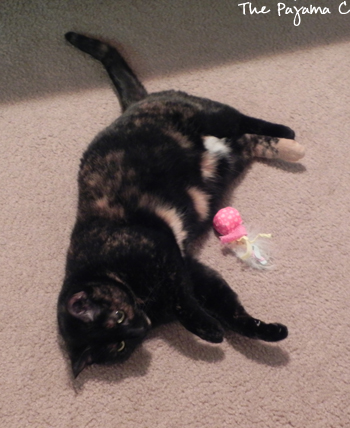
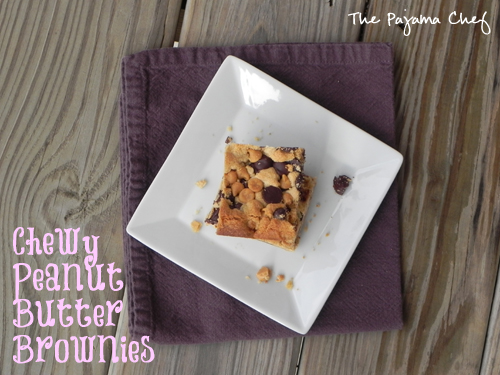
Not sure if you can see the detail, but it’s pink with white hearts! How appropriate for Valentine’s Day, huh? And speaking of appropriate for Valentine’s Day… check out these Red Velvet Marshmallow Bars!

Red Velvet Marshmallow Bites | The Pajama Chef

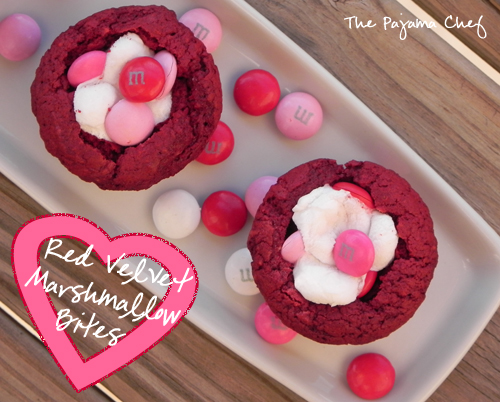
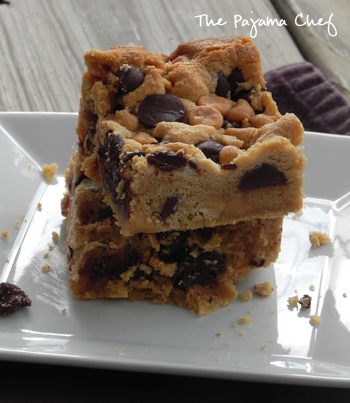
I didn’t get these made far enough in advance for you to make them before today, but if you’re looking for a super fast and tasty holiday treat, these are just the ticket! With a thick, brownie-like red velvet base, these bites don’t really need anything else to be delicious, but topping them with gooey marshmallows and a few chocolatey M&Ms makes them even better!

Red Velvet Marshmallow Bites | The Pajama Chef

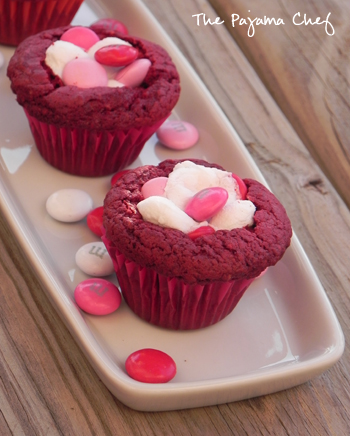
The original recipe made these miniature sized treats in bar form, but since I made these to take them today to my class and for Ben to take to work, I decided I didn’t want to mess with cutting a whole pan of Red Velvet Marshmallow Bars into nice pieces. Mini muffin cups are my BFF sometimes! If you would prefer to make them in a pan, you can totally do that–just click over to the original recipe for altered times and quantities. But I personally love anything miniature, I think these are just perfect… and I think you will too!

Red Velvet Marshmallow Bites | The Pajama Chef

Hope you have a lovely Valentine’s Day! What are your plans? My sweet husband is cooking me dinner and making me a pie! I can’t wait! 🙂

Red Velvet Marshmallow Bites [slightly adapted from Confessions of a Cookbook Queen]
click to print

Ingredients:

  • 1 [18.25 ounces] box red velvet cake mix
  • 1/4 cup canola oil [or melted butter]
  • 1/4 cup water
  • 1 egg
  • 2 cups mini marshmallows
  • 1 cups Valentines M&Ms

Directions:

Preheat oven to 375 degrees. Prepare two mini muffin pans by spraying with nonstick cooking spray or lining with paper liners.

In the bowl of a stand mixer, combine cake mix, oil, water, and egg. Mix on low until fully combined, scraping the sides as needed.

Scoop thick batter into mini muffin cups in generous tablespoon increments [a cookie scoop would be helpful if you have one]. If batter is not smooth, use a spatula coated with a little cooking spray to spread it in place.

Bake for 14-15 minutes or until toothpick inserted into center comes out clean.

Press in 3 mini marshmallows and top with 3 M&Ms, then return to oven for 2 minutes to allow marshmallows to melt.

Time: 35 minutes total time, 15 minutes active time.

Yield: 38 bites.

Bars, Desserts, Recipes

Chewy Peanut Butter Brownies

So, if you’ve never checked out Megan’s blog, What Megan’s Making, you’re missing out. I’m not sure how I first found it but I’m glad I did. Everything I’ve made from her blog has been incredibly delicious… and my most recent love are these Chewy Peanut Butter Brownies! They are seriously in hot contention for the best thing I ever ate. An indicator? I rarely make the same recipe twice, but this recipe was first posted in March 2012 and I have made them at least two, if not three times since then. For me, that equals a spot on the bus to Crazytown, USA. No joke.

Chewy Peanut Butter Brownies | The Pajama Chef

I know it’s a little redundant but the best way to describe these brownies is to say that they’re uber peanut buttery, chocolatey, and chewy. I don’t use the word “uber” lightly, so when I say all those things, imagine I’m screaming it. And if you know me in real life, you know that me screaming is pretty rare. Sooooo… emphasis should be noted. 🙂

Chewy Peanut Butter Brownies | The Pajama Chef

Even though these brownies are rich, I’d be lying if I said you just had to eat a small piece to be satisfied. You won’t. Don’t worry, if you’re anything like me, you won’t have any self control around these insanely addicting brownies. They’re nothing fancy–just a buttery and soft brownie with nutty, caramely peanut butter flavor. And the best parts are the bites with the melted bits o’ fudgy chocolate. Oh wait–that’s each bite. Whoops! They are definitely not for sharing… unless you want to make a second batch tomorrow. Enjoy! 🙂

Chewy Peanut Butter Brownies | The Pajama Chef

Chewy Peanut Butter Brownies

  • Servings: 12
  • Print

from What Megan’s Making

Ingredients:

  • 1/2 cup creamy peanut butter
  • 1/3 cup butter, softened
  • 2/3 cup sugar
  • 1/2 cup brown sugar, packed
  • 1 teaspoon vanilla
  • 1 egg
  • 1 cup all-purpose flour
  • 1 teaspoon baking powder
  • 1 1/2 cups semi-sweet chocolate chips [or 3/4 cup dark chocolate chips + 3/4 cup peanut butter chips]

Directions:

Preheat oven to 350 degrees. Grease a 9×9 baking pan with cooking spray.

In the bowl of a stand mixer, cream together peanut butter and butter. Add sugars and vanilla. Then mix until creamy, scraping the sides as needed. Next, add egg. Beat on low until light and fluffy.

Slowly add flour and baking powder and beat until incorporated. Fold in the chocolate chips.

Spoon batter into prepared pan and smooth out with spatula.

Bake for 25-30 minutes, or until toothpick inserted in the center comes out clean. Cool completely before cutting.

Bars, Desserts, Recipes

Dark Chocolate Crumb Bars

***Edited April 5, 2013–this recipe can now be found on my site here 🙂

Do you like dark chocolate?

dark chocolate crumb bars image on plateIf so [and who doesn’t??!?]… go check out my post on Today’s Housewife for this awesomely ooey gooey recipe. I know you’ll love it! Happy Thursday!

Bars, Desserts, Recipes

PB + J Brownies

Several weeks ago, I received a fun email request from Christina of She Runs, She Eats. She and her friend Cindy of Once Upon a Loaf had dreamed up an awesome contest, complete with prizes, recognition, and glory of epic proportions. Well, perhaps not recognition and glory of epic proportions, but you get my drift. The competition is in honor of National Peanut Butter and Jelly Day, as well as Cindy’s birthday, on April 2. So what exactly was this contest, you may ask? Well, to create the most magnificent peanut butter and jelly creation imaginable, of course! In sandwich or baked good form, please. With any kind of nut butter and any jelly or jelly-like food [preserves, spreads, fresh/dried fruit, etc.]. Sign me up right away, I said! And just like that, I was dreaming up ideas for Project PB&J.

Though I do love me a good PB&J, something sweet and chewy was calling my name. Since our recipes were supposed to be original, I didn’t want to go a-copying the PB&J bars that were popular over the past year or so. So what else went with peanut butter and fruit? Well, chocolate of course!

PB + J Brownies via thepajamachef.comA little experimentation later and PB&J Brownies were born. These, my friends, are nothing short of amazing. I mean… do you see what I see?!?!

PB + J Brownies via thepajamachef.comSee that rich, fudgy, chewy brownie. Then see that little bit ‘o peanut butter action. But notjustpeanut butter all alone, or even anything reminiscent peanut butter cookie. More like peanut buttercheesecake. Mhmm… now that’s the good stuff! Where the brownie layer is rich and decadent, the peanut butter layer is sweet–but not too sweet. Creamy, but definitely baked. Fantastic.

Can you deny it? Please say no.

But of course, we have to take these brownies over the top just a little more [and qualify for the contest, duh!]… To put the cherry on the sundae… or the topping on the brownie :)… let’s swirl some raspberry preserves into the peanut butter layer. The preserves fold into the peanut butter as the brownies bake, leaving that perfect mix of peanut butter-jelly action that we know and love. If raspberry isn’t your thing, feel free to sub any other all-fruit preserves. I happen to love the subtle-sweet raspberry with peanut butter [and didn’t want to finish the last of 2011’s strawberry freezer jam… just saying :)], but do what suits you. And it would suit me to enjoy another brownie right now… but sadly, they all disappeared! Bummer. I better get busy baking again!PB + J Brownies via thepajamachef.com

PB&J Brownies [brownie layer inspired by/compared with the recipes here, here, here, and here; PB&J layers are TPC originals!]
click to print

Ingredients:

  • 3/4 cup salted butter
  • 4 ounces good quality bittersweet chocolate, roughly chopped
  • 2 cups + 1 tablespoon sugar, divided
  • 3/4 cup all-purpose flour
  • 3/4 cup unsweetened cocoa powder [sifted if lumpy]
  • 1/2 teaspoon baking powder
  • 4 eggs, divided
  • 1 1/2 teaspoons vanilla, divided
  • 1 1/2 cups creamy peanut butter [not the “natural” kind]
  • 8 ounces cream cheese, softened [I used Neufchâtel]
  • 1/3 cup sour cream [I used light]
  • 1/2 teaspoon cinnamon
  • scant 1/3 cup raspberry preserves

Directions:

Preheat oven to 350 degrees. Line a 9×13 baking dish with parchment paper.

In a small saucepan, melt butter and chocolate on low, stirring occasionally. Set aside to cool.

Whisk together 2 cups sugar, flour, cocoa powder, and baking powder. Break 3 eggs in a separate bowl and whisk to break yolks, then stir in 1 teaspoon vanilla. Pour egg mixture and chocolate mixture [once cool–don’t cook the eggs] into dry ingredients, then stir together until just combined. Spoon into prepared pan. Mixture will be fudgy.

In the bowl of stand mixer, beat together peanut butter, cream cheese, sour cream, cinnamon, and remaining  1 egg, 1 tablespoon sugar and 1/2 teaspoon vanilla. Spread in pan on top of  chocolate layer, using a spatula and [clean!] hands to press down.

Lastly, spoon preserves over peanut butter layer and use a knife to swirl preserves into peanut butter layer.

Bake for 60 minutes, covered, or until a toothpick inserted in the center comes out clean. Cool completely before cutting. Store in an airtight container for up to 2-3 days–if they last that long!

Time: 80 minutes [20 minutes active].

Yield: 24.

Bars, Cheesecakes, Desserts, Recipes

Apple Streusel Cheesecake Bars

So, is it just me, or is sometimes deciding what to bake harder than actually baking it? I mean, there are so many good recipes out there. With so recipes available online, in cookbooks, and in magazines, sometimes my life feels like recipe overload. There are so many things I’d like to make one day. Cakes and cookies and pastries and cheesecake and pie and about 20453408 other things that can be classified as desserts. Know what I mean??! Therefore, what I love are recipes that bring together the best of the best.

Like these Apple Streusel Cheesecake Bars.

Apple Streusel Cheesecake Bars - an incredible fusion dessert in one easy to make bar cookie recipe! via thepajamachef.com Think about it. A layer of oatmeal cookie dough topped with luscious, creamy cheesecake filling. Sounds pretty awesome, huh? But that’s not all. Sitting above that layer of velvety richness are tender, cinnamon spiced apples and a simple streusel topping that is out of this world.

Can this get any better? Apple Streusel Cheesecake Bars are like three desserts in one: cookies, cheesecake, pie.

And did you catch what these babies are baked up in? Yes, that’s right–a 9×13″ pan. So can it get any easier? I think not. Score!

Don’t shy away based on the length of the recipe. Most ingredients can be found in your pantry, and once you break it down by layer, this dessert comes together in a snap. Much easier than scooping out individual cookies, fussing with a cheesecake’s water bath, or dealing with the tedious process of rolling out pie dough, I say!

And once try ’em, I’m certain you’ll agree. Just be careful to not take too many test bites in the baking process… you might have a difficult time filling the pan otherwise. Ask me how I know. Sigh… 🙂Apple Streusel Cheesecake Bars - an incredible fusion dessert in one easy to make bar cookie recipe! via thepajamachef.com Don’t worry, you’ll understand once you take your first bite. Enjoy!

Apple Streusel Cheesecake Bars

  • Servings: 24 bars
  • Print

from Betty Crocker; cookie base from Betty Crocker’s New Cookbook; apple filling adapted from Allrecipes.com

Ingredients:

for the apple layer

  • 3 1/3 cups water
  • 1 1/2 cups sugar
  • 1/3 cup cornstarch
  • 1 teaspoon cinnamon
  • 1/4 teaspoon nutmeg
  • 6 cups thinly sliced apples [about 6 medium- I used a mix of Gala and Granny Smith]

for the cookie base

  • 3 cups old-fashioned oats
  • 1 cup all-purpose flour
  • 2/3 cup sugar
  • 2/3 cup brown sugar, packed
  • 1 teaspoon baking soda
  • 1 teaspoon cinnamon
  • 1/2 teaspoon baking powder
  • 1/2 cup butter, softened

for the cheesecake layer

  • 2 -8 ounce packages cream cheese, softened
  • 1/2 cup sugar
  • 2 tablespoons all-purpose flour
  • 1 teaspoon vanilla
  • 1 egg

Directions:

Heat oven to 350 degrees. Grease a 9×13 baking dish thoroughly with cooking spray or line bottoms and sides with parchment paper.

Begin by preparing the apple layer. In a large pot set over medium heat, stir together water, sugar, cornstarch, cinnamon, and nutmeg. Stir until sugar dissolves and mixture comes to a boil. Boil for 2 minutes, stirring constantly, then add apples. Return to a boil then reduce heat to a simmer and cook for 7-8 minutes, or until apples are tender. Set aside.

While apples are simmering, prepare cookie base. In a large bowl, stir together oats, flour, sugar, brown sugar, baking soda, cinnamon, and baking powder. Using a pastry blender or two knives, cut in butter until mixture resembles coarse crumbs. Set aside 1 1/2 cups, and press rest of mixture into prepared pan. Bake for 10 minutes.

Next, with a stand [or electric] mixer, beat together cream cheese, sugar, flour, vanilla, and egg.

Then assemble bars. Spread cheesecake filling over partially baked crust, then spoon apple filling over top. Sprinkle on reserved crumbs, then bake for 35-40 minutes or until golden brown. Refrigerate to chill before cutting, then store in the refrigerator.

Notes: Bars best for presentation within 24 hours, but they last longer–the crumbs just start to get a bit soggy after a day or so.