Appetizers, Other, Recipes

Caramel Apple Dip

I know that we’re smack dab in the middle of Christmas cookie season and that it’s usually more fun to bring sweets to a party instead of the obligatory fruit or veggie tray. But truth be told, even though I enjoy making those sweets for parties, I am forever grateful to those who bring fruits and veggies to parties. Especially if they take the time to make the trays from scratch instead of hitting up the grocery store. And even more especially if they make a yummy dip like this one.

Caramel Apple Dip | The Pajama Chef

This dip pretty much tastes like a combination of fall and holiday cheer in one go. Instead of consisting of straight-up caramel, which is definitely good but a little messy, this Caramel Apple Dip replicates the taste of caramel in a creamy spread that is out of this world. It’s so simple to make, but the combination of brown sugar, honey roasted peanuts, vanilla, and cinnamon makes such a rich, flavorful spread that it seems like more work should be involved beyond the five minutes needed to mix everything up in a bowl. Simple, yes, but I’ll take it. 🙂

Caramel Apple Dip | The Pajama Chef

When Natalie called it “cheesecake meets peanut butter meets caramel” I was a little skeptical, but after one bite I had no doubt in my mind that that is exactly spot on. You’ll seriously be eating more and more apple slices just so you can enjoy more of this dip! Enjoy!

Caramel Apple Dip

  • Servings: 8
  • Print

slightly adapted from The Sweets Life

Ingredients:

  • 8 ounces cream cheese [I used Neufchâtel]
  • 1/4 cup sugar
  • 1/2 cup brown sugar
  • 1 teaspoon vanilla extract
  • 1 teaspoon ground cinnamon
  • 1 cup honey roasted peanuts, coarsely chopped
  • apple slices and graham crackers for serving

Directions:

In the bowl of an electric mixer, beat together cream cheese and sugars until smooth. Then stir in vanilla, cinnamon, and honey roasted peanuts.

Refrigerate for at least an hour before serving, then enjoy with apple slices and graham crackers.


Desserts, Other, Recipes

Peach Raspberry Clafouti

Another peach recipe in a hurry! I certainly did not plan well on this front–I made this amazing fruity custard back in June, people! But alas, some things just have to be shared, no matter the practicality of the season.

Like this Peach Raspberry Clafouti! Eeeek!

It is just the perfect warm summer dessert. It’s a gooey, creamy pudding-like dessert studded with sweet, juicy raspberries and peaches. Though this version of a clafouti isn’t authentic [the original French version is made with cherries], it’s pretty darn amazing.

If you wanted you could add a little spice for extra flavor, but it didn’t really seem necessary… fresh fruit on its own is just perfect!

And maybe a little more amazing with a dab of real whipped cream? Mhmm, that’s what we thought too. This gooey, custardy fresh fruit delight is a fun out of the ordinary dessert that I will definitely be trying with other fruits, and maybe a bit of chocolate too! Enjoy!

Peach Raspberry Clafouti [adapted slightly from About.com]
click to print

Ingredients:

  • 1 cup raspberries, rinsed
  • 2 cups sliced fresh peaches
  • 1/2 cup all-purpose flour
  • 2/3 cup sugar
  • 1 1/4 cup milk
  • 3 eggs, beaten
  • 1/2 teaspoon vanilla

Directions:

Preheat oven to 350 degrees. Spray a 2 quart baking dish with cooking spray [I used a large round casserole dish].

Place raspberries and peaches in baking dish.

Then, whisk together flour and sugar, then pour in milk, eggs, and vanilla. Whisk until well combined. Pour over fruit, then bake for 45 minutes or until golden brown, puffy, and set in the middle.

Cool 5-10 minutes before serving with whipped cream.
Time: 60 minutes [5 minutes active].
Yield: 6 servings.


Desserts, Other, Recipes

SRC: Chocolate Mousse

First Monday in September! Even though it’s Labor Day, it’s still a Secret Recipe Club kind of day. 🙂 If you’ve missed past SRC posts, the premise is this: you’re assigned a different member’s blog every month. You visit their blog, choose any recipe you want, then make it and share it on your blog. Everyone else posts about their secret blog the same day. It’s fabulously fun to try out new blogs. If you have a blog, definitely check it out and consider joining! I highly recommend it.

This month I was assigned Veggie Grettie. This blog is written by Gretchen, who believes in food as the ultimate medicine. You can read her story here, and I suggest you do because her story is pretty inspiring, even though I don’t personally eat a completely plant-based or gluten-free diet. Gretchen has many awesome recipes, reviews, and educational posts on her site… it was so fun to peruse. Anyways, I must admit that I adapted the recipe I made from Gretchen’s blog… but simply because I already had regular milk, cocoa, chocolate, and sweetener at home and wanted to make this recipe right away. But do click over to the original to see her recommendations for ingredients. However, do not despair because [in my opinion] I did not change the biggest component of all from this vegan chocolate mousse recipe: TOFU!

Yes, that’s right. That smooth, creamy, chocolately mousse isn’t made with heavy cream or eggs, but rather a block of extra firm tofu. Whaaaat? And I promise you that you cannot taste any tofu at all. There is no tofu-y taste, no tofu-y texture, just a luscious chocolate dessert that can’t be beat. It’s fabulous!

Ben was a doubter when I told him about it. He thought it was weird, but since he’s such a great guy, he always is willing to try anything I make. 🙂 As I was dishing up this dessert last week, here are some of the names Ben came up with to call this dish rather than Chocolate Mousse:

  1. tofudding
  2. tofousse
  3. moufu

Which do you prefer? I actually like tofousse. Tofudding creeps me out, and moufu sounds like a character from a Disney movie.

But after a bite or two, here’s what I had on my hands…

He loved it! And when asked if he would have suspected tofu was in this dish had he not known, this was his reply: “when you put a chocolate dessert in front of me, the first thing that comes to mind is not tofu.” I think that about sums it up. I wish I had done a fake out test on him, but sadly I didn’t. However, you can! Because really, who would guess that this was a big bowl of anything but chocolate mousse?

It’s rich and creamy, while being fairly healthy and even vegan [if you want]. I’m so glad I got the chance to try this recipe from Gretchen… it is amazing and I hope you try it too! 🙂

Chocolate Mousse [adapted from Veggie Grettie]
click to print

Ingredients:

  • 8 ounces good-quality dark chocolate, chopped roughly
  • 14 ounce package of extra firm tofu
  • 1 1/2 to 2 cups skim milk
  • 6 tablespoons cocoa powder
  • 6 tablespoons sweetener [I used half honey, half sugar]

Directions:

Melt chocolate in a double boiler over medium-low heat, stirring occasionally.

Meanwhile, combine tofu, 1 1/2 cups milk, cocoa powder, and sweetener in a food processor or high powdered blender [like a Vitamix] and blend until very, very smooth. Be sure to stop and scrape down the sides as needed.

After chocolate has melted, stream in with other ingredients, and continue to blend until smooth. Mixture will be warm and not quite the consistency of pudding. If it seems too thick, add up to another 1/2 cup of milk.

Place in a covered container and refrigerate at least several hours to thicken completely.

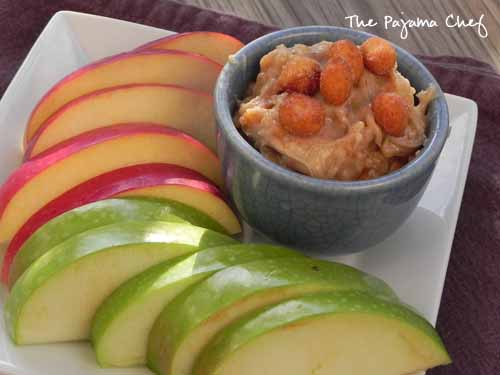
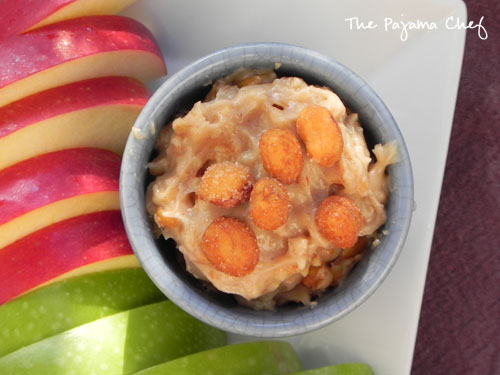
When ready to serve, spoon or pipe into individual bowls. Top with berries, whipped cream, spinkles, or my personal favorite, Trader Joe’s Sugar, Chocolate, and Coffee Bean Grinder.

Time: 15 minutes preparation, plus time to chill.

Yield: 4 1/2 cups.

Be sure to check out other posts from today’s SRC reveal. Happy Labor Day!

Desserts, Other, Recipes

Individual Pumpkin Pie Parfaits

Sometimes, a picture is worth 1000 words.

I think now is one of those times.

Let me explain, in case you’re confused. Oreo crust. Pumpkin pudding. Whipped cream. Oreo. Pumpkin. Whip. Oreo. Delicious spoonfuls of marvelousness coming your way. Yes, please.

Individual Pumpkin Pie Parfaits are like a cup of pumpkin pie, except 1000% easier and [dare I say] way more delicious. I made these recently when we had friends over for dinner because they could be made ahead of time from ingredients already in my fridge and pantry. I typically go for over the top baked desserts when I’m cooking for company and so often just forget about pudding or easy chilled treats, but these parfaits are a good reminder to think beyond the oven and experience fall in a new way. Pumpkin and chocolate just can’t be beat this time of year.

Individual Pumpkin Pie Parfaits [adapted from My Name is Snickerdoodle and The Avid Appetite]
printable version

Ingredients:

  • 1 small box [3.4 ounce package] instant vanilla pudding
  • 2 1/2 cups milk, divided
  • 1 envelope Dream Whip
  • 1/2 teaspoon vanilla extract
  • 1 teaspoon pumpkin pie spice
  • 1 cup pumpkin puree
  • 2 tablespoons powdered sugar
  • 1 cup crushed Oreos [8-10]
  • 1 tablespoon butter, melted

Directions:

In a medium bowl, combine vanilla pudding powder and 2 cups milk. Beat with a wire whisk for 2 minutes then cover and refrigerate for 5 minutes.

Meanwhile, in a stand mixer, whisk Dream Whip envelope, 1/2 cup milk, and vanilla on low for two minutes. Use a spatula to scrape the sides of the bowl, then beat on high for 5-8 minutes or until stiff peaks form.

Remove pudding from refrigerator and stir in pumpkin pie spice and pumpkin puree. Set aside. Stir powdered sugar into Dream Whip mixture. Set aside.

Mix together Oreo crumbs and melted butter. Press 1 tablespoon into the bottom of four small dessert glasses or bowls, then top with 1/4 cup pudding, and 1/4 cup Dream Whip*. Repeat, ending with cookie crumbs.

Refrigerate until ready to serve, up to 4 hours.

Notes:

Can substitute 2 cups Cool Whip or Whipped Cream for the Dream Whip. I just used what I had at home.

31 days of pumpkin

Come join the fun at the My Baking Addiction and GoodLife Eats Holiday Recipe Exchange sponsored by Spice Islands.

Desserts, Other, Recipes

Linda’s Caramel Ritz Bits Crackers

So, I don’t know who  this Linda character is, but I sure love her Caramel Ritz Bits Crackers.

Linda's Caramel Ritz Bits Crackers | thepajamachef.comWell, wait. I lied. I suppose Linda is likely one of the authors of The Potluck Club Cookbook, is the source for this tasty treat. Found at my local library, this cookbook was a fun little book to peruse. I definitely photocopied more than a few recipes to try and this was the first gem of the bunch.

I have to admit though, when I first pulled these treats out of the oven, I had my doubts. It kind of looked like gloppy cereal. But a few minutes to cool and a quick bite popped in my mouth a minute later, I swiftly apologized to Linda because I was fully convinced that these. are. awesome. Just as she said in her book.

Of course, why wouldn’t they be??!

Crunchy crackers, flavorful nuts, and a thick, rich caramel glaze… what’s not to love?

Linda's Caramel Ritz Bits Crackers | thepajamachef.com

I made these for a church event and they were gone fast–much to my relief. I guess others were not swayed by their looks but embraced their sweet, crunchy, crispy flavor. These are the perfect easy dessert for a potluck or a road trip/lunch box snack. Just a warning though: they are addicting!

Linda's Caramel Ritz Bits Crackers

  • Servings: 10-15
  • Print

from The Potluck Club Cookbook
Linda's Caramel Ritz Bits Crackers | thepajamachef.com #easy #addictive #snack

Ingredients:

  • 2 – 9 ounce boxes of Ritz Bits Crackers [either filled or the Buttery Pretzel Rounds Munchables, which I used]
  • 1 cup chopped walnuts [or dry roasted peanuts]
  • 1/2 cup butter
  • 1 cup sugar
  • 1/2 cup light corn syrup
  • 1 teaspoon vanilla
  • 1 teaspoon baking soda

Directions:

Preheat oven to 250 degrees.

In a large, shallow, greased baking pan, mix crackers and nuts. Then, in a saucepan, melt butter. Add sugar and syrup and bring to a boil. Cook for five minutes, then remove from heat and stir in vanilla and baking soda.

Immediately pour mixture over crackers and stir well. Bake for 60 minutes, stirring every 15 minutes. Remove from oven and spoon out onto wax paper to cool. Break apart and store in air tight container.