Bars, Desserts, Recipes

The Last Chapter of Dessert Week

Finally.

The moment you have all been waiting for…. [drumroll, please!]

The exciting conclusion to dessert week 2K10!!!!

Sheba the kitty
Woohoo! Sheba is so excited, she’s even playing with her new toy. Take it down, Sheebs!

[I just had to throw that in. Isn’t she so cute? This is the only time I think she’s played with that new toy we got her recently. She has a toy that looks like that, but is falling apart and absolute d-i-s-g-u-s-t-i-n-g. It used to have feathers, and was attached to her scratcher. Now she has ripped it off the scratcher, destroyed the feathers that were once attached to it, and bats it around all the time. She also loses it everywhere. We thought we’d get her something new but it isn’t working. This new toy just doesn’t have the charm of the old one. 😦 My husband and I have dubbed the old toy the “dead animal,” because that’s what it looks like.  You can decide for yourselves, though!]

Sheba the kitty's favorite toy
What do you think? I think it’s UGLY!

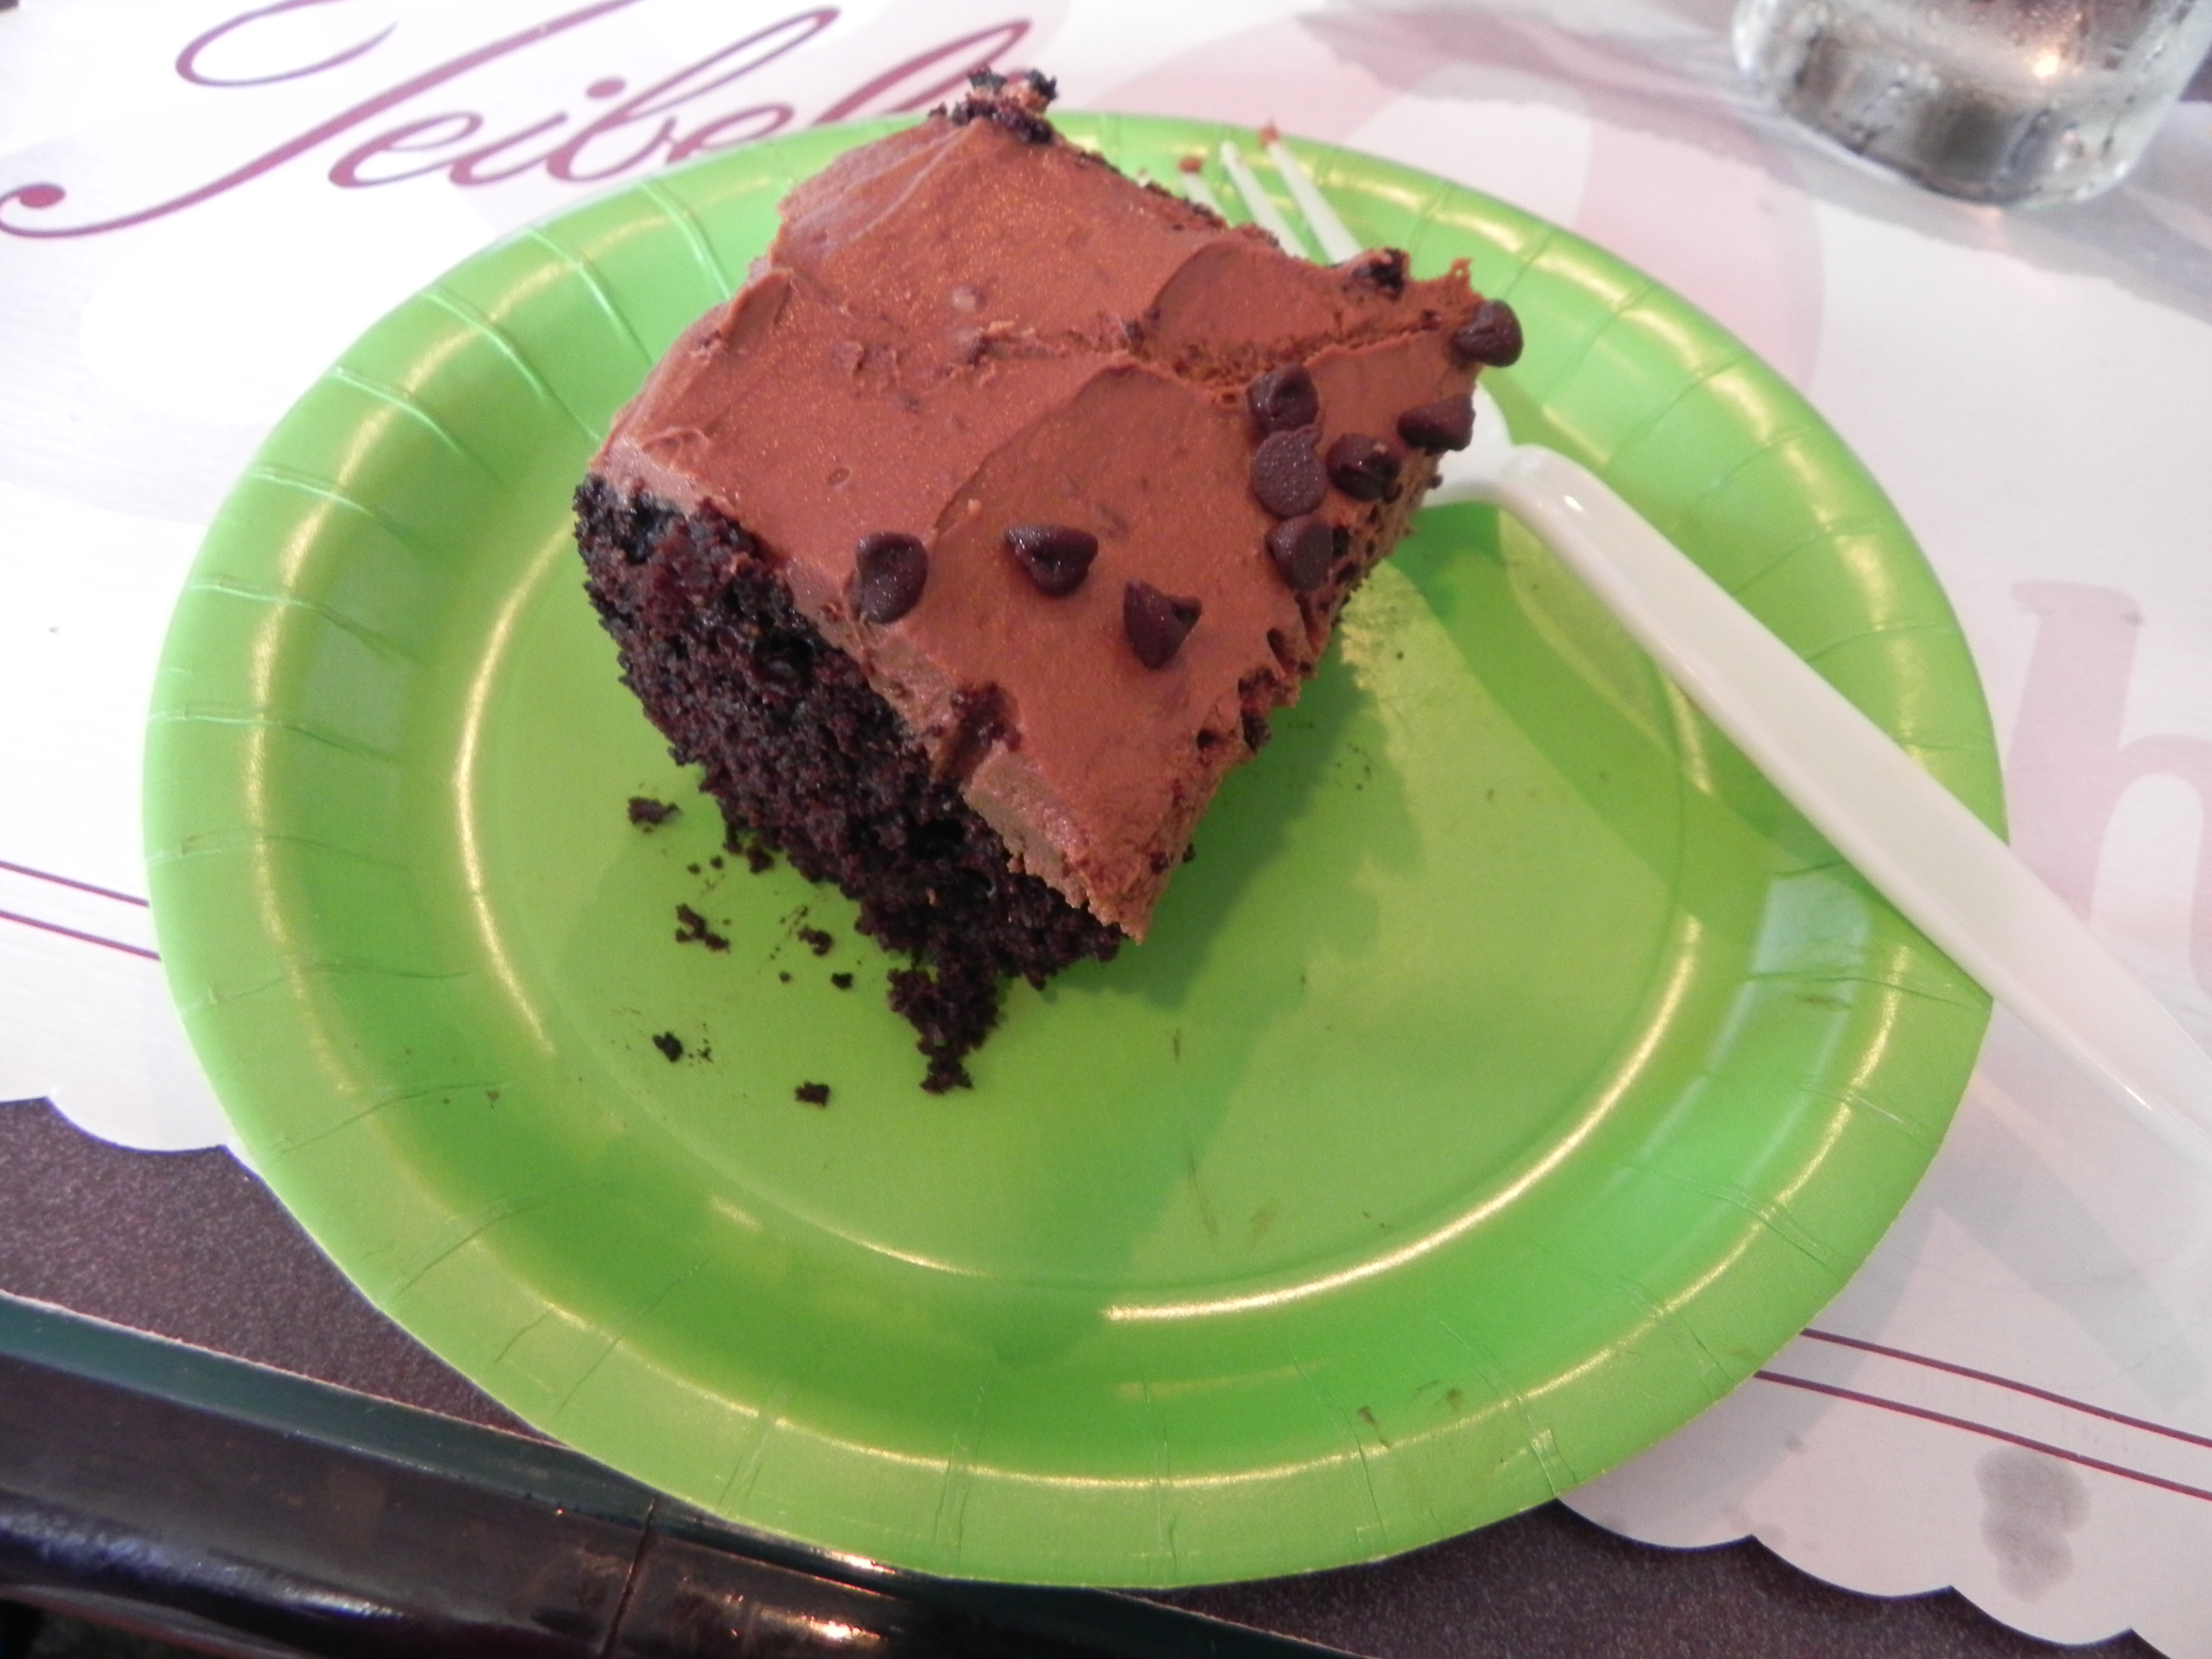
On to something more pleasant. Such as the fact that this probably won’t be the last dessert week of the year because it’s still August [not for long though!] and even though school is starting on Monday [year 2 of 3 of my grad program], I will still love baking and will do it for my own sanity. Hahaha! Take that, classes! 🙂 As a refresher, last week I made an amazing Chocolate Cake and Creamy Lemon Squares. I decided to make these Peanut Butter Fingers as a last-minute replacement for the tasty-but-falling-apart Creamy Lemon Squares for two reasons.

1) You can’t go wrong with peanut butter and chocolate.
2) One fun blog I read is called Peanut Butter Fingers. You should check it out… it’s hilarious! 🙂

Scratch that–3 reasons.

Peanut Butter Fingers | thepajamachef.com
How delicious does this look?
Peanut Butter Fingers | thepajamachef.com
Or this?

Mmmm… maybe 4 or 5 reasons.

Peanut Butter Fingers | thepajamachef.com
Or that? YUM.

Okay, well, any way you view it… these are delicious and are highly recommended. They aren’t the best thing ever for you but they are oh so good.

Peanut Butter Fingers

  • Servings: 24
  • Print

from Jenn Cooks

Ingredients:

  • 1/2 cup margarine
  • 1/2 cup sugar
  • 1/2 cup brown sugar
  • 1 egg
  • 1/3 cup + 1/4 cup creamy peanut butter, divided [I did not use natural peanut butter… but you’re welcome to experiment with that if you’d like! I used regular PB like Jiff or Skippy or the Kroger store brand!]
  • 1/2 teaspoon baking soda
  • 1/2 teaspoon vanilla
  • 1 cup old-fashioned rolled oats
  • 1 cup all-purpose flour
  • 6 ounces chocolate chips
  • 1/2 cup powdered sugar
  • 2-4 tablespoons skim milk
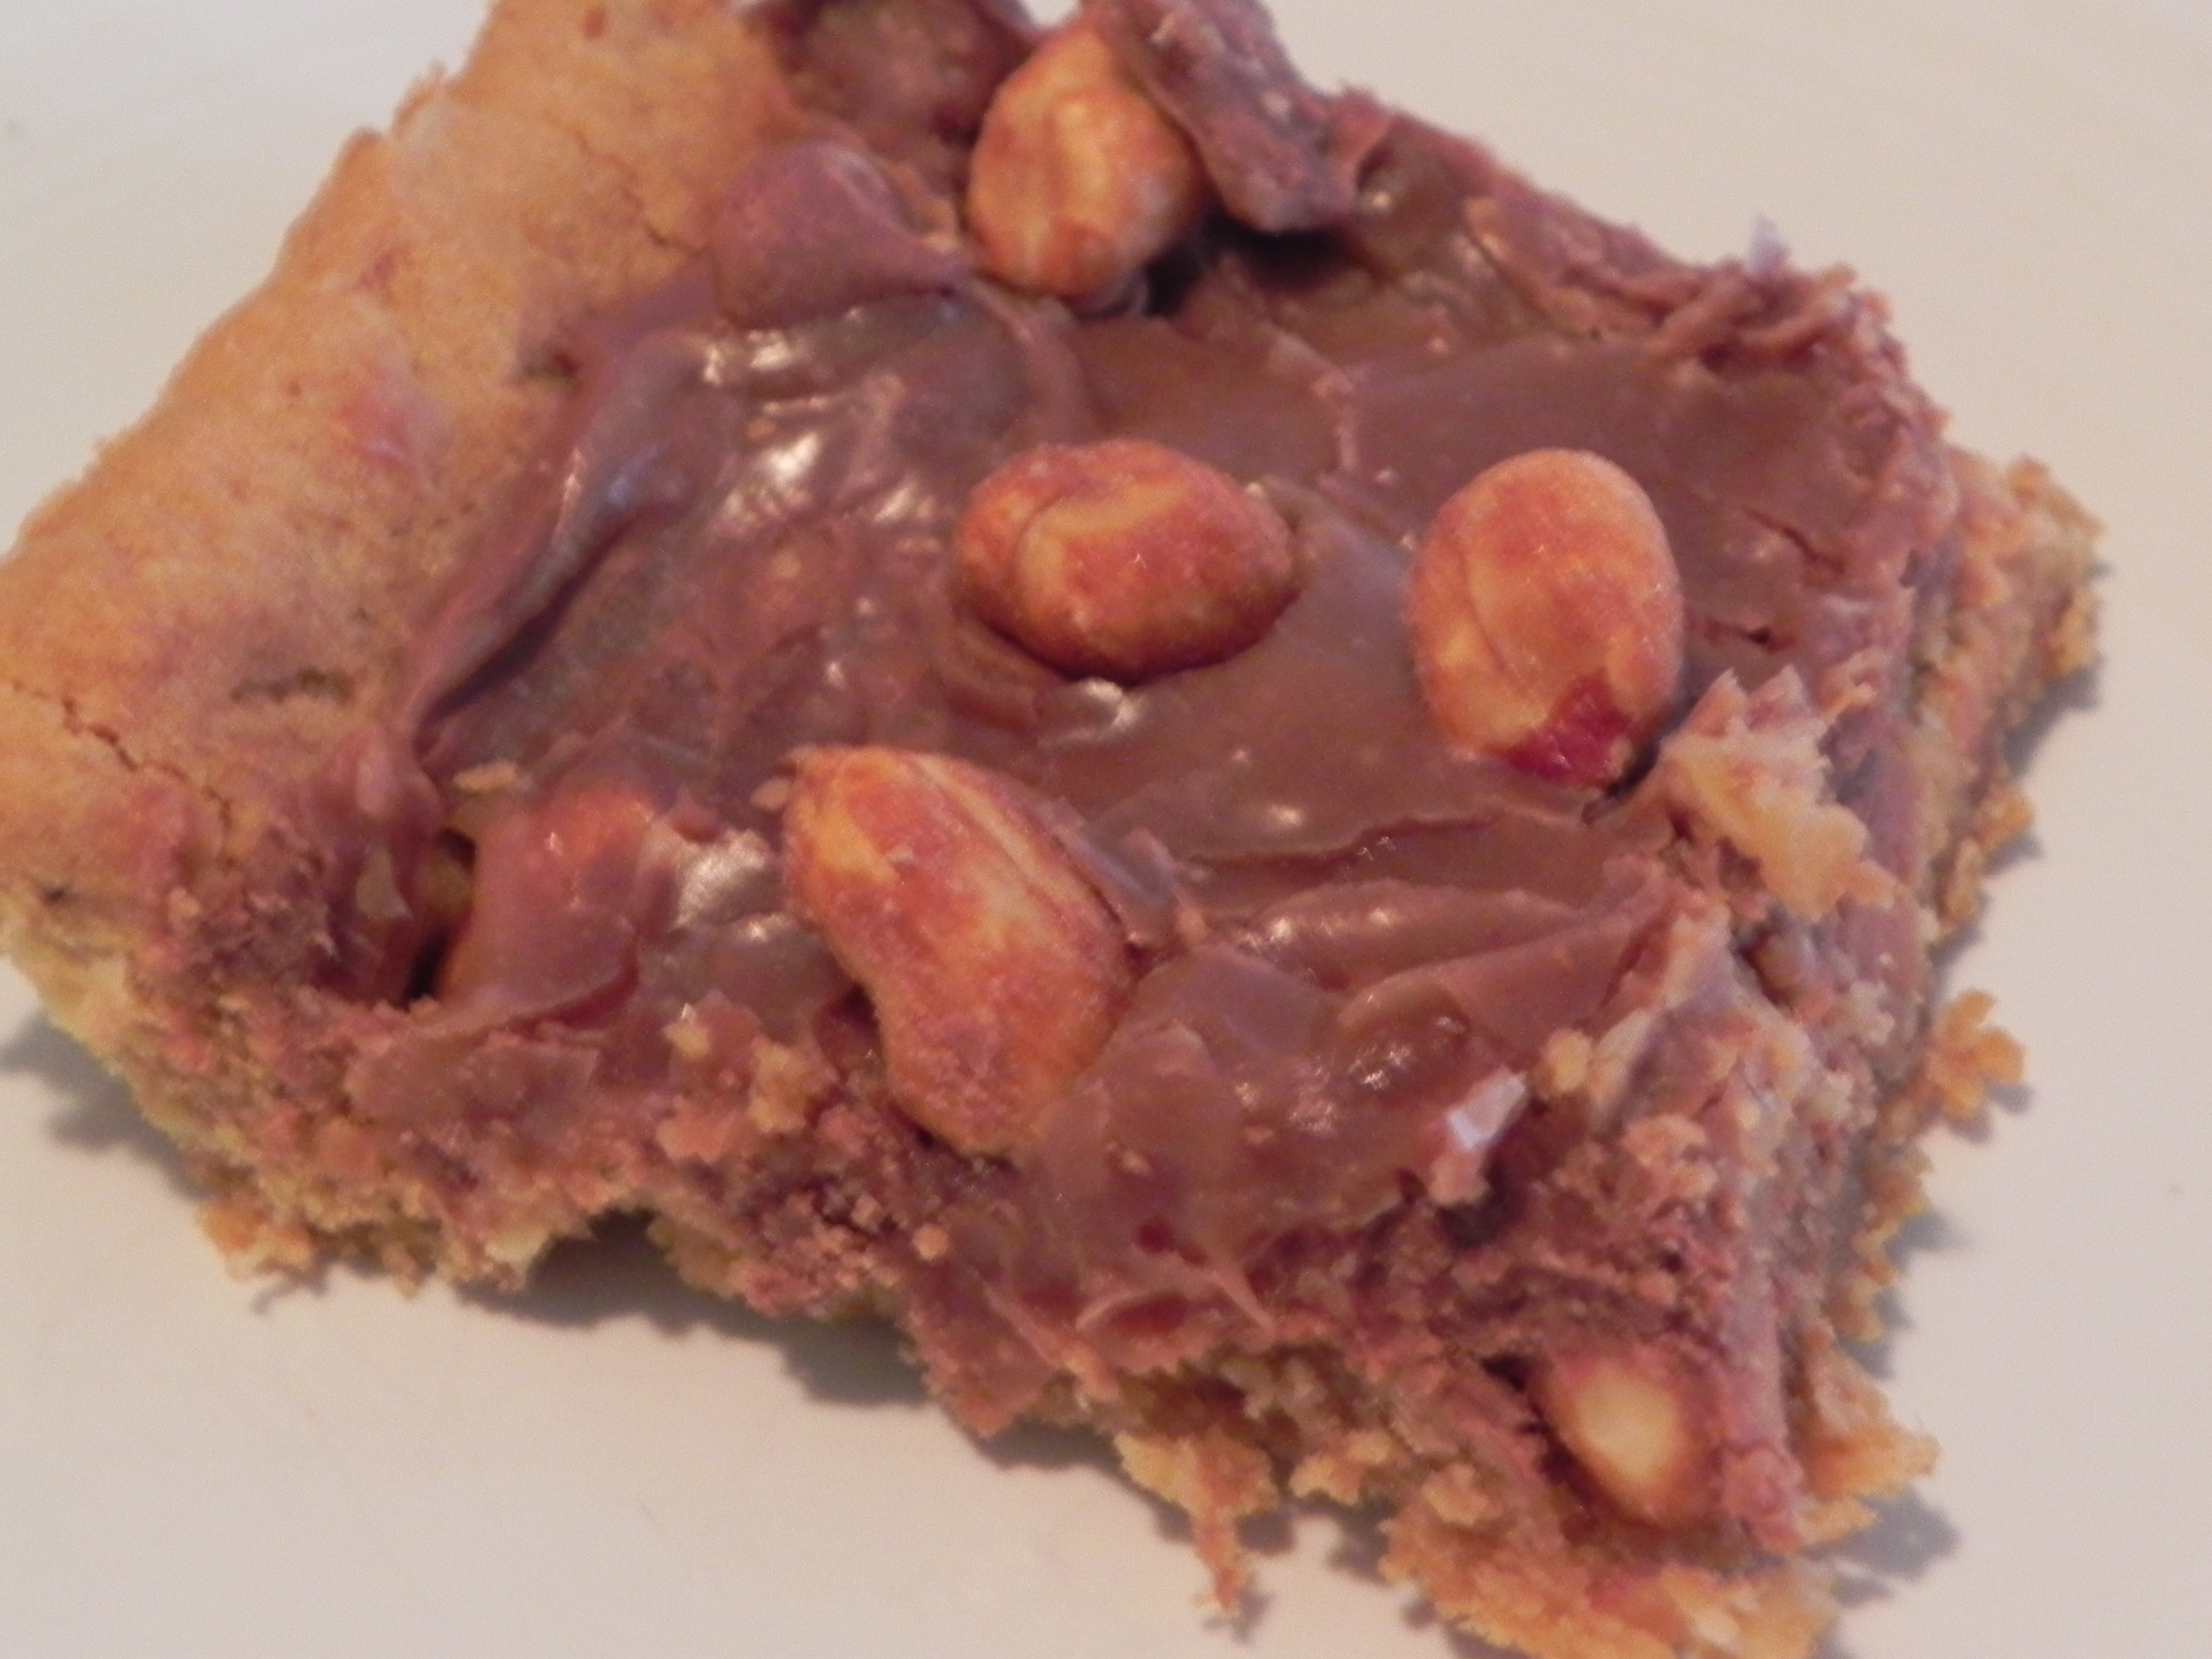
  • 1/4 cup honey-roasted peanuts
  • cooking spray

Directions:

Preheat oven to 350 degrees. Use cooking spray to grease a 9×13″ pan.

In the bowl of an electric mixer, cream margarine, sugar, and brown sugar until fluffy. Add in the egg, 1/3 cup peanut butter [hint: grease measuring cup with cooking spray first–it will come out a lot easier!], baking soda, and vanilla. Mix until combined. In a separate bowl, mix flour and oats with a wooden spoon and gradually add to the batter in the electric mixer. When combined, use rubber spatula to turn dough into the prepared pan. Use your hands [washed, of course!] to press dough into the bottom of the pan. Lick your fingers if you want, then place pan in the oven and bake for 18 minutes. Not 17 or 19; 18. This. Is. Crucial. [You can also recruit a husband or wife or friend or sister or father or anyone to put the pan in the oven so you can lick your fingers completely, but this is totally optional. Feel free to bribe them with the beater or something, if you can share. ;-)]

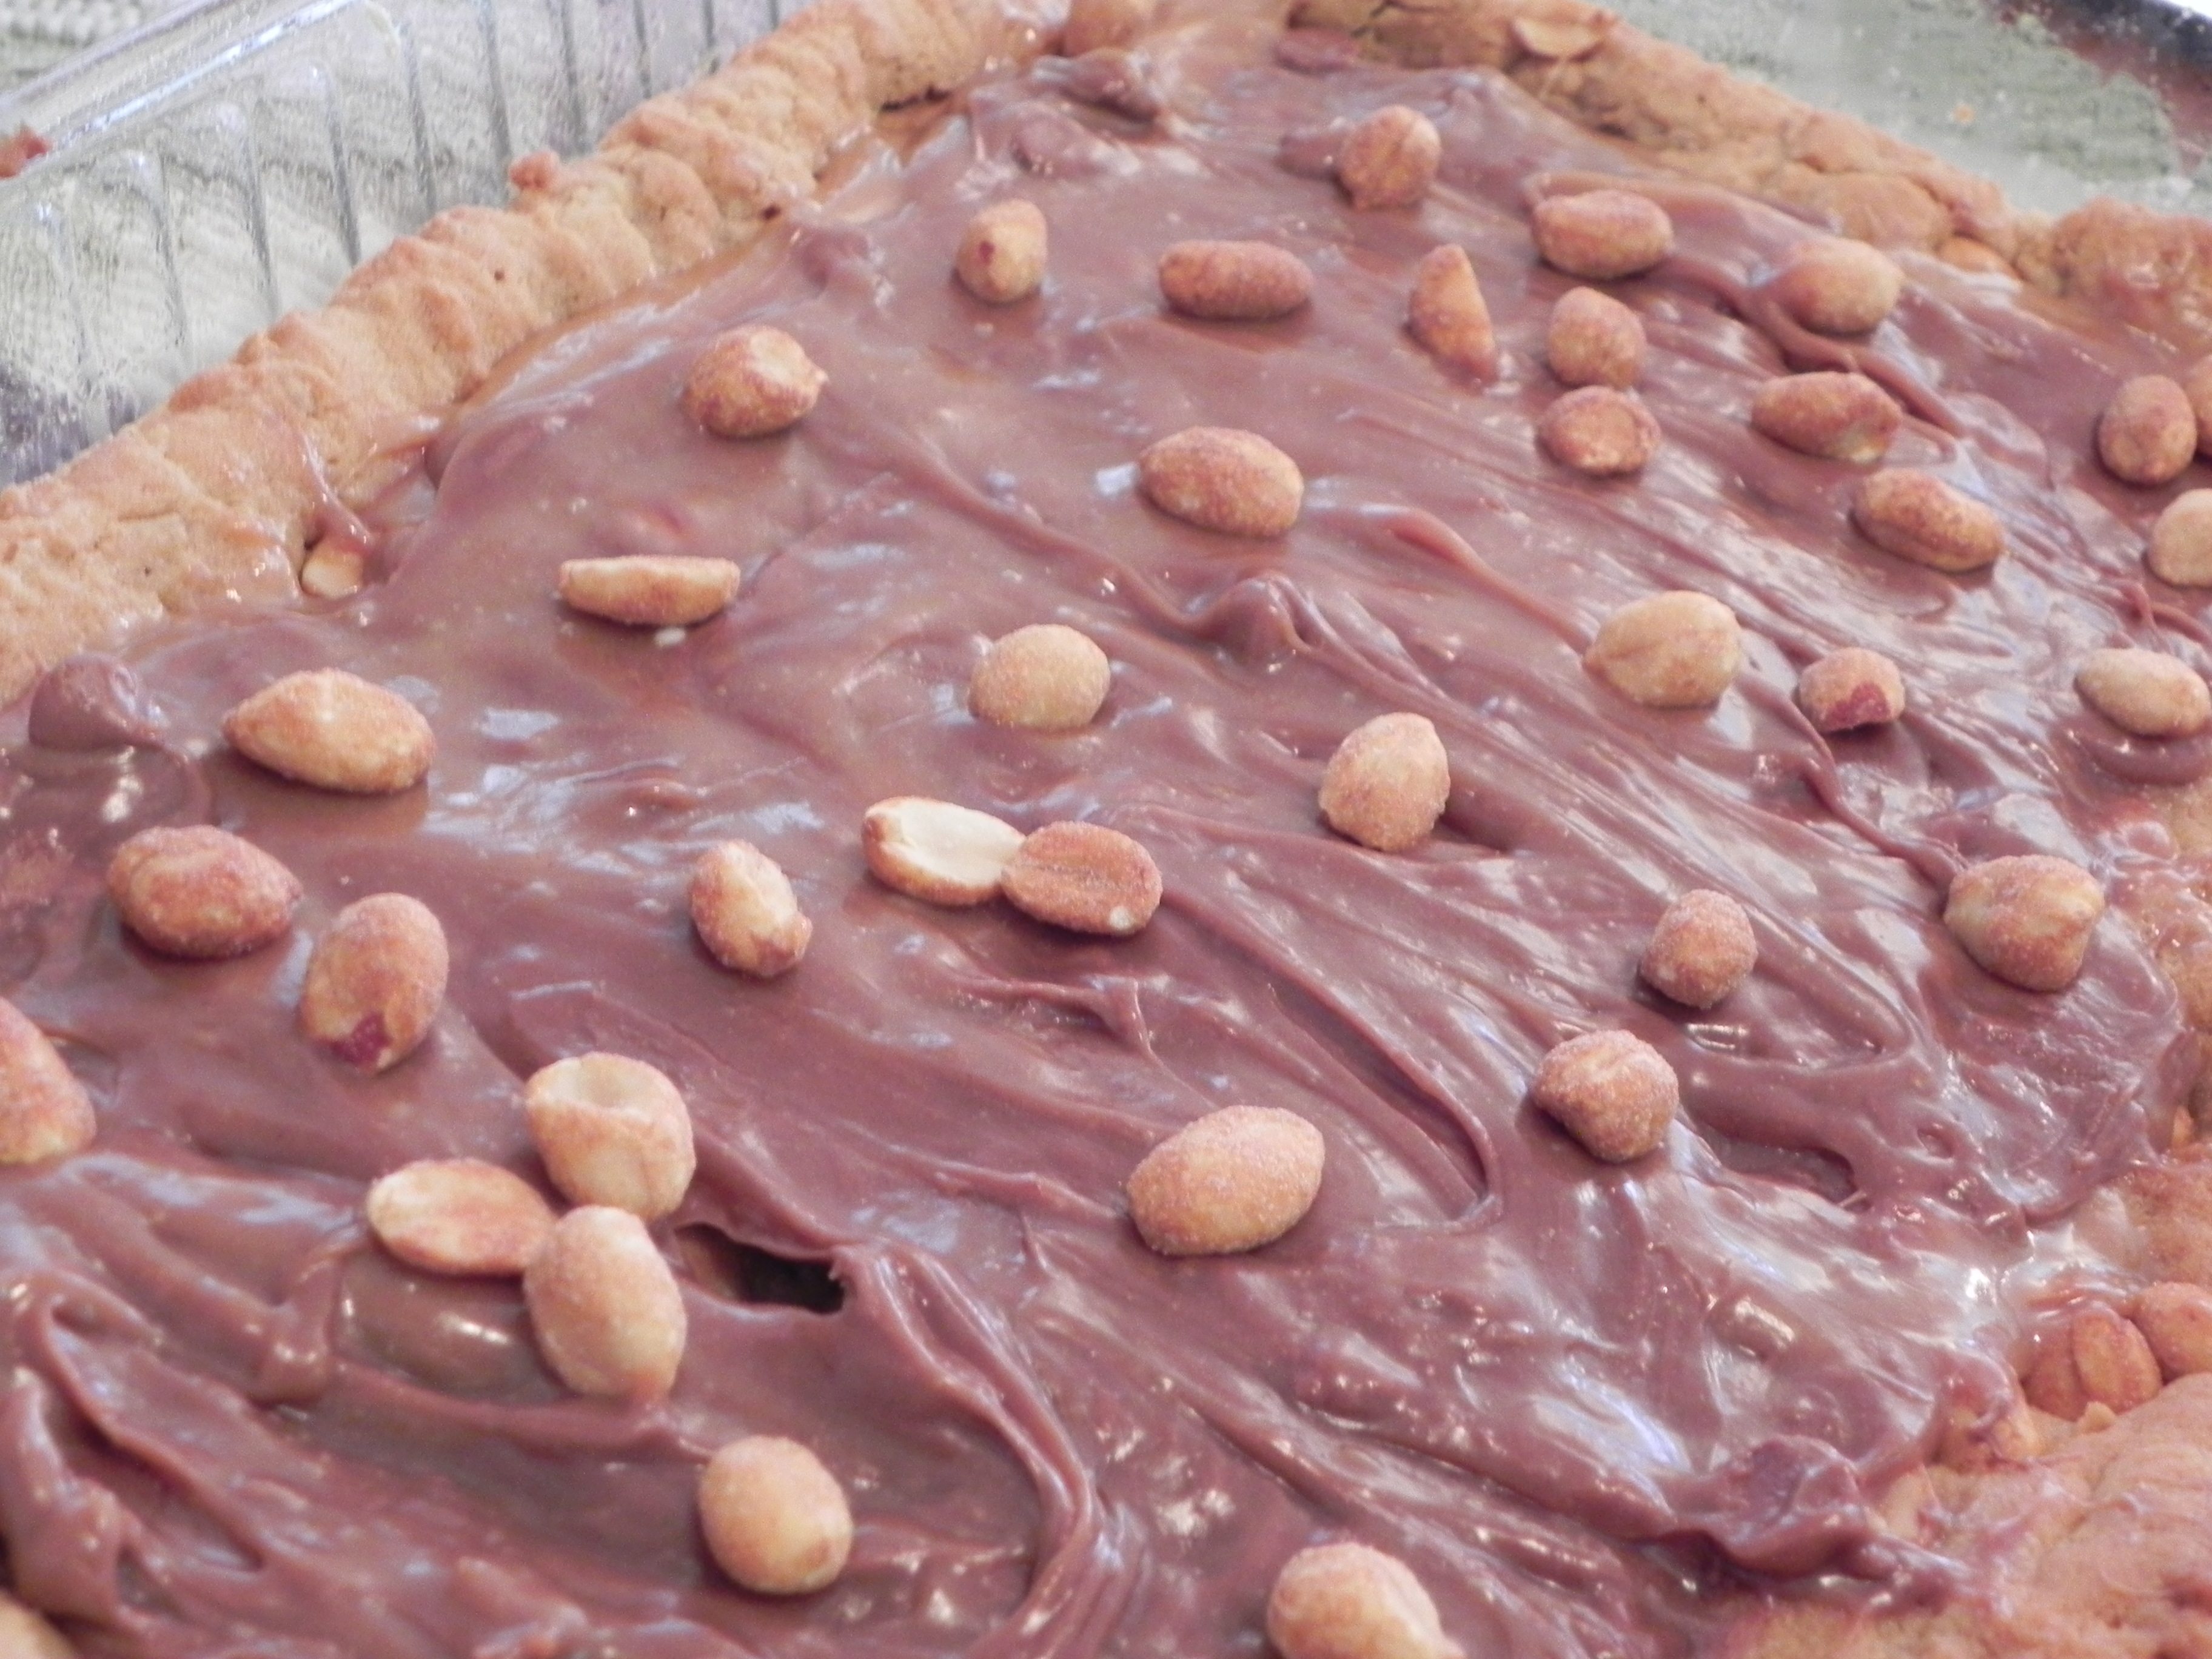
Meanwhile, make the glaze. In a medium bowl, whisk together powdered sugar, 1/4 cup peanut butter, and 2 tablespoons milk. Add up to 2 more tablespoons of milk, but don’t make it too runny. You want the consistency to be spreadable but not super liquidy. I added an extra 1 tablespoon milk [total of 3 altogether], and this was good for me.

After those 18 minutes of baking, if the bars are baked almost to perfection [golden brown, yet still slightly under-baked in the center], dump the chocolate chips evenly over the peanut butter base and return to oven to bake for 2-4 minutes, or until peanut butter base looks good to you [base this on your desire: underbaked, crispy, or just right cookie bars].

Then, pour the glaze over top the chocolate goodness and swirl it around with a spatula or icing knife. Top with honey-roasted peanuts for extra peanut flavor and crunch!

And so concludes dessert week 2K10. I think I should plan another soon, k?

Breakfast, Muffins, Recipes

Cran-Oat Muffins

I love muffins. They’re just so easy and fun to eat. And they’re cute too. And yummy. On that note, I made muffins the other night.

Cran-Oat Muffins | thepajamachef.com

These were great. Not my favorite muffins ever, but pretty darn close. [That title is reserved for pumpkin chocolate chip muffins which I will be making in the fall when pumpkin returns to the grocery stores… I can’t WAIT!] These muffins remind me of fall. Delicious spices, sweet-tart cranberries, and the texture of oats. Incredible.

Cran-Oat Muffins | thepajamachef.com

Cran-Oat Muffins

  • Servings: 20
  • Print

from Dorie Greenspan’s Baking From My Home to Yours, adapted by OvenLove and me

Ingredients:

  • 1/2 cup packed light brown sugar
  • 1/2 cup chopped pecans
  • 2 eggs
  • 1 1/4 cups unsweetened natural applesauce
  • 1/3 cup canola oil
  • 1/4 cup lowfat buttermilk
  • 3/4 cup granulated sugar
  • 1 1/4 cups all-purpose flour [I used 3/4 cup all-purpose + 1/2 cup whole wheat]
  • 1 1/2 teaspoons baking powder
  • 1/2 teaspoon baking soda
  • 3/4 teaspoon + 1/2 teaspoon cinnamon, divided
  • 1/4 teaspoon nutmeg
  • 1/4 teaspoon cloves
  • 1/4 teaspoon pumpkin pie spice
  • 1/2 cup dried cranberries
  • 1 cup old fashioned rolled oats

Preheat the oven to 350 degrees. Prepare muffin tins with either paper or foil muffin cups, or if you’re fancy, use silicone muffin tins or cups. I would love these!

muffin cupsOr this:

Muffin tinAnyways… let’s get going on those muff muffs!

In a medium bowl, use a whisk to combine eggs, applesauce, oil, and buttermilk until combined. Make sure the eggs are fully incorporated… for some reason I had troubles with that.

Then, using a large bowl, stir together the flour, sugar, baking powder, baking soda, 3/4 teaspoon cinnamon, nutmeg, cloves, and pumpkin pie spice. Remove 1/2 teaspoon of the dry ingredients and toss with the cranberries to coat. Mix oats and cranberries into the bowl. Pour wet ingredients into the dry ingredients and mix until just moistened. Spoon batter into muffin cups [I got about 20 muffins out of this batter].

Then, make the topping by stirring together the brown sugar, pecans, and 1/2 teaspoon cinnamon. Top each muffin with a teaspoon of topping and press down gently into the batter so it sticks. Bake for 20-22 minutes, or until a toothpick inserted into the center comes out clean.

Notes:

If I were to make these again, which I do want to do because they were delicious, I would probably decrease the amount of granulated sugar to 1/2 or 2/3 cup. I just thought they were way too sweet, especially with the brown sugar-based topping. Also, I’d increase the amount of cranberries to 3/4 cup. I wanted more! My husband agreed with the cranberry idea, but didn’t find these too sweet at all, so it’s all about personal taste I guess!

Chicken, Main Dishes, Recipes

Lemon-Herb Grilled Chicken

I promise, I really do cook real food and not just desserts. And just to prove it to ya… here’s a fab new recipe I recently tried.

This Lemon-Herb Grilled Chicken is a wonderfully easy summertime recipe. I used the fresh herbs growing on my balcony in the marinade, and it was absolutely divine. I loved being able to taste and smell a variety of flavors in this chicken. It cooked really quickly in the George Foreman grill, too, which was perfect for a weeknight meal, and didn’t require the use of the oven so the apartment didn’t get all toasty. What a plus! 🙂

Lemon-Herb Grilled Chicken - an easy summertime recipe | thepajamachef.com
grillin’ UP!

This recipe does require some advanced prep work, but it’s easy enough to whip up in the morning before work or the night before. Also, I found the red pepper flakes really spicy for some reason. My husband loved it, but feel free to omit those or decrease the amount if you want a milder dish.

Lemon-Herb Grilled Chicken - an easy summertime recipe | thepajamachef.com
Dinner is served!

Lemon-Herb Grilled Chicken

  • Servings: 3-4
  • Print

[adapted from Midwest Living July/August 2010]

Ingredients:

  • 1 lb chicken breasts [I used 3]
  • salt
  • pepper
  • 1/4 cup water
  • 1/2 cup chicken broth
  • 1/4 cup fresh parsley, or 4 teaspoons dried parsley
  • 1 tablespoon lemon zest
  • 1/3 cup lemon juice
  • 3 tablespoons olive oil
  • 1 tablespoon fresh sage, chopped or 1 teaspoon dried sage
  • 1 tablespoon fresh thyme, chopped or 1 teaspoon dried thyme
  • 1 teaspoon red pepper flakes
  • 3 cloves garlic, minced
  • 1/4 cup honey

Directions:

In a medium bowl, combine all ingredients except the chicken, salt, pepper, and water. Mix well, and reserve 1/4 cup marinade. In a separate bowl or on a plate, season chicken with salt and pepper. Add chicken and water to the first bowl [not the reserved portion], toss to coat. Cover and refrigerate chicken, as well as reserved marinade for at least 4 hours or up to 24. I left mine for about 9 hours. Grill chicken [husband used the George Foreman] until cooked through. Cut into the chicken every so often to test for doneness. When chicken is tender and no longer pink on the inside, brush the marinade over the top and cook for an additional minute or two, holding open the grill cover. Remove to a plate and let rest for two minutes before serving.

Cakes, Desserts, Recipes

Chocolate Cake That Changes Everything

I’ve been on a dessert kick lately. I promise though, it’s not my fault. Last week I had to make desserts to take to two separate occasions. And one recipe failed in presentation [due to the lack-of-parchment-paper-incident-of-2010 so I had to make a third, which was so difficult fun!

This is dessert recipe 2 of 3 that I made last week. It is by far my favorite, and chocolate cakes aren’t really my thing.

However, they are my Grandpa’s thing, and I was in charge of making him a chocolate cake with chocolate frosting for his 89th birthday last week. It’s his favorite, and I had to oblige.

Grandpa
Grandpa sporting new oven mitts!

This cake changes everything in regard to my feelings about chocolate cake. It’s another Martha winner.

Chocolate Cake & Frosting | this chocolate cake changes everything! {thepajamachef.com}Moist. Rich. Tasty. Sweet, but not too sweet. With a frosting that has a slight tang to it… not sickeningly sweet and great when cold.

My mom said it was one of the best she’d ever had.

It even comes highly recommended by…

Chocolate Cake & Frosting | this chocolate cake changes everything! {thepajamachef.com}
NEGLEY!

Negley is my husband’s new pet dinosaur. He’s a velociraptor, to be precise. Anyways, he came along to the birthday celebration and he wholeheartedly enjoys this cake, so you should too.

Chocolate Cake & Frosting

  • Servings: 18
  • Print

by Martha Stewart

Ingredients:

  • 3/4 cup + 1/8 cup unsweetened cocoa powder, divided, plus more for dusting
  • 1 1/2 cups all-purpose flour
  • 1 1/2 cups sugar
  • 1 1/2 teaspoons baking soda
  • 3/4 teaspoon baking powder
  • 3/4 teaspoon salt
  • 2 large eggs
  • 3/4 cup low-fat buttermilk
  • 3/4 cup warm water
  • 3 tablespoons oil [Martha suggests safflower, I used canola]
  • 1 teaspoon vanilla extract
  • 1 1/8 cups powdered sugar
  • pinch of salt
  • 3 ounces cream cheese, softened
  • 1/4 cup unsalted butter (1/2 stick)
  • 3 ounces fat free sour cream
  • 3 ounces bittersweet chocolate, melted
  • 2 ounces milk chocolate, melted
  • cooking spray

Directions:

Preheat the oven to 350 degrees. Use cooking spray to grease pan, then dust with cocoa. I used a 9×13 baking dish because I had to transport the cake 4 hours in the car, but the original recipe calls for 2 8″ cake pans, so feel free to take your pick. 🙂 A layer cake would be much prettier!

In an electric mixer, combine 3/4 cup cocoa, flour, sugar, baking powder, baking soda, and salt. Add eggs one by one, mixing in between to fully combine. Then gradually add in buttermilk and mix to fully incorporate. Repeat with water, oil, and vanilla. Once all ingredients are added, mix on medium speed until smooth and batter is free from any lumps.

Pour batter into pan(s). Bake until a toothpick inserted in the center of the cake comes out clean, about 35 minutes. Place on cooling rack to cool. [If using round cake pans, turn cake out onto cooling racks after about 15 minutes.] Cool completely before frosting.

Meanwhile… make that frosting! [Note: if using round cake pans, just double this recipe to ensure you’ll have enough frosting.]

In a small bowl, mix powdered sugar, cocoa, and salt. In the bowl of an electric mixer, combine cream cheese and butter until smooth and fluffy. Add cocoa mixture to cream cheese concoction in 1/3 cup increments, mixing until fully incorporated. Pour in the chocolate [it helps to melt it in a glass measuring cup with a spout] while mixer is turned on low, then add sour cream and beat until combined, scraping the sides as necessary.

Frost the cake once cooled, and be sure to lick the beater! No eggs=safe indulgence! 🙂 Top with a sprinkling of mini chocolate chips and you have yourself one chocolaty treat to enjoy.

Feel free to let the cake sit overnight… if you can help it. I refrigerated it because the frosting had dairy in it, and it was ever-so-tasty the next day. Remember, Negley thought it was good and you will too! 🙂

Bars, Desserts, Recipes

Creamy Lemon Squares

Martha Stewart. Brings to mind different opinions for different folks. I won’t even go into that debate here. That being said… the recipe.

I read accounts of this particular version of lemon squares here and here and here. I’m sure it’s elsewhere too.

I was initially drawn to this recipe because it looks like an absolutely amazing way to eat a lemon. I love lemons but don’t make homemade lemonade because I don’t have a juicer and think it’d be hard to squeeze all those lemons by hand. I don’t want to always use lemon as a chicken marinade (even though it can be really tasty). And I don’t really think to make it as a dessert very often because I love peanut butter and chocolate and berries way too much. Not all together. Just different combination of those yummy morsels.

I’m rambling. I’m sorry. It’s late and now I’m thinking of peanut butter. Mmmmm peanut butter. A spoonful might be necessary now.

Okay, back to the lemon squares. These are a refreshing treat on a hot summer day. Best cold out of the fridge, I would recommend these lemon bars for an everyday treat or a fancy dinner party dessert. They can be dressed up with some powdered sugar or a sprinkling of fresh berries… the possibilities are endless!

A word to the wise though… use parchment paper. I didn’t, and regretted it. Horribly, horribly regretted it. I didn’t take a picture of the aftermath of the pan or the broken lemon squares. It was sad. Really sad. At least they were tasty… very tasty!

Creamy Lemon Squares | thepajamachef.com
The prettiest ones of the bunch.

Another redeeming quality of these bars were that they were gooey. And I cannot resist a gooey dessert… yumalicious!

Creamy Lemon Squares | thepajamachef.com
Gooooooo!

Without further ado…

Creamy Lemon Square

  • Servings: 12
  • Print

by Martha Stewart

Ingredients:

  • 1/2 cup butter, softened [or 1/2 cup unsalted butter + 1/4 teaspoon salt]
  • 1/2 cup powdered sugar, plus more for dusting [or dumping like I did]
  • 1 cup all-purpose flour
  • 4 large egg yolks
  • 14 ounces lowfat sweetened condensed milk
  • 3/4 cup fresh lemon juice, from about 3 lemons [some bloggers suggest 4; I made it with 3… depends on the size of your lemons]
  • cooking spray

Directions:

Preheat oven to 350 degrees. Spray an 8″x8″ baking pan with cooking spray, line with parchment paper (leaving an overhang on two sides), and spray paper. [PLEASE DO THIS. Or you will be sad.]

For the crust, combine butter and sugar in an electric mixer until fully combined and fluffy. Add flour, about 1/3 of a cup at a time, and mix until incorporated in the butter. Spoon dough into the prepared pan, pressing along the sides and bottom of the pan. Use a fork to prick all over so your crust doesn’t bubble up. Bake until golden yet still soft to the touch, about 15-20 minutes.

Now onto the lemony goodness… aka the reason to make this recipe.

Add yolks, milk, and lemon juice to a large bowl. Whisk until combined. [Hint: teach husband to separate eggs and serve him the whites for breakyfasty the next day. Yes, I did just say breakyfasty. I’m not sure why. Husband is also a good whisker too.]

Pour filling over hot crust in pan. Ooh and ahh over how good the butter and sugar and lemon smells.

Return lemon squares to oven and bake until filling is set. Martha recommends 25-30 minutes, mine was set in about 22. My advice? Watch it very closely after about 19 minutes… that’s when mine started to brown around the edges.

Cool completely in pan, then refrigerate until firm, about 2 hours. I let mine refrigerate overnight, and Martha sez you can keep it in there for up to 3 days. 3 days?!? Geeze, I don’t think an uncut dessert would last that long here.

Before eating and enjoying, remove cake from pan, cut, and sprinkle with powdered sugar. Yum.

I’m not sure why I’m so weird now, but I am… and don’t forget… use parchment paper! It will make your life so much better. The end.