Jump on the homemade nut butter train with this chocolately spread with a bit of cookie dough flair! This #Choctoberfest recipe is made with delicious Barlean's Butter Flavored Coconut Oil.
Breakfast, Recipes, Spreads

#Choctoberfest: Chocolate Cookie Dough Peanut Butter

Jump on the homemade nut butter train with this chocolately spread with a bit of cookie dough flair! This #Choctoberfest recipe is made with delicious Barlean’s Butter Flavored Coconut Oil.

Jump on the homemade nut butter train with this chocolately spread with a bit of cookie dough flair! This #Choctoberfest recipe is made with delicious Barlean's Butter Flavored Coconut Oil.

Have you made homemade nut butter yet? It’s one of those recipes that people give you a doubletake when you say, “oh, I made peanut butter this weekend.” It does sound fancy, I’ll admit. But can I tell you a secret? It’s not as impressive as it sounds! As long as you have a good food processor or blender, making nut butter is e-a-s-y. And it tastes amazing, especially since you can customize it a whole bunch. And that’s EXACTLY what I did here!

Jump on the homemade nut butter train with this chocolately spread with a bit of cookie dough flair! This #Choctoberfest recipe is made with delicious Barlean's Butter Flavored Coconut Oil.

I know almond, cashew, etc. butters are trendy, and they’re fun and good… but my personal favorite nut butter is the classic peanut butter! When I make it at home, I love throwing in some warm spices, chia seeds, and a little honey or maple syrup for sweetness. But since it’s #Choctoberfest, I had to go in the chocolate direction. Oh darn! But you know me… I didn’t want to JUST make chocolate peanut butter. I wanted to make it even more special. What to do?! Add some buttery goodness in the form of Barlean’s Butter Flavored Coconut Oil, along with some vanilla, brown sugar, and chocolate chips in a nod to cookie dough. Yes, please!

Jump on the homemade nut butter train with this chocolately spread with a bit of cookie dough flair! This #Choctoberfest recipe is made with delicious Barlean's Butter Flavored Coconut Oil.

Thanks to our fabulous #Choctoberfest sponsor, Barlean’s, this chocolate peanut butter really tastes great. Though you can make nut butter without any added oils, for homemade nut butter, a little oil really does help everything come together. Normally I use canola or olive oil, but this coconut oil (and its buttery taste) was so welcome. Barlean’s makes superfood nutrition easy, and that’s true with my chocolatey recipe!

Jump on the homemade nut butter train with this chocolately spread with a bit of cookie dough flair! This #Choctoberfest recipe is made with delicious Barlean's Butter Flavored Coconut Oil.

My family and I have been enjoying this Chocolate Cookie Dough Peanut Butter on the daily over the past week. I can’t decide on my favorite use. It’s great stirred into oatmeal or on a banana. But if I’m being TRULY honest… I’ve probably consumed half the jar by the spoonful. No joke. But it’s not just me! My two year old now says “spoon like Mama!” because he’s seen me sneaking spoonfuls of Chocolate Cookie Dough Peanut Butter a few too many times. Ooops! Guess that’s just an excuse to make a second batch. 🙂 I’ll have to experiment with different textures. I left this version a little chunky, but you can also smooth it out more if you prefer. I guess you’ll have to make a few batches too to see how it’s best! 🙂 Enjoy!

one year ago: Pumpkin Spice Coffee Syrup + Cold Brew Coffee Method
two year ago: Banana Espresso Chocolate Crumb Cake
three years ago: Coconut Oil Dark Chocolate Chip Cookies
four years ago: Asian Turkey Meatballs with Carrot Rice
five years ago: Cream of Broccoli Soup with Cheese
six years ago: No Bake Tropical Energy Bites
seven years ago: Garlicky Pasta with Fresh Tomatoes and Basil
eight years ago: Pillow Cookies

Please check out other delicious #Choctoberfest recipes here! And enter our giveaway this week here! 🙂 

Chocolate Cookie Dough Peanut Butter

  • Servings: makes 2 cups
  • Print

Ingredients:

  • 16 ounces dry roasted unsalted peanuts
  • 3 tablespoons Barlean’s Butter Flavored Coconut Oil
  • 1/4 cup cocoa powder
  • 1/4 cup brown sugar, packed (or to taste)
  • 1 tablespoon chia seeds
  • 1 teaspoon vanilla extract
  • 1/2 teaspoon salt
  • 2 tablespoons mini chocolate chips

Directions:

In a food processor, pulse together peanuts and coconut oil until the peanuts are pretty broken down, but aren’t completely smooth yet.

Add cocoa powder, brown sguar, chia seeds, vanilla, and salt. Pulse a few more times until everything starts to come together, scraping the sides with a spatula as necessary. Repeat until mixture is smooth.

Add mini chocolate chips and pulse once to incorporate.

Store in a jar or other air-tight container in the refrigerator, up to one month.

For easier spreading, allow to sit at room temperature for about 15 minutes. Alternatively, microwave for 15-20 seconds or until stirrable. This peanut butter is delicious on toast, with apples or bananas, on oatmeal, or just by the spoonful!

Disclosure: I received free product from Barlean’s to use in this recipe for #Choctoberfest. I was not required to review them or provide positive feedback. All opinions are my own. You can learn more about Barlean’s and get great recipe ideas from them on PinterestFacebookInstagram, and Twitter.

Bars, Breakfast, Recipes

Fantastical Food Fight: Banana Breakfast Bars

These simple freezer-friendly banana breakfast bars come together in a snap and taste SO good! They’re a great breakfast or snack that everyone will love. 

These simple freezer-friendly banana breakfast bars come together in a snap and taste SO good! They're a great breakfast or snack that everyone will love. #FantasticalFoodFight via thepajamachef.com

Apparently these days all my recipes revolve around breakfast or snack time. Ha! I first made these yummy banana breakfast bars in the winter and have since made them several times because they are a) easy, b) addictive, c) pretty healthy, and d) made with ingredients I always, always, ALWAYS have on hand. All three of us love these hybrid granola bar/banana bread recipe that can be enjoyed for an on-the-go breakfast or for a healthy snack option. And my husband likes them doubly-so because they’re made in just one bowl for extra-easy clean up! Haha.

These simple freezer-friendly banana breakfast bars come together in a snap and taste SO good! They're a great breakfast or snack that everyone will love. #FantasticalFoodFight via thepajamachef.com

I’m always on the look out for easy, real-food recipes that I can make for my toddler’s afternoon snack at school… with the dreaded “nut free” caveat. I’m fortunate enough to not have a child with food allergies, so I don’t quite understand that world, though I do try to be sympathetic. But it’s hard because I love me some peanut butter and lots of my favorite recipes include it! So I have to think outside the box a bit for school snacks. We try to rotate between yogurt, applesauce, cheese, fruit, and some sort of muffin/bar recipe so he doesn’t have the same thing for snack everyday. The muffin/bar option is one of my favorites because so many recipes–including this one–can be made ahead and frozen so he doesn’t have a week’s worth of the same thing. I know he’s only two, but even so I don’t want him to get bored with the same snacks. And maybe BECAUSE he’s two, I don’t want him to get into a food rut. 🙂 So many store-bought breakfast/granola bars are made with nuts or nut butter, which is a no-go for school… so these are absolutely perfect!

These simple freezer-friendly banana breakfast bars come together in a snap and taste SO good! They're a great breakfast or snack that everyone will love. #FantasticalFoodFight via thepajamachef.com

I hope you give these easy bars a try. Read through the recipe below to see how to make them… and be sure to click over to the original recipe. If you don’t have to make nut-free snacks like I do, you’ll want to try the yummy peanut butter-white chocolate drizzle. I need to give that try sometime! 🙂

P.S. I’m linking these up with the BANANA Fantastical Food Fight this month. Check out more banana recipes here: 

two years ago: Creamy Sweet Potato and Kale Orzo
three years ago: Cantucci (Almond Biscotti)
four years ago: Homemade Pumpkin Pie Spice
five years ago: Autumnal Muffins
six years ago: Iced Tea with Ginger-Mint Simple Syrup
seven years ago: Roasted Vegetable Quinoa Salad
eight years ago: Spaghetti + Meatballs

Banana Breakfast Bars

  • Servings: 12 bars
  • Print

slightly adapted from Crazy for Crust

Ingredients:

  • 2 medium bananas, very ripe
  • 1/4 cup canola oil
  • 1 large egg
  • 1/2 teaspoon vanilla
  • 1 cup old-fashioned oats
  • 1/2 cup whole wheat flour
  • 1/4 cup brown sugar, packed
  • 1/2 teaspoon cinnamon
  • 1/2 teaspoon baking soda

Directions:

Preheat oven to 350 degrees F. Grease an 8×8 or 9×9 baking dish with non-stick spray.

In a large bowl, mash bananas. Add oil, egg, and vanilla, then whisk until egg is beaten in and everything is combined. Add in oats and flour, then stir to combine. Sprinkle in brown sugar, cinnamon, and baking soda. Stir to combine.

Pour batter into prepared pan, then bake for 18-22 minutes until edges are golden brown and center is cooked through.

Cool completely before cutting into bars. Store in the fridge for up to 4 days, or freeze (in bags for easy lunch packing, if desired) for up to a month.

The original recipe has a yummy peanut butter-white chocolate drizzle on top if you want to try that! I needed to keep these nut-free for my son’s school, but that would be a fun addition. Enjoy!

Easy and delicious, these peanut butter chocolate protein poppers are a fun healthier snack option that taste like dessert!  thepajamachef.com
Breakfast, Granola, Recipes

Peanut Butter Protein Poppers

Easy and delicious, these peanut butter chocolate protein poppers are a fun healthier snack option that taste like dessert! 

Easy and delicious, these peanut butter chocolate protein poppers are a fun healthier snack option that taste like dessert!  thepajamachef.com

It’s Fridayyyy! And I’m sitting in my office, eating lunch and hoping no one comes by and thinks I’m not working when really, it’s my lunch break. Does anyone else ever get like that? Paranoid, I mean… it’s my natural tendency. Ugh. But anyway, I shouldn’t be all “ugh” because it’s almost the weekend!! What does your weekend look like? These days, mine are filled with running, playing Duplo trains with my toddler, reading, going to church, and then MAKING ALL THE THINGS to eat on Sunday afternoons because marathon training makes me hungry.

Easy and delicious, these peanut butter chocolate protein poppers are a fun healthier snack option that taste like dessert!  thepajamachef.com

I’m not a hardcore meal prepper by any means, but I do like to be strategic in my weekend cooking: preparing breakfasts, snacks, and a dinner for Monday night make the whole week go so much smoother. Monday night dinner already made? Sign me up! Making a breakfast dish (baked oatmeal, egg casserole/muffins, or a batch of overnight oats) saves me in the mad rush out the door in the morning. Running at 5 am and trying to be out the door by 6:45 am is a little crazy some days, so having a prepared meal that I can easily heat up or take to go is fantastic. Likewise, I need snacks to enjoy at work. My coworkers and the students in the library probably think I eat all day long, and they wouldn’t be wrong. Haha! I do lots of the usual options: veggies and dip, apples and nut butter, cheese, nuts… but my new favorite thing is homemade granola bars and little bites, like these amazing Peanut Butter Protein Poppers! I know you can buy things like this but there’s just something so fun about homemade treats that are on the healthy side.

Easy and delicious, these peanut butter chocolate protein poppers are a fun healthier snack option that taste like dessert!  thepajamachef.com

These little peanut butter bites are made with protein powder, which isn’t something I consume regularly, but I had some samples to use so that was fun to throw in here. Aside from the protein powder, these bites have pantry staples that I use all the time in the kitchen. Oats! Cinnamon! Peanut butter! Honey! Coconut Oil! They are SO easy to make–just stir everything together, shape into balls, and chill for awhile. Then, melt some dark chocolate and drizzle on top. Presto! Tasty little protein poppers that are almost like dessert. I like to eat a couple of these in the afternoon as a snack, but I think they could also be great before/after a workout or even as a healthy dessert. Hope you guys enjoy!

Easy and delicious, these peanut butter chocolate protein poppers are a fun healthier snack option that taste like dessert!  thepajamachef.com

one year ago: Honey Sweetened Banana Berry Oat Muffins
two years ago: Creamy Pesto Pasta with Broccoli and Chicken
three years ago: Red Cabbage, Raisin, and Apple Slaw
four years ago: Healthy Crumb Topped Zucchini Bread
five years ago: Pumpkin Coconut Soup
six years ago: Chocolate Mousse 
seven years ago: Pumpkin Granola
eight years ago: Pizza Sauce

Peanut Butter Protein Poppers

  • Servings: 20 poppers
  • Print

slightly adapted from Kelly Lynn’s Sweets and Treats

Ingredients:

  • 1 cup old fashioned oats
  • 1 cup protein powder – I used half vanilla, half plain
  • 1/2 teaspoon cinnamon
  • 1 cup creamy peanut butter – I used a no-stir natural peanut butter
  • 2 tablespoons honey
  • 2 tablespoons coconut oil
  • 1/4 cup dark chocolate chips – for drizzling (optional, but not really!)

Directions:

In a large bowl, stir together oats, protein powder, and cinnamon. In a measuring cup, whisk together peanut butter, honey, and coconut oil. If it is too thick to mix well, microwave it for 15 second bursts until easily stirrable. Pour over oat mixture, then quickly stir to combine. The texture will be similar to cookie dough, and if stirring is difficult, use your (clean!) hands to mix together.

Use a medium cookie scoop (or your hands) to roll into balls. Place on a silicone mat or wax paper lined baking sheet, then refrigerate for at least 20 minutes to set.

When set, drizzle with melted dark chocolate. I like to melt chocolate in the microwave, using 50% power for 15 second bursts. Stir between bursts until chocolate is completely melted. Drizzle chocolate over Peanut Butter Protein Poppers, then return to refrigerator for at least another 10 minutes until chocolate is set.

Store in a covered container in the refrigerator for up to one week.

Notes: my protein powder had chia seeds in it, but if yours doesn’t, you could add a little in place of a little protein powder or oats… maybe like a tablespoon or so.

If you love cinnamon rolls, and you love blueberries, you NEED TO MAKE THIS RECIPE! Recipe for Blueberry Sweet Rolls on thepajamachef.com @thepajamachef
Breakfast, Pastries, Recipes

Blueberry Sweet Rolls

If you love cinnamon rolls, and you love blueberries, you NEED TO MAKE THIS RECIPE!

If you love cinnamon rolls, and you love blueberries, you NEED TO MAKE THIS RECIPE! Recipe for Blueberry Sweet Rolls on thepajamachef.com @thepajamachef

Long time no blog. Lots has been going on in my corner of the real world… including a new job (still at my library, just new responsibilities) and the start of marathon training (Rocket City Marathon in December). I know I could blog in the evening but I’ve honestly been more interested in reading a nice book. Currently, The Outsider by Stephen King. Eeeeek! I’m actually typing away at this post during my lunch break. But I’m back, and I bring BLUEBERRY SWEET ROLLS! These are absolutely phenomenal and I hope you can make them before summer is up. If you like cinnamon rolls, and you like blueberries, you will l-o-v-e these blueberry sweet rolls. #promise

If you love cinnamon rolls, and you love blueberries, you NEED TO MAKE THIS RECIPE! Recipe for Blueberry Sweet Rolls on thepajamachef.com @thepajamachef

Homemade cinnamon rolls are my love language. If someone tells me they’re making cinnamon rolls for brunch, and I show up expecting homemade cinnamon rolls and am greeted with their sad canned counterpart… I have to admit I’m a little disappointed. Not that people need to make good food (read: homemade cinnamon rolls) to be my friend exactly, but just that soft, fluffy sweet rolls are absolutely fabulous… and the canned kind are just a little blah. I know people are scared of baking with yeast, but it’s totally doable–and this recipe is a great place to start! For these blueberry sweet rolls, I use the same dough as my Copycat Cinnabon Cinnamon Rolls… and that dough is SO forgiving. I’ve screwed it up more times than I can count. I’ve mismeasured the yeast, added too much flour, forgotten the buttermilk… I could go on. Basically, it takes a lot to mess up that dough, and even if you do, chances are good that your sweet rolls will still bake up soft and tender. And still be easy to roll out. #winning And for the record, if you invite me over, ask ME to make the cinnamon rolls. I’ll be happy to oblige!

If you love cinnamon rolls, and you love blueberries, you NEED TO MAKE THIS RECIPE! Recipe for Blueberry Sweet Rolls on thepajamachef.com @thepajamachefI could eat regular cinnamon rolls year round, but in the summer, I want to add fruit to everything! I mean, I eat copious amounts of fruit every day… so it’s only natural. Peaches! Watermelon! Berries of all types! This time, I loaded up on the blueberries because why not? The sweet blueberry filling I made is good enough to eat with a spoon, but please save some for your sweet rolls. You’ll probably have extra so you can swirl it in your oatmeal, top your ice cream with it, or just enjoy it as is. I added some cinnamon to the blueberry filling because it seemed only natural, but there’s also some cardamom in there to make it extra special. The best part about the blueberry filling is that some of it pools on the bottom of the baking dish as the rolls rise and bake. Yum!! After the rolls are baked up and before you dive in, take a minute to make a super easy cream cheese frosting. I added a bit of lemon juice and lemon zest, and that citrus addition was perfection! I prefer cream cheese frosting on my cinnamon rolls, blueberry or otherwise, but if you want something a little lighter, you could just make a glaze with powdered sugar, cream/milk, and lemon juice. There are recipes online but you could improvise with a cup of powdered sugar, a tablespoon of cream/milk, and a tablespoon of lemon juice and go from there. I highly recommend the cream cheese frosting but if you want something simpler, that glaze would also be fantastic.

If you love cinnamon rolls, and you love blueberries, you NEED TO MAKE THIS RECIPE! Recipe for Blueberry Sweet Rolls on thepajamachef.com @thepajamachef

Oh, and while this post is 100% NOT sponsored, if you’re in Nashville… be sure to check out Mr. Blueberry for the delivery service of your blueberry dreams. I used their luscious Michigan blueberries to make these sweet rolls (and to devour!). The season is almost ending (I think the last delivery is next weekend, August 24-25, 2018). Just FYI, friends! 🙂 Have a great Wednesday!!

one year ago: Mexican Lasagna
two years ago: Awesome Kale Salad
three years ago: Cheesy Veggie Pasta
four years ago: Dulce de Leche Peanut Butter Sandwich Cookies
five years ago: Chocolate Zucchini Muffins
six years ago: Cinnamon Bacon Carbonara
seven years ago (wow!): Maple Pecan Pear Scones

Blueberry Sweet Rolls

  • Servings: 12-15 rolls
  • Print

adapted from my Copycat Cinnabon Cinnamon Rolls

Ingredients:

for dough

  • 3/4 cup water – microwaved for about 15-20 seconds, should feel warm like bathwater, about 105-110 degrees F
  • 2 1/4 teaspoons active dry yeast
  • 1/2 cup sugar, divided
  • pinch of salt
  • 1/4 cup buttermilk [1/4 cup milk + a couple drops of lemon juice/vinegar stirred and left to sit for 5 minutes works great]
  • 1 egg, beaten
  • 1/3 cup canola oil
  • 4 1/2 to 5 cups all-purpose flour

for filling

  • 2 cups blueberries (fresh or frozen)
  • 1/2 cup brown sugar, packed
  • 1 1/2 tablespoons cinnamon
  • 1/2 teaspoon cardamom
  • 2 tablespoons lemon juice
  • 1 tablespoon cornstarch
  • 1/2 teaspoon vanilla
  • 1/4 cup unsalted butter, softened

for frosting

  • 2 ounces cream cheese, softened
  • 3 tablespoons unsalted butter, softened
  • 1 teaspoon vanilla extract
  • 1 teaspoon lemon juice
  • zest of one large lemon
  • 1 – 1 1/2 cups powdered sugar

Directions:

In the bowl of a stand mixer, stir together warm water, yeast, and 1 tablespoon of the sugar. Let rest for 5-10 minutes until yeast starts to bubble. When frothy, add salt, buttermilk, egg, oil, and remaining sugar. Whisk to combine. With a wooden spoon, stir in 2 cups of the flour. Then using a dough hook, add flour in 1/2 cup increments, mixing on low speed until dough begins pulling away from the side of the bowl. When a total of 4 1/2 cups flour have been added, increase speed to medium and knead for 5 minutes. If you need to add an additional 1/2 cup flour, do so during this kneading process. I usually add the extra flour if the dough seems too sticky.

Grease a bowl with cooking spray [you can use the same bowl if you are coordinated enough to grease while the dough is in there/hold it to the side], then allow dough to rise in a warm location, covered with a dish towel, until doubled in size. This should take 1-2 hours.

When dough is almost ready, prepare filling.

In a medium saucepan set over medium-high heat, stir together blueberries, brown sugar, cinnamon, and cardamom. Bring to a boil, then reduce heat to low. Cook for 4-5 minutes, stirring occasionally. In a small bowl, whisk together lemon juice and cornstarch, then pour into blueberry mixture. Cook for another minute or two until mixture begins to thicken. Remove from heat and stir in vanilla. Allow to cool. Mixture will thicken a little more as it cools.

Grease a 9×13 inch baking pan and set aside.

When dough is ready, flour your clean counter top/work surface. Punch down the dough and roll into a large rectangle, about 20×30 inches. Spread butter over dough, leaving a 1 inch margin on all edges.

Next, top with the blueberry filling mixture. You probably won’t use all of it, and if your filling is very runny, you will want to use a slotted spoon to remove excess liquid. I overfilled the rolls so I would recommend starting with 1/3 cup of the filling and adding more from there. Extra filling is great on ice cream or oatmeal, or by the spoonful!

Roll into a tight log, rolling from the long side closest to you. When you are almost to the other end, bring the far long side up and over so the seam is on top. Gently press the exposed edge to the top of the dough to seal.

Divide the log into three sections, then divide each section into four or five rolls depending on how big you want them. Cut with a sharp knife and gently transfer cinnamon rolls to prepared pan. If you lose the filling along the way, just gather it up and sprinkle over cinnamon rolls. Cover rolls with a dish towel and let rise in a warm location for another 1-2 hours, or cover with plastic wrap and place in the refrigerator to bake the next morning [this is what I always do]. For the refrigerator rise, remove from refrigerator and let rest at room temperature for 30 minutes before baking.

When ready to bake, preheat the oven to 350 degrees and bake for 15-17 minutes for 15 rolls or about 18-22 for 12 rolls. Bake until tops begin to brown, but check in the middle to make sure the dough isn’t raw. If they need additional baking time, cover with foil to prevent excess browning.

While rolls bake, prepare frosting. Using a stand mixer, hand mixer, or a whisk, beat together cream cheese and butter until smooth. Add vanilla, lemon juice, and lemon zest, beating until combined. Add powdered sugar gradually, mixing until smooth. In my stand mixer this usually takes about 2-3 minutes. When I make the rolls the night before, I leave the butter and cream cheese on the counter overnight so they are soft in the morning.

When rolls come out of the oven, immediately spread half of the frosting on top. Add additional frosting on individual rolls for serving, or when they have cooled down considerably. Serve warm–they reheat well too!

Breakfast, Egg Dishes, Recipes, Reviews

Cheesy Ricotta Frittata Cups #TheLostFamilySupperClub

Cheesy ricotta frittata cups in celebration of Jenna Blum’s newest novel, The Lost Family. I received an advanced copy of the novel to join with other bloggers in a virtual supper club to celebrate the book’s June 5 release. I was not compensated in any other way, and was not asked to provide positive feedback. All opinions are my own. 

Cheesy ricotta frittata cups in celebration of Jenna Blum's newest novel, The Lost Family.  #TheLostFamilySupperClub

Click here for more information about #TheLostFamilySupperClub, and to find what the other bloggers brought to this party!

Cheesy ricotta frittata cups in celebration of Jenna Blum's newest novel, The Lost Family.  #TheLostFamilySupperClub

Happy Sunday! First let’s start with the book… and then the food.

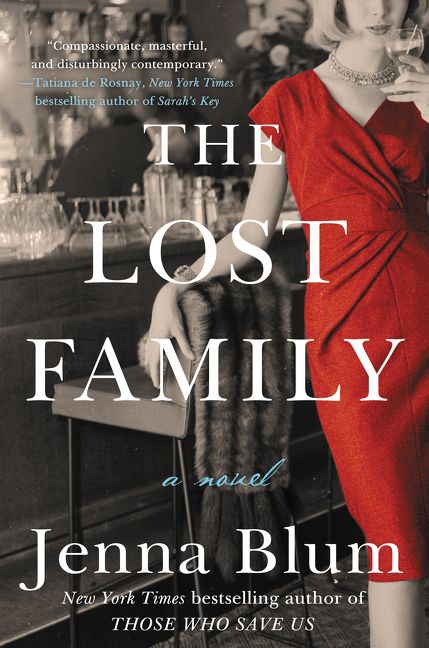
A description of the book from the publisher:

The New York Times bestselling author of Those Who Save Us creates a vivid portrait of marriage, family, and the haunting grief of World War II in this emotionally charged, beautifully rendered story that spans a generation, from the 1960s to the 1980s.

In 1965 Manhattan, patrons flock to Masha’s to savor its brisket bourguignon and impeccable service and to admire its dashing owner and head chef Peter Rashkin. With his movie-star good looks and tragic past, Peter, a survivor of Auschwitz, is the most eligible bachelor in town. But Peter does not care for the parade of eligible women who come to the restaurant hoping to catch his eye. He has resigned himself to a solitary life. Running Masha’s consumes him, as does his terrible guilt over surviving the horrors of the Nazi death camp while his wife, Masha—the restaurant’s namesake—and two young daughters perished.

Then exquisitely beautiful June Bouquet, an up-and-coming young model, appears at the restaurant, piercing Peter’s guard. Though she is twenty years his junior, the two begin a passionate, whirlwind courtship. When June unexpectedly becomes pregnant, Peter proposes, believing that beginning a new family with the woman he loves will allow him to let go of the horror of the past. But over the next twenty years, the indelible sadness of those memories will overshadow Peter, June, and their daughter Elsbeth, transforming them in shocking, heartbreaking, and unexpected ways.

Jenna Blum artfully brings to the page a husband devastated by a grief he cannot name, a frustrated wife struggling to compete with a ghost she cannot banish, and a daughter sensitive to the pain of both her own family and another lost before she was born. Spanning three cinematic decades, The Lost Family is a charming, funny, and elegantly bittersweet study of the repercussions of loss and love.

This book was absolutely captivating from start to finish. Even though it’s being released at the beginning of summer (well, almost), don’t think this is a light, beach read. Jenna Blum writes with such passion and depth that you will be drawn to the pages. It’s hard to put down!

I will warn you though, this story is bittersweet from start to finish. Every character’s flaws are readily apparent, if not to themselves, to those around them. Such is the human experience. Parts were tough to read, especially as you understand the various ways that Peter, June, and Elsbeth seek to deal with their individual pain and the shadow of Peter’s war experience on the whole family.

See, Peter lost his wife and twin daughters in the Holocaust, and has spent every moment of his life dealing with his grief and loss. Work is his method of coping, and Masha’s (named after his late wife) is the essence of their pre-war dreams. Sadly though, Masha’s does not survive either, and that (to me) seems to be a catalyst for change in the new family’s lives. And yet… there’s beauty in their pain, and redemption in their stories. I won’t give away the ending (READ THE BOOK!) but it is satisfying. The mark of a good story, in my opinion!

When I first started reading this book, I immediately understood WHY this book was being celebrated with a virtual supper club. The food is almost like a character in this novel! Jenna wrote all of us bloggers a sweet note (and sent chocolate!) about her love of food and the inspiration of many of the dishes in this book… “I LOVE FOOD, and I had a joyous time creating and kitchen-testing all the recipes for Masha’s menus in The Lost Family (there are two, Spring 1966 and Fall 1965). I relied on my German friend Christiane’s mother’s recipes, my childhood memories of my Jewish grandmother’s dishes, the Mad Men Cookbook and similar cookbooks from the 1960s, and ingredients from my garden.” Food was celebrated throughout the novel–everything from fancy German and Jewish cuisine served at Masha’s, to family meals, to Midwestern fare that June and Elsbeth eat when visiting June’s mother, and much, much more.

Cheesy ricotta frittata cups in celebration of Jenna Blum's newest novel, The Lost Family.  #TheLostFamilySupperClub

The two dishes that compelled ME the most though were not from any of these experiences. Actually, they came from the end of the book–scrambled eggs that Peter makes for his family on the regular, and a mushroom soup that he works to perfect with his daughter by his side. I was *this close* to recreating his mushroom soup (and I still might!) but it has been roasty toasty in Nashville lately, so soup hasn’t been something I’ve been craving.

But these eggs… don’t they sound delicious? This whole breakfast spread, really. “Sometimes, on Saturday mornings, if the Claremont had had a good night the evening before, Peter didn’t go in right away. He got up with Elsbeth, and they made breakfast: fresh-squeezed orange juice–naturally, Peter would not hear of juice from a carton or can. Braed toasted in the oven so it would crisp all the way through, Elsbeth turning it carefully with tongs. And Peter’s special scrambled eggs: first he caramelized onions in a pan, cooking them very slowly in butter until they were translucent; then he added eggs whipped to a froth, heavy cream, ham, fresh dill, and the secret ingredient: a dollop of Neufchâtel cheese. Elsbeth was always allowed to drop this last onto the dish from a wooden spoon. She had her own jacket with her name stenciled on the lapel, a mini chef’s hat, rubber clogs, and a special stool to stand on while she helped Peter stir and mince and measure. The Fabulous Rashkins, the called themselves, and when the food was ready to be served, they presented it to June at the table with a bow, Peter sweeping his hand to the right and Elsbeth to the left. “Ta da! The Fabulous Rashkins! Lo and behold!” (page 277)”

Cheesy ricotta frittata cups in celebration of Jenna Blum's newest novel, The Lost Family.  #TheLostFamilySupperClub

I am just in love with that scene. There’s so much happiness and joy between father and daughter. With the knowledge of what comes before and after (it’s actually a memory), it’s very poignant in the life of Peter, June, and Elsbeth. There’s performance and ritual and relationships… and caring for others through a purposeful, planned, and delicious meal. Though my eggs aren’t just like Peter’s in ingredients, they are in spirit: a way to care for my family through good food. These are the frittata cups that my son loves most for weekday breakfasts at school. And why wouldn’t he? These light and fluffy egg muffins are full of three types of cheese. The ricotta contributes to the lightness of the frittata cups, the Parmesan gives them a salty bite, and the cheddar on top gets all brown and crispy. Yum!

Cheesy ricotta frittata cups in celebration of Jenna Blum's newest novel, The Lost Family.  #TheLostFamilySupperClub

What I also love about the family breakfast scene is how Elsbeth helps her father in the kitchen. You can tell that this is a usual occurrence, not just an occasional thing. That is what I hope to accomplish with my son as he grows up, and he actually helps me make these muffins. He’s getting good with the whisk and loves to top them with cheese (and eat some too, haha… he is only two after all). I hope you enjoy these Cheesy Ricotta Frittata Cups, and The Lost Family. Let me know if you read it… I’d love to know what you think! 🙂

one year ago: Copycat Chuy’s Creamy Jalapeno Dip
two years ago: Baked Tilapia with Coconut-Cilantro Sauce 
three years ago: Southwestern Cilantro Mac and Cheese
four years ago: Black Bean and Rice Soup
five years ago: Blueberry Burgers
six years ago: Parmesan Garlic Rolls
seven years ago: Lemony Kale Pasta

Cheesy Ricotta Frittata Cups

  • Servings: 12
  • Print

from The Kitchn

Ingredients:

  • 12 large eggs
  • 3/4 cup ricotta cheese
  • 1/4 cup milk
  • 1/2 cup Parmesan cheese, grated
  • freshly ground black pepper
  • 1-1 1/2 cups cheese, shredded (I’ve used Gruyere, mozzarella, and cheddar but fontina is suggested in the original)
  • 1-2 tablespoons fresh chives, minced

Directions:

Preheat oven to 350 degrees F. Grease a 12 cup muffin tin with cooking spray, or line with silicone liners (paper liners probably would stick, but I haven’t tried them).

Combine the eggs, ricotta, milk, Parmesan, and a generous amount of black pepper in a large bowl. Whisk to combine until the eggs are beaten. Transfer to prepared muffin tins, filling each well 1/2 to 3/4 full. Top with shredded cheese and chives.

Bake until a toothpick inserted in the center of the frittata cups comes out clean. Tops should be puffy and edges should be golden brown, just pulling away from the sides. Allow to cool in the pan for about 5 minutes, then remove individual frittata cups to a cooling rack to cool completely. If you do not use silicone liners, a butter knife can be used to loosen the frittata cups from the pan.

Serve warm or at room temperature. Frittata cups can be refrigerated for a few days or frozen for up to 3 months.

Cheesy ricotta frittata cups in celebration of Jenna Blum's newest novel, The Lost Family.  #TheLostFamilySupperClub

Be sure to follow the author and sponsors!
Disclosure: I received a complimentary, advance reading copy of The Lost Family by Jenna Blum for my participation in the #TheLostFamilySupperClub party. All opinions are my own. I received no further compensation for this post.