Potato Rosemary Knots | thepajamachef.com #TripleSBites
Breads, Recipes

#TripleSBites: Potato Rosemary Knots

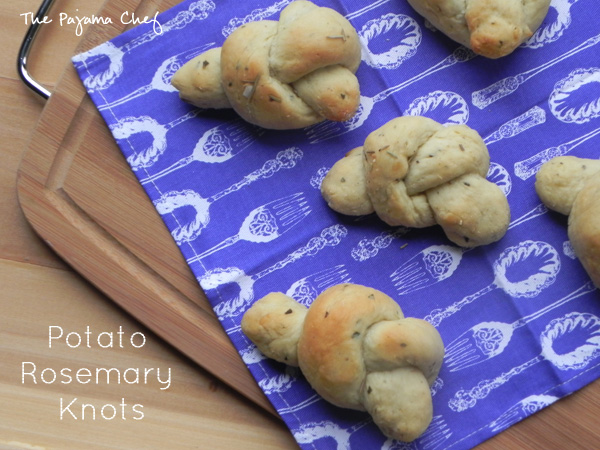
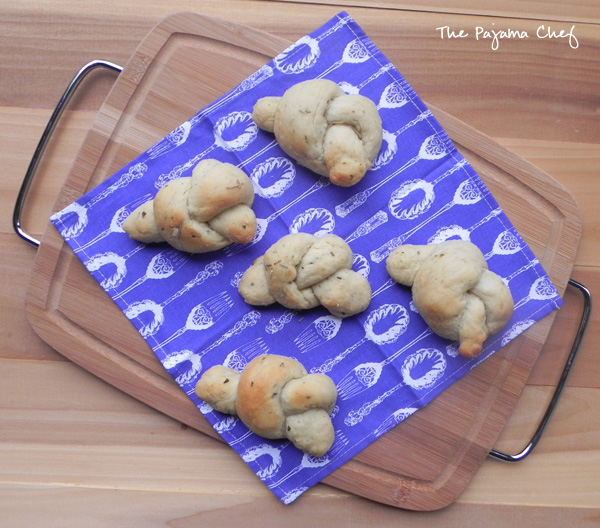
These soft and doughy Potato Rosemary Knots have a fancy shape and are full of lots of fresh herb flavor! They’re a great compliment to any dinner.

Potato Rosemary Knots | thepajamachef.com #TripleSBites

Making fresh bread and rolls is something that I absolutely love to do. I love the process of kneading the dough and seeing it come together from a mess of flour and liquid and salt and yeast into something wonderful. Though I use my stand mixer to knead the dough more often than not, I still like seeing the magic happen. Of course, another perk of the bread making process is the eating process. 🙂 Can’t deny that! Having fresh bread to serve with dinner elevates the meal to the next level. Whenever I walk through the bakery at the grocery store, I’m always tempted to pick up a loaf of bakery bread or a package of rolls. They just look SO good, you know? And it’d be so easy. But then I remember that roll recipes like this one can be made in a matter of minutes as I’m making other components of dinner, and enjoyed for pennies on the dollar instead of dollars on the dollar like at the bakery. Baguettes and croissants are my exception to this rule though, but I’d love to try to make them both!

Potato Rosemary Knots | thepajamachef.com #TripleSBites

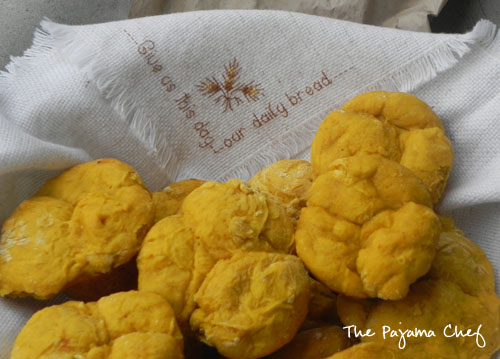
Before making these Potato Rosemary Knots on a recent lazy, home-from-work-early Friday afternoon, I had never baked with potato flakes, flour, or mashed potatoes. I’ve seen so many potato bread recipes, and have enjoyed many a slice before, but never had made it myself. In fact, when I was shopping for these potato flakes I ended up asking one of the Publix employees where the instant potatoes were in the store because I just could not find them! I don’t think I’ve ever bought them before. But I loved seeing how the potato flakes folded easily into the dough, giving it a hearty, nutty appearance and baking into something soft and wonderful. 🙂 For this recipe, I used the requisite dried rosemary but had it been summer, would have used fresh rosemary. I amped up the flavor with a bit of Gourmet Garden’s Italian herbs though! Gourmet Gardens is one of our sponsors for #TripleSBites so it was only appropriate, and it tasted SO good with the rosemary and the extra herbs. Mmm!

Potato Rosemary Knots | thepajamachef.com #TripleSBites

one year ago: Lindsay’s Chicken Noodle Soup
two years ago: 60 Minute Sandwich Buns
three years ago: Loaded Sweet Potato Fries
four years ago: Tomato Tortellini Soup

Potato Rosemary Knots

  • Servings: 12
  • Print

from Mazola Oil

Ingredients:

  • 2 3/4 to 3 1/4 cups all-purpose flour
  • 1 tablespoon yeast [or 1 package rapid rise yeast]
  • 1 tablespoon sugar
  • 2 teaspoons onion powder
  • 1 teaspoon salt
  • 1 teaspoon rosemary
  • 1 tablespoon Italian Herbs from Gourmet Garden, optional
  • 2 tablespoons olive oil
  • 1/2 cup instant potato flakes or buds
  • 3/4 cup milk
  • 1/2 cup water
  • poppy seeds or rosemary, for topping

Directions:

In a large bowl, combine 1 1/2 cups flour, yeast, sugar, onion powder, salt, rosemary, Italian Herbs, olive oil, and potato flakes. Heat milk and water until approximately 120-130 degrees F. Stir into dry ingredients. Stir in enough flour to make a soft dough, then knead until smooth and elastic, about 4-6 minutes. This can be done in a stand mixer or on a floured surface. Cover with a tea towel and let rise for 10 minutes.

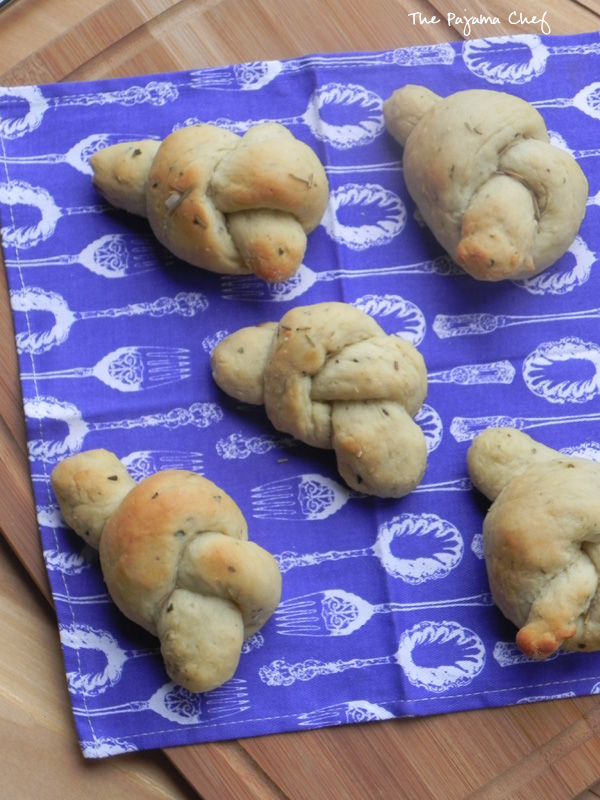
Preheat oven to 375 degrees F. Grease a baking sheet with cooking spray or line with parchment or a silpat. Divide into 12 portions. Shape each piece into a long rope [10-12 inches], then tie into a loose knot. Place 2 inches apart on baking sheet, then cover and rise until doubled, about 20-30 minutes.

Brush each roll with olive oil, then top with poppy seeds or rosemary. Bake for 15-20 minutes or until golden brown.

#TripleSBites | thepajamachef.com

Be sure to check out other yummy recipes from #TripleSBites at the link below!

Disclosure: I received herbs and spices from Gourmet Garden as part of my participation in #TripleSBites. I was not compensated in any way–for my time, to create a recipe, or to publish positive comments. I was not required to use these products as part of my recipe. My opinions are my own. 

Advertisement
Breads, Recipes

Pumpkin Bagels

With these pumpkin bagels, it’s like you’re eating pumpkin pie for breakfast! 

Pumpkin Bagels | thepajamachef.com Ever since I made bagels earlier this year I’ve been obsessed with the idea of making as many different kinds of bagels as I can. Problem is… I always come back to the same old recipe because it’s tried and true and so freaking delicious! I’ve seriously made plain bagels more times than I can count. But now… NOW I have the perfect bagel for fall: PUMPKIN bagels. Betcha didn’t see that one coming, did you? 🙂 Just kidding, it’s pretty obvious. Not only do these bagels taste absolutely incredible, but on the day you make them you won’t be able to think about anything else besides pumpkin spice goodness because your house will smell like fall just walked in to stay. Oh goodness, they’re divine!!

Pumpkin Bagels | thepajamachef.com

I know it may sound a bit crazy [and conceited] to say that these are the best bagels that I’ve ever had, but I really think it might be true. My bagel litmus test is whether or not I can eat them plain, untoasted, naked. Normally I’m very particular about how I eat bagels. They need to be toasted and covered with butter or cream cheese. For good bagels I can tolerate them at room temperature with cream cheese, but that’s rare. This all stems back to college cross country and track, when often the only thing available to eat during long days of meets and traveling was bagels, bagels, and more bagels, with some broken pretzels, brown spotted bananas, bruised apples, and smooshed bread thrown in there for good measure. All this food was stored in a huge plastic tote that was utterly nasty inside. For topping the bagels we had giant jars of peanut butter with broken plastic knives for spreading, along with a cooler full of Sam’s Club sized sliced deli meat. So hygienic, I know. And appetizing, yes? <sarcasm> But when you’re hungry, you do what you gotta do! After four years of this every. single. Saturday, I became a littttle tired of cold bagels. And bagels with peanut butter? Absolutely no way. It’s been seven [yikes] years since these days and still, the thought of sandwiches without condiments or peanut butter bagels churns my stomach a little. But these bagels… there’s something different about them! Something incredible, because the passed the test! When I was down to the last one, on a whim I threw it in a sandwich bag and tossed it in my lunchbox. Around 10:30 am I found a really great snack. 🙂 Woohoo!

Pumpkin Bagels | thepajamachef.comThese bagels taste like pumpkin pie, seriously. They’re sweet but not too sweet, have so much pumpkin spice that it’s a little ridiculous, AND they have the best crunchy sugar-spice topping. I didn’t do a great job chopping the pepitas on top but you definitely should so they spread out a little more evenly. They’re so good, and so easy! Hope you make them this weekend!

one year ago: Funfetti Cookies
two years ago: Apple Peanut Butter Oatmeal Cookies
three years ago: Pumpkin Brownies
four years ago: Crispy Crunchy Chocolate Chip Cookies

Pumpkin Bagels

  • Servings: 8
  • Print

from Taste of Home

Ingredients:

for bagels

  • 2/3 cup warm water
  • 1 package [1/4 ounce… 2 1/4 teaspoons] active dry yeast
  • 1/3 cup packed brown sugar
  • 3 cups bread flour
  • 1 teaspoon salt
  • 1 tablespoon + 1 teaspoon pumpkin pie spice
  • 1/2 cup canned pumpkin

for topping

  • 2 tablespoons brown sugar
  • 1 teaspoon pumpkin pie spice
  • 1 tablespoon pepitas, chopped
  • 1 tablespoon butter, melted

Directions:

In a small bowl, combine water, yeast, and brown sugar. I don’t have an exact temperature for you, just that it should be like bathwater–warm enough you can comfortably put your fingers in but not too hot. Stir and let rest for 5 minutes. At the end of this time, water should be somewhat bubbly.

In a large bowl, stir together flour, salt, and pumpkin pie spice. Pour yeast mixture into the flour, then add pumpkin and stir together with a fork until a shaggy dough is formed. At this point, you can knead by hand on a flour-dusted countertop for about 10 minutes, until smooth and elastic OR you can place in a stand mixer and knead with a dough hook until smooth and elastic, about 6-7 minutes. I recommend the second option if possible because the pumpkin makes the dough sticky.

Place dough in a well-oiled bowl and turn once to coat. Cover with a damp towel and let rise in a warm place for an hour.

After an hour, punch dough down and let rest for 10 minutes. Then divide dough into eight pieces [if you are obsessive and weigh them like me, mine were approximately 120 grams each]. Shape into a ball and with a flour-covered finger, punch a hole through the center [there’s a lot of punching in bagel making, obviously]. The hole should be about 1 inch in diameter. Place on a baking sheet lined with parchment paper or a Silpat, and cover with a damp towel. Let rest for 10 minutes.

During this time, preheat oven to 400 degrees and bring a large pot of water to a boil. When water is boiling, place bagels in boiling water, two or three at a time. Poach for 2 minutes per side, then remove to baking sheet with a slotted spoon to drain excess water.

Prepare topping by combining brown sugar, pumpkin pie spice, pepitas, and melted butter in a small bowl. Divide between bagels, pressing down gently so it sticks.

Bake for 15-20 minutes or until golden brown. Broil for 1-2 minutes at the end if desired for extra texture/chewiness [I skipped this step].

Store in an airtight container after cooling completely.

linked up with: Weekend Potluck

Honey Cornbread | thepajamachef.com
Breads, Recipes

Honey Cornbread

This cornbread is sweet, delicious, and honey-scented. You’ll want to make batch after batch to enjoy with your favorite soups and chilis this fall!

Honey Cornbread | thepajamachef.com

There’s nothing better than a warm slice of sweet cornbread! This easy recipe is my absolute favorite cornbread out there. It’s perfect with any dish, but I especially love it with my potato soup. Eating a slice hot out of the oven, slathered with butter and honey, is an experience unlike any other. Mmmm, I can almost taste it now. 🙂 I have no idea how many times I’ve made this recipe for a potluck or dinner with friends, but whenever I do, I always have to suppress the urge to hide a few slices away so I make sure I can have a few pieces leftover for breakfast. I can guarantee that when you take some to a group gathering you’ll be bringing home an empty pan! So you probably shouldn’t steal some from your friends, even though you might want to because it is that good.

Honey Cornbread | thepajamachef.com

The reason this cornbread is so darn delicious is that it’s cake-like. It’s moist and fluffy at the same time… utterly delicious! Even though it makes a huge pan, don’t think about halving the recipe. When I make this, if there’s any doubt that we won’t finish it in a few days, I just freeze individual slices in sandwich bags. Then I can easily throw a slice in my lunch when I’m taking some leftover soup and I can be a very happy camper at lunchtime! Enjoy!

four year ago: Tropical Granola

Honey Cornbread

  • Servings: 20
  • Print

from Money Saving Mom

Ingredients:

  • 2/3 cup sugar
  • 1/4 cup butter, softened
  • 4 eggs
  • 1/2 cup honey
  • 1 1/3 cups milk
  • 2 1/3 cup flour
  • 1 1/2 tablespoons baking powder
  • 1/2 cup cornmeal

Directions:

Preheat oven to 400 degrees. Grease a 9×13 or 11×14 inch baking pan with cooking spray.

Cream together sugar and butter. A stand or hand mixer works great, but so does a wooden spon. Add eggs, honey, and milk, then mix well. In a small bowl, stir together flour, baking powder, and cornmeal. Fold dry ingredinets into the wet ingredients until just combined. Don’t overmix–batter will be lumpy. Transfer to prepared pan, then bake for 35 minutes until golden brown.

Serve warm with butter, honey, and your favorite soup.

Linked up with Weekend Potluck and Foodie Friends Friday.

30 Before 30, Breads, Recipes

Easy Homemade New York Bagels

I’ve never been to New York City, but I have a certain fondness for the city for two reasons… BAGELS BEN BAGELS BEN BAGELS BEN BAGELS, in no particular order, ha ha ha. Number one, Ben was born there, on Long Island. He lived there for a year, but hey! It’s his birthplace, and therefore, it is special to me. Number two, bagels. I know bagels probably originally do not hail from NYC, but the American bagel certainly does. So, NYC is the birthplace of two of my loves. Hence my love for the city, even though I’ve never been. 🙂

Easy Homemade Bagels | thepajamachef.com

I have bagels on my 30 Before 30 bucket list, and they have been on my culinary bucket list for quite some time but it wasn’t until a recent episode of Mad Men that REALLY got me in the mood for them. Sure, we eat bagels occasionally–from Panera or another bagel shop, or even [gasp] from the grocery store. But now that I’ve made bagels from scratch I’m not sure I can go back. Since my 29th birthday was yesterday, the clock was a-ticking to get my 30 before 30 list dunzo!

Easy Homemade Bagels | thepajamachef.com

I’ve actually made these bagels twice in the past week–last weekend, and then again yesterday with Ben. Who makes bagels on their birthday? I do apparently, but in my defense, it was a cloudy dreary day. It was sunny before church and then clouded over and rained later in the day… perfect baking weather if you ask me! These bagels are absolutely amazing and are a cinch to put together. They are so chewy and thick that you’d swear they came from a bagel shop instead of your kitchen. I never knew plain bagels could be so flavorful… they’re great toasted with butter, jam, or cream cheese. This is a great recipe to try if you’re new to baking with yeast because it’s SO simple. You don’t need a mixer and there are only five ingredients. Give ’em a try. What do you have to lose?! 🙂

Easy Homemade Bagels | thepajamachef.com

one year ago: Bean and Cheese Enchiladas 
two years ago: Ham and Cheese Baked Pasta
three years ago: Mexican Pizza

New York Bagels

  • Servings: 8
  • Print

from Rachel Schultz

Ingredients:

  • 1 1/2 cups warm water
  • 2 1/4 teaspoons active dry yeast [1 package]
  • 1 1/2 tablespoons sugar
  • 3 1/2 cups bread flour
  • 1 1/2 teaspoons salt
  • sesame seeds, poppy seeds, cinnamon sugar, etc. – for topping, optional

Directions:

Combine water, yeast, and sugar in a small bowl or measuring cup. I don’t have an exact temperature for you, just that it should be like bathwater–warm enough you can comfortably put your fingers in but not too hot. Stir and let rest for 5 minutes. At the end of this time, water should be somewhat bubbly.

In a large bowl, stir together flour and salt. Pour wet ingredients into dry ingredients and stir with a fork until a shaggy dough is formed. Remove to a flour-dusted countertop and knead dough until smooth and elastic, about 10 minutes. Place dough in a well-oiled bowl and turn once to coat. Cover with a damp towel and let rise in a warm place for an hour.

After an hour, punch dough down and let rest for 10 minutes. Then divide dough into eight pieces [if you are obsessive and weigh them like me, mine were approximately 110 grams each]. Shape into a ball and with a flour-covered finger, punch a hole through the center [there’s a lot of punching in bagel making, obviously]. The hole should be about 1 inch in diameter. Place on a baking sheet lined with parchment paper or a Silpat, and cover with a damp towel. Let rest for 10 minutes.

During this time, preheat oven to 425 degrees and bring a large pot of water to a boil. When water is boiling, place bagels in boiling water, two or three at a time. Poach for 2 minutes per side, then remove to baking sheet with a slotted spoon to drain excess water.

If desired, top–while still wet from the poaching process–with sesame seeds, poppy seeds, cinnamon sugar, or whatever topping your little heart desires. I want to try an everything bagel seasoning blend sometime!

Bake for 20 minutes or until golden brown. Broil for 1-2 minutes at the end if desired for extra texture/chewiness [I skipped this step].

Store in an airtight container or ziptop bag after cooling completely.

Linked up with: Weekend Potluck.

Breads, Recipes

Pumpkin Cloverleaf Rolls

Last week, I texted Ben randomly during the day at work and asked if he wanted to have Thanksgiving dinner a little bit early. As I expected, he was ALL in. So this weekend, we got to cookin’, and had ourselves a delicious feast on Sunday afternoon. Turkey, chipotle-cilantro mashed potatoes, cranberry sauce, mixed vegetables mornay, pumpkin cloverleaf rolls, and harvest pear crisp with candied ginger. It was GLORIOUS! For my dream meal I would have had stuffing too–but Ben doesn’t like it, and I couldn’t find the kind of bread I wanted, so that didn’t happen, but everything else was divine and I can’t wait to share the recipes with you this week! So, I officially declare this to be THANKSGIVING WEEK on the blog and I will do my absolute best to post all five new recipes this week. I’ve already shared my cranberry sauce before so I won’t repeat that… but just because it is old doesn’t mean it isn’t worth trying! 🙂

Pumpkin Cloverleaf Rolls | thepajamachef.com

I had a hard time deciding what to share first, so I just picked my absolute favorite thing… bread. Ahh, delicious carbs! 🙂 With pumpkin too! Doubly good, huh? I seriously am not sure if there is anything I could love more than soft, pillowy rolls, warm out of the oven with just a touch of butter.

Pumpkin Cloverleaf Rolls | thepajamachef.com

I made the dough for these rolls in my bread maker. If you don’t have a bread maker, definitely consider investing in one if you have the space. I bought mine from a Craigslist post for $20. It was a wedding gift that had never been used, so that couple’s loss was our gain! I am not a huge fan of how bread bakes in it, but it is super convenient for preparing dough while you are doing other things, like pulling together a huge meal for two people just for the heck of it.

Pumpkin Cloverleaf Rolls | thepajamachef.com

Please don’t judge how these Pumpkin Cloverleaf Rolls were shaped. It takes a time or two [or four] to get the hang of shaping the balls, and I will warn you–the dough is really sticky, so use flour and/or cooking spray liberally. I read too late that cooking spray is better for shaping rolls than flour is because it won’t dry the dough out… so I will try that next time. Regardless of how the rolls are shaped, the taste will be out of this world!

Pumpkin Cloverleaf Rolls | thepajamachef.com

The rolls are slightly sweet, with a delightful orange flavor. The flavor is really strong at first, but after a day it tones down a bit. But if orange isn’t your thing, feel free to leave that out and add a little bit of warm spice like cinnamon or nutmeg, some vanilla, or even something a little more savory like garlic powder.

Thanksgiving Meal | thepajamachef.com

Ben and I absolutely adored these rolls! I’m sure you didn’t need clarification on that, but for what it’s worth–they were great! I can’t wait to enjoy one for breakfast with some jam. Yum! As much as I would love to say that they were so amazing because they included pumpkin [aka my favorite thing about fall], I really don’t think that was it. They are just super soft, melt-in-your-mouth rolls. Even if you are scared of baking with yeast, try these rolls! In a bread maker, they are so simple and easy–almost foolproof. Since the dough is so sticky, I think it would be hard to knead this dough by hand, but you could try it in a stand mixer–just use these tips on converting the recipe. I hope you give these rolls a try for your Thanksgiving table! They’re so appropriate for the season. I know they will be my go-to for many years to come! Enjoy, and be sure to come back all week long for more Thanksgiving recipes. 🙂

one year ago: Pork, Apple, & Ginger Stir Fry
two years ago: Pumpkin Chocolate Chip Energy Bars
three years ago: Balsamic Roasted Chickpeas

Pumpkin Cloverleaf Rolls

  • Servings: 16
  • Print

from The Bread Lover’s Bread Machine Cookbook by Beth Hensperger

Ingredients:

  • 1/2 cup milk
  • 1/2 cup water
  • 1/3 cup butter, melted
  • 1 cup pumpkin puree
  • 2 teaspoons salt
  • zest of 1 orange
  • 4 1/2 cups all-purpose flour [562 grams]
  • 3 tablespoons brown sugar
  • 2 1/4 teaspoons yeast [1 package]

Directions:

Place ingredients in bread machine according to manufacturer’s instructions. For me, it is: liquids and salt, dry ingredients, and yeast in a well.

Set bread machine on dough cycle. Grease two muffin tins with cooking spray.

When finished, turn dough out onto a floured surface. With floured hands, divide dough in half, then divide each piece in half again. You should have four pieces. Then divide each of those pieces in half again–making eight. Finally, divide in half again so you have 16 pieces.

Roll each piece into three equal sized balls. Gently place in a muffin cup, and repeat with remaining dough.

Cover loosely with plastic wrap and let rise for 30 minutes, until doubled in bulk.

Preheat oven to 375 degrees, and then bake for 15-18 minutes or until golden brown.

Linked up with: Tuesday Talent Show.