Reviews

A Night in Spain: A Review of CourseHorse and Dabble Studio

Disclosure: We received complementary tickets for this cooking class from CourseHorse. However, I was not required to write a positive review and was not compensated in any other way. The thoughts expressed below are entirely my own. Thanks to CourseHorse and Dabble Studio for a great date night!

A Night in Spain: A Review of CourseHorse and Dabble Studio

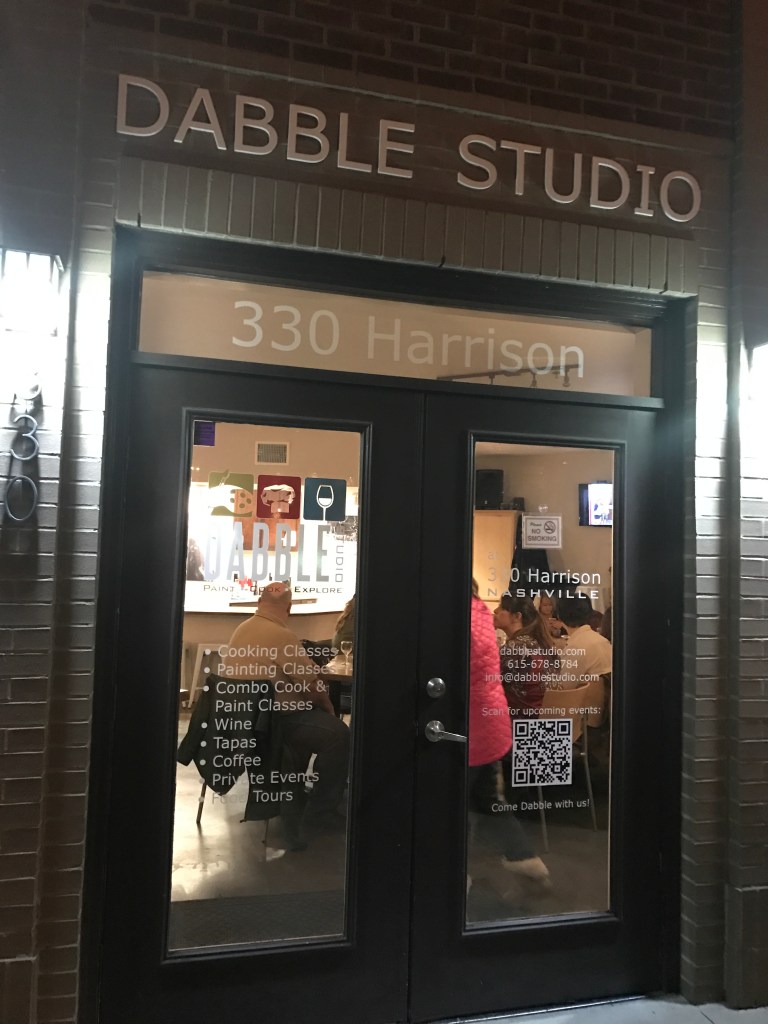
Recently Ben and I had one of the BEST dates we’ve ever been on. It’s hard to judge and rank dates, so my verdict might be influenced by the fact that date nights have been in short supply since a cute little baby entered our lives last May. Haha. But anyways, recently, we were able to check out a local cooking class at Dabble Studio, located near the Sounds Stadium in Nashville.

https://www.instagram.com/p/BRhPWi6FS6B/

You guys, we had SO MUCH fun! I’ve never been that interested in cooking classes, to be honest, because I like to think I know how to cook pretty well. #truth But I had a little change of heart when I was contacted by CourseHorse, a website to help you find and compare a variety of classes, workshops, and tours in cities across the country. Helllloooooo date night! Now, I’m hooked and want to take so many more cooking classes!

CourseHorse’s official launch in Nashville is later this year, and it was fun to try their service a little early. They offer everything from food tours to cooking classes in Nashville, and I expect will eventually expand to other workshops and fun stuff too. Ben and I chose to attend A Night in Spain – Paella and Sangria, and you guys… it was SO DELICIOUS.

A Night in Spain: A Review of CourseHorse and Dabble Studio

Jamie was our host/instructor. She owns Dabble Studio with her parents, and their story is so fun. Jamie went to cooking school in NYC as a career change move from her corporate job, then convinced her parents to open a business to allow people to “dabble” in all sorts of fun! Coincidentally… or not, this fun aligns with the family’s passions–and each area allows someone to shine! From food tours to painting classes to cooking classes, Dabble does it all. We loved how friendly and accommodating Jamie was. She did a great job at making everyone in our class feel comfortable and confident in the kitchen.  I also loved the cooking tips she peppered in throughout the evening–how to cut an onion, seasoning tips, how to use a mandoline cutter, etc. as well as restaurant recommendations for Nashville.

A Night in Spain: A Review of CourseHorse and Dabble Studio

Even though it was an interactive event with a large group of strangers, it still was a fun date night. Maybe not a fun first date though, haha. There was a good mix of couples and groups of friends of all ages, including a few repeat customers. So grab some gal pals for a night like this–it’ll be a blast!

A Night in Spain: A Review of CourseHorse and Dabble Studio

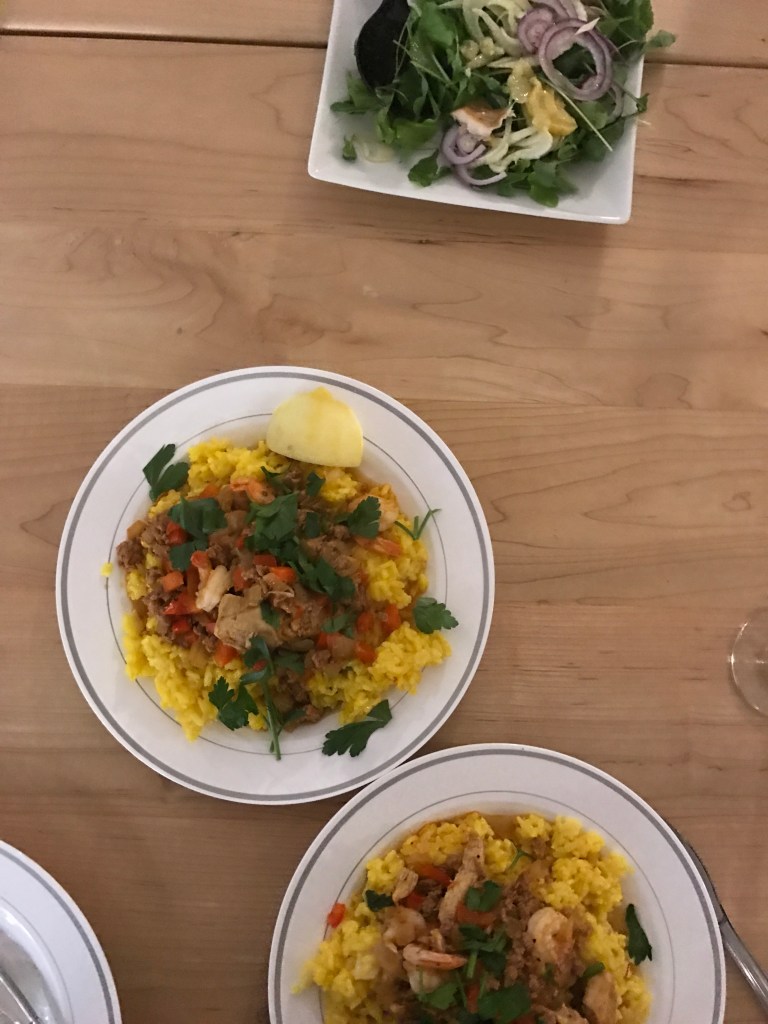
Our menu for the evening included: a fabulous cheese and charcuterie plate, a delicious salad made by Jamie that included Spanish Anchovy, Fennel and Preserved Lemon, Spanish Potato Omelet, Spanish Paella, and Red Sangria. So much good stuff!! Everything was so fresh and flavorful. The portions were also huge and Jamie was thoughtful enough to provide boxes for leftovers so nothing went to waste.

A Night in Spain: A Review of CourseHorse and Dabble Studio

We cooked the omelet and paella ourselves, and were even given copies of the recipes to take home to make again. Despite the fact that we all initially found these recipes complicated to make, the step by step instructions and demos made these dishes accessible for even the newest cooks. I think we’re on the market for our own mandoline so we can make this amazing omelet (above) sometime soon! But it will be sad to have to do all the clean up ourselves afterwards, haha.

A Night in Spain: A Review of CourseHorse and Dabble Studio

So, to sum it up… if you’re looking for a fun date night/girls’ night, do check out a cooking class (especially at Dabble Studio in Nashville, or with a trusted partner of CourseHorse elsewhere in the country)… even if you already know how to cook. You’ll have fun, I guarantee it! 🙂

You can find Dabble Studio on Twitter, Instagram, Facebook,  Trip Advisor, and Yelp. Connect with CourseHorse on Twitter, Instagram, and Facebook too.

Main Dishes, Pasta, Recipes

Lentil Veggie Macaroni and Cheese

Who doesn’t love mac and cheese? This version is fancied up with some lentils and veggies for a more complete version of a childhood favorite.

Who doesn't love mac and cheese? This version is fancied up with some lentils and veggies for a more complete version of a childhood favorite.

When it comes to macaroni and cheese, I usually gravitate towards the baked variety. Don’t get me wrong, a box of Kraft or Annie’s is pretty much always in our pantry for those desperate nights… but when I REALLY want mac and cheese, this is what I’m talking about. Ben and I can make our way through a pan of that stuff in just a few days… it’s crazy good. And now that #BabyVolde is eating more and more of my regular cooking, heaven help us. When I made that mac and cheese a few weeks ago, he gobbled it up.

https://www.instagram.com/p/BRjiw0blT1F/?taken-by=thepajamachef

While that mac and cheese will always always always be my favorite, sometimes I want mac and cheese… but with a little less cheese and a little more nutrition. Yeahhh… especially since I have a pretty non-picky-baby eater right now and I want to keep it that way. So that’s when I bring in Lentil Veggie Macaroni and Cheese. You still have your cheese and pasta… but with a little extra protein (helllllllooooo lentils) and some extra veggie power. I won’t say the lentils and veggies aren’t noticeable, but they do make this dish a bit heartier and a little healthier. I can’t wait to make it again soon–it’s absolutely delicious!

Who doesn't love mac and cheese? This version is fancied up with some lentils and veggies for a more complete version of a childhood favorite.

One last thing before I go… I did make this recipe into a baked mac and cheese cause that’s my favorite. #crispynoodlesforlife But if that’s not your thing, or you’re in a time crunch, you can omit the panko topping and the baking step, no problemo! Enjoy!

one year ago: Chocolate Chip Butterscotch Bars
two years ago: Butternut Squash and Mushroom Tart
three years ago: Oatmeal Fudge Bars
four years ago: Neely’s Lemon Pasta Salad
five years ago: Pineapple-Apricot Teriyaki Chicken
six years ago: Sweet and Tangy Pork Chops with Pineapple over Coconut Toasted Rice

Lentil Veggie Macaroni and Cheese

  • Servings: 8
  • Print

slightly adapted from The Lean Green Bean

Ingredients:

  • 8 ounces dry pasta
  • 3/4 cup lentils
  • 3 tablespoons butter, divided
  • 2 cloves garlic, minced
  • 3-4 cups mixed vegetables, diced – can be fresh or frozen, or a combination
  • 5 ounces frozen spinach, defrosted – or 3 handfuls fresh baby spinach
  • 2 tablespoons flour
  • 1 teaspoon paprika
  • 1/2 teaspoon cayenne pepper
  • 1 1/2 cups milk
  • 8 ounces sharp cheddar cheese, grated
  • 2/3 cup panko breadcrumbs

Directions:

Preheat oven to 400 degrees F. Grease a large baking dish – 9×13 inches or similar and set aside.

Prepare pasta according to package directions. Prepare lentils according to package directions.

While pasta and lentils are cooking, melt 2 tablespoons butter in a large skillet. Add garlic and saute for 30 seconds until fragrant, then stir in mixed vegetables and spinach. Saute for 5-10 minutes until softened – less for frozen vegetables and more for fresh. Sprinkle with flour, paprika, and cayenne, then stir to coat. Add milk and cheese, stirring until well combined.

Carefully fold in pasta and lentils, then transfer mixture into greased baking dish.

In a small bowl, melt remaining 1 tablespoon butter in the microwave. Toss with panko, then sprinkle panko mixture over the macaroni mixture.

Bake for 15-20 minutes until bubbly. Enjoy!

Note: If baked pasta isn’t your thing or you’re in a time crunch, just omit the panko and baking steps. It’ll be just fine without it. 🙂

Chicken, Main Dishes, Recipes

Trader Joe’s Chili Lime Chicken Burgers

A copycat version of a Trader Joe’s fave… chicken burgers spiced up with chili, lime, cilantro, and garlic. This is an epic burger you don’t wanna miss!

A copycat version of a Trader Joe's fave... chicken burgers spiced up with chili, lime, cilantro, and garlic. This is an epic burger you don't wanna miss!

If you’ve ever stepped foot into Trader Joe’s, you have probably seen tons of delicious-looking treats. At Trader Joe’s, I’m always tempted to buy so many more convenience foods than I ever would in a regular grocery store. I don’t know what it is about that insanely crowded grocery store with a death trap parking lot, but everything inside sounds SO FREAKING GOOD. I mean, seriouslyyyy. Is it just me? I sure hope not.

A copycat version of a Trader Joe's fave... chicken burgers spiced up with chili, lime, cilantro, and garlic. This is an epic burger you don't wanna miss!

One of my favorite things to get at TJ’s is their Chili Lime Chicken Burgers. Alright, I know they’re probably everyone’s favorite. Maybe that’s not true but I literally know SO many people who love them. After buying them one too many times, it’s no surprise that I sought out a homemade copycat version. Because… why not? These burgers are just as good (if not better) than their counterpart, and come together in a flash in your kitchen! Be sure to dress them up with all your favorite burger toppings–avocado is a must for me! Oh, and p.s. I suggest using non-smashed buns (don’t be like me–but I hate food waste so…yeah). ENJOY!

A copycat version of a Trader Joe's fave... chicken burgers spiced up with chili, lime, cilantro, and garlic. This is an epic burger you don't wanna miss!

one year ago: Buffalo Chicken Lettuce Wraps
two years ago: French Toast Casserole
three years ago: Tasty Mexican Lentils
four years ago: Quick Chocolate Pudding
five years ago: Alice’s Vanilla Tea-Infused Granola
six years ago: Roasted Tomato and Black Bean Soup

Trader Joe's Chili Lime Chicken Burgers

  • Servings: 4
  • Print

from Iowa Girl Eats

Ingredients:

  • 1 pound ground chicken
  • 2 green onions, sliced
  • 1/4 cup red bell pepper, diced
  • 2 tablespoons chopped cilantro
  • 3 cloves garlic, minced
  • 1/4 teaspoon red pepper flakes
  • zest and juice of half a lime
  • hamburger buns
  • avocado, tomato, lettuce, cheese, etc. for topping as desired

Directions:

In a medium bowl, combine ground chicken, green onions, red bell pepper, cilantro, garlic, red pepper flakes, and lime zest and juice. Use your hands to mix together, then divide into four equal portions. Press into patties and coat each side with nonstick spray or brush with olive oil.

Cook in a skillet, set over medium-high heat, for approximately 3-4 minutes per side until cooked through. Alternatively, you can use a George Foreman-type grill.

Serve on a bun with desired toppings.

Menu Plans

Menu Plan: Spring Style

Spring has sprung! And with that, here are some great eats to make your spring season a little tastier. 🙂 Enjoy!

Check out this spring-themed meal plan and celebrate with us! :)

Brunch

Check out this spring-themed meal plan and celebrate with us! :)

Check out this spring-themed meal plan and celebrate with us! :)

Check out this spring-themed meal plan and celebrate with us! :)

Entrees & Sides

Check out this spring-themed meal plan and celebrate with us! :)

Check out this spring-themed meal plan and celebrate with us! :)

Desserts

Check out this spring-themed meal plan and celebrate with us! :)

Check out this spring-themed meal plan and celebrate with us! :)

Check out this spring-themed meal plan and celebrate with us! :)

This month’s recipe round up was brought to you by:

The Pajama Chef | Ninja Baker | The Cooking Actress | Pies and Plots | The Spiffy Cookie | Foodtastic Mom | Kelly Lynn’s Sweets & Treats | Savory Moments

Pin this to your meal planning board for easy access all month long!

Check out this spring-themed meal plan and celebrate with us! :) Check out this spring-themed meal plan and celebrate with us! :)


Desserts, Pies, Recipes

Fantastical Food Fight: Baked PB + J Pie

Your favorite childhood sandwich… in PIE form! Enjoy PB&J in a whole new way. It’s not Pi Day anymore but that doesn’t mean we still can’t enjoy some pie. 🙂

Your favorite childhood sandwich... in PIE form! Enjoy PB&J in a whole new way. :)

Hey hey! It’s PB&J… not on bread… but in a PIE. Yes, you read that right. Peanut butter and jelly… in pie. Whaaaaat? I made this delicious pie for the PB&J themed Fantastical Food Fight this month. (New to Fantastical Food Fight? Check out all the details here–this is my first time joining in and I’m sure it won’t be my last.) This pie combines the best of the sweet childhood sandwich with a little bit of adult sophistication.

Your favorite childhood sandwich... in PIE form! Enjoy PB&J in a whole new way. :)

When tasked with making a peanut butter and jelly themed recipe for Fantastical Food Fight this month, I had so many ideas… cookies, cake, muffins, candy… the sweet treats go on and on! I even considered some kind of savory peanut butter pasta that incorporated berries somehow… or even a peanut butter-dressed kale salad with fruit. But then… somehow, someway… peanut butter and jelly PIE started sounding awfully appealing. I think it was the leftover cubed butter I had in the freezer from Thanksgiving that started it. See, my go-to pie crust requires cubing butter and chilling it in the freezer, so there you have it. To make the crust a little more interesting, I substituted some of the flour for crushed graham crackers to mimic some of the super-sweetness of the childhood version of the PB&J.

Your favorite childhood sandwich... in PIE form! Enjoy PB&J in a whole new way. :)

Most Peanut Butter Pies are no-bake concoctions, featuring lots of whipped cream, powdered sugar, and fluffy sweetness. But for some reason, I wasn’t feeling that lightness–I wanted something creamy and thick, more like the peanut butter and jelly sandwich that I still have for lunch on occasion. So I consulted my friend Google and found a few baked peanut butter pies and decided to give it a whirl! Turns out baked peanut butter pie is AWESOME, my friends! The texture is similar to pumpkin pie or even a homemade pudding/custard pie… it is rich and delicious. When you add a layer of jam between the graham cracker-laced crust and the creamy peanut butter pie filling, you’ll be in heaven. Each bite is better than the last. I used cherry preserves in this layer and the tartness pairs so well with the sweet peanut butter filling… but any kind of jam/jelly/preserves would go well I do believe. 🙂

Your favorite childhood sandwich... in PIE form! Enjoy PB&J in a whole new way. :)

I would say one slice is enough… but it really isn’t! Haha. We couldn’t get enough of this pie and hope you feel the same way. 🙂

one year ago: Coffee Chocolate Chip Streusel Muffins
two years ago: Mujaddara: Mediterranean Lentils and Rice with Carrot Slaw
three years ago: Apple Rubies in Coconut Milk
four years ago: Double Blueberry Walnut Muffins
five years ago: Quinoa Pancakes
six years ago: Lemon Blueberry Bread

P.S. Are you loving my custom stamped fork? Check out my college friend Nicole’s awesome Etsy shop, Tattooed Silver. #GiftIdea

Find more PB&J deliciousness at the link below!

Baked PB + J Pie

crust adapted from Simply Recipes, pie from Magnola Days

Ingredients:

for crust:

  • 3/4 cup all-purpose flour
  • 1/2 cup graham cracker crumbs
  • pinch of salt
  • pinch of sugar
  • 8 tablespoons chilled unsalted butter, cut into 1/2 inch cubes (I like storing mine in the freezer for at least 1 hour)
  • 3-4 tablespoons ice water, very cold

for pie:

  • 2 eggs, at room temperature and separated
  • 1/2 cup light brown sugar, packed
  • 3/4 cup creamy peanut butter
  • 1/4 cup corn syrup
  • 5 ounces evaporated milk
  • 1 teaspoon vanilla extract
  • 1/2 cup jam or preserves of choice (I used cherry preserves)

Directions:

Begin by making your pie crust. If desired you can just use storebought or use your favorite recipe.

Pulse flour, graham cracker crumbs, salt, and sugar in a food processor. Add about half of the butter cubes and pulse 6-8 times, then add the rest and do the same. The butter should be pea-sized at this point. Add water (minus the ice cubes) one tablespoon at a time, pulsing between additions, until the mixture starts to clump together. The dough is ready when you pinch it and it holds together. I usually use about 4 tablespoons water–don’t add too much or crust will be tough.

Turn dough out onto a clean countertop and shape into a disk. Dust with flour on all sides, then cover with plastic wrap and refrigerate for at least an hour or up to a couple days. When ready to use, bring to room temperature for about 10-15 minutes, then unwrap. Sprinkle some flour on the dough and countertop so the dough doesn’t stick. Use a rolling pin to roll out dough to a 12 inch circle. Gently fold in half before transferring to a pie pan, then press dough into pan. Alternatively, you can skip the rolling out process and just press this dough into the pan–sometimes that is easier, though it won’t be as pretty. Keep handling to a minimum for ultimate dough flakiness.

Preheat oven to 350 degrees F.

Then, make your pie filling. Beat egg whites in a large bowl until stiff peaks form–I used my stand mixer for this, but a hand mixer would be fine too. In another large bowl, whisk egg yolks and brown sugar together. Mixture should be thick and light brown in color. Add peanut butter and corn syrup, then stir to combine. Mix in milk and vanilla, then gently fold in egg whites.

Spread jam or preserves directly on pie crust, then pour peanut butter mixture on top.

Bake for 30-35 minutes until filling is set. Allow to cool for at least 30 minutes before cutting. Store leftovers in the refrigerator.