Breakfast, Cakes, Desserts, Recipes, Spreads

Lemon Cake with Lemon Curd Filling and Vanilla Cream Cheese Frosting

My mom’s birthday is three days after Christmas, so sometimes she will have a birthday cake at an odd time of the year to alleviate the typical post-holiday sugar rush. Last summer, in July, I made her an all-natural flop of a red velvet cake. This year, I decided to make an over the top yummy lemon cake and surprised her with it on my parents’ recent visit to see us. She was certainly surprised with the cake, and I was too with the ease this cake was to make. I mean, it has a long name and certainly looks complicated. Though there are many steps, it’s well worth it and really not that time consuming as long as you plan ahead.

Lemon Cake with Lemon Curd Filling and Vanilla Buttercream Frosting | The Pajama Chef

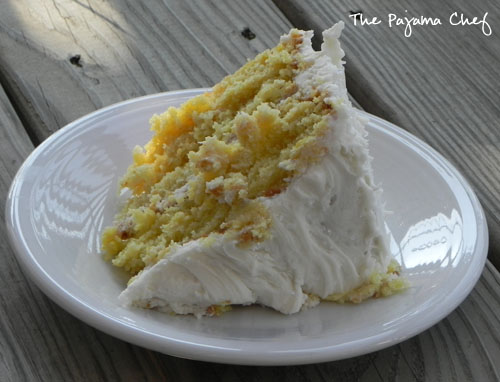
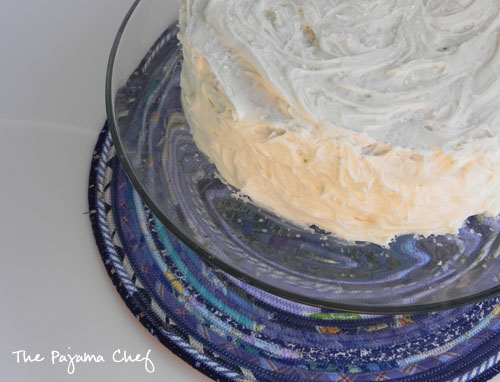
First, let’s talk about the cake. Ohhh the cake! It’s a little hard to tell from the pictures, but this is a FOUR layer cake! [it was a very sunny day when I made this cake, and just couldn’t wait to take pictures, so they are a little too bright for my liking.] I made the cake in two cake pans, then split each down the middle after they were cooled so I had four thin layers. In between, I filled the cake with lemon curd and vanilla cream cheese frosting. So yum!

Lemon Cake with Lemon Curd Filling and Vanilla Buttercream Frosting | The Pajama Chef

This lemon cake recipe is definitely a winner. It has the classic 1-2-3-4 ingredient ratio for cakes: 1 pound butter, 2 cups sugar, 3 cups flour, and 4 eggs. I amped it up with a bit more lemon zest than it called for, so the cake itself was perfectly tart and sweet at the same time. The texture of this cake was definitely moist, but was almost spongier than your average, everyday cake. This was the perfectly pairing to the smooth lemon curd filling that I used.

Lemon Cake with Lemon Curd Filling and Vanilla Buttercream Frosting | The Pajama Chef

If you’ve never made lemon curd before, don’t worry. It’s super easy, and very inexpensive compared to those $4-5 jars at the grocery store. You actually make it in a fairly similar fashion to quick homemade pudding, except with eggs, so you do have to pay attention so that the eggs don’t start cooking separately. The lemon curd is easily my favorite part of this cake, and I think I actually want to make some again soon to spread on an english muffin at breakfast.

Lemon Cake with Lemon Curd Filling and Vanilla Buttercream Frosting | The Pajama Chef

The most outrageous part of this cake was the frosting, by far. For this cake, I used Veronica’s Cream Cheese Celebration Frosting. Recently I won a bottle of Crème Bouquet from her blog, and you can click over to see how she describes it, but basically it is a flavor emulsion that is lemony and sweet and reminiscent of good bakery cakes. Since this was my first time using it, I thought it only appropriate to use one of Veronica’s recipes–so I paired this tangy lemon cake with a rich, creamy celebration frosting made with cream cheese and butter. The good stuff!

I can’t really say enough good things about this cake–you’ll just have to try it out, and not be intimidated by all the steps and recipes. It is well worth it, I promise! 🙂 Lemony and creamy makes for a very happy birthday [two months’ belated]!

Lemon Cake with Lemon Curd and Vanilla Cream Cheese Frosting
click to print whole recipe

Lemon Cake [from Martha Stewart]

Ingredients:

  • 1 cup unsalted butter, softened to room temperature, plus more for pans
  • 3 cups sifted all-purpose flour, plus more for pans
  • 1 tablespoon baking powder
  • 1 teaspoon baking soda
  • 2 cups sugar
  • 4 large eggs, lightly beaten
  • 1 1/4 cups buttermilk
  • 1 1/2 teaspoons pure vanilla extract
  • zest of 2 1/2 lemons
  • 1 1/2 cups lemon curd [see recipe below]
  • 1 recipe vanilla cream cheese frosting [see recipe below]

Directions:

Preheat oven to 350 degrees. Butter two 8 by 2 inch round cake pans, then line bottoms with parchment paper. Flour pans on top of parchment, then set aside.

Cream butter in the bowl of a stand mixer on medium speed for 1 to 2 minutes, until softened  Then slowly add sugar, mixing on medium speed for 3-4 minutes or until fluffy. Scrape down sides of the bowl as needed. Gradually pour in eggs, continuing to mix on medium speed. Beat well and scrape sides between each addition, about 5 minutes in total. Batter should not look slick.

Meanwhile, combine flour, baking powder, and baking soda in a small bowl.

After eggs are mixed in, reduce speed to low, then alternate between adding flour and buttermilk. Begin and end with flour, then fold in vanilla and lemon zest.

Divide batter between prepared pans, then bake for 25 minutes. Rotate pans in oven for even browning [cover with foil if necessary], then bake for another 10-20 minutes until toothpick inserted in center comes out clean.

Cool cake in pans on wire rack for 15 minutes, then invert cake onto wire racks to cool completely before cutting, filling, and frosting.

When cake has cooled completely, remove parchment from each cake and then use a serrated knife [I used a long bread knife] to gently split each layer into two, making a four layer cake. Reserve the prettiest domed layer for the top of the cake, and use the other domed layer for the bottom. I used 3/4 cup lemon curd in between layers 1 and 2, frosting in between layers 2 and 3, and the remaining 3/4 cup lemon curd in between layers 3 and 4. If you want lemon curd in between all layers, double the recipe below and use 1 cup in between each layer.

Frost generously with vanilla buttercream, using a crumb coat if necessary [I didn’t find it to be], then sprinkle with sparkling sanding sugar for decoration, if desired. Store in the refrigerator, covered, and serve chilled.

Time: 70 minutes [30 minutes active] + time for cake and curd to cool.

Yield: 12 servings.

Lemon Curd [from Martha Stewart]

Ingredients:

  • 3 large egg yolks, strained through a mesh sieve
  • zest of 1/2 lemon
  • 1/4 cup freshly squeezed lemon juice
  • 6 tablespoons sugar
  • 4 tablespoons unsalted butter, cold, cut into small pieces

Directions:

In a small saucepan, whisk together egg yolks, lemon zest, lemon juice, and sugar. Turn heat on to medium, then cook for 5 to 7 minutes, or until thick. While mixture is cooking, be sure to stir constantly with a wooden spoon, not forgetting the sides and bottom of pan.

Remove from heat, then add butter piece by piece, stirring until smooth and melted before adding the next piece.

Pour mixture into medium bowl, then wrap tightly with plastic wrap–placing it directly on the curd so a skin doesn’t form. Refrigerate until firm and chilled, at least one hour or overnight.

Time: 20 minutes.

Yield: 1 1/2 cups.

Notes: To fill each layer with curd, double this recipe.

Vanilla Cream Cheese Frosting [from Veronica’s Cornucopia]

Ingredients:

  • 1 8 ounce package cream cheese, softened to room temperature
  • 1/2 cup unsalted butter, softened to room temperature
  • 2 pounds powdered sugar
  • 2 teaspoons crème bouquet
  • 2 teaspoons vanilla extract [clear for a more pure white frosting, regular vanilla if you’re okay with a cream/yellowy frosting]
  • milk to thin, if necessary

Directions:

In a stand mixer, beat together cream cheese and butter until smooth. With mixer on low, add sugar [gradually so as to not explode powdered sugar everywhere] and crème bouquet and vanilla. When sugar is incorporated, turn to medium-high and beat for 2 minutes, then add milk if necessary to thin [I used about 1 tablespoon]. Refrigerate or freeze if you won’t be using it within a few days.

Yield: enough frosting for a two layer cake + 1 cup extra.

Time: 10 minutes.

Linked up with: Weekend Potluck.

Breakfast, Muffins, Recipes, Reviews

Double Blueberry Walnut Muffins

Ben and I are huge yogurt fans. Every week, without fail, our grocery cart contains at least 10 cartons of yogurt [one for each lunch of the work week plus a big tub or two for smoothies or eating at home]… some Greek, some regular, some fruity, some plain or vanilla… whatever I’m in the mood for or whatever is on sale. For awhile I was making my own yogurt in the crockpot, but then grad school began consuming my life too much and making yogurt plummeted on my priority list. There are just too many good storebought brands, right? I look forward to the yogurt in my lunch everyday…it’s my dessert of sorts.

Even though yogurt is something I love a ton, one thing that I don’t do enough of with it is baking! Yogurt is a great ingredient to bake with because it makes muffins and even cakes incredibly pillowy, light, and soft for a fraction of the fat and calories of butter or oil. The inclusion of Liberté Blueberry Greek Yogurt is the secret ingredient in these yummy Double Blueberry Walnut Muffins, and the reason [in my humble opinion] why they are so, so, so good… sweet, hardy, and soft. Perfect trifecta for muffins, I think!

Double Blueberry Walnut Muffins | The Pajama Chef

If you’ve never tried Liberté Greek and Méditerranée yogurt before, you should definitely check it out. Ben and I had tried it once or twice before I received a BzzKit from BzzAgent, but after eating this yogurt in place of our normal brands for a week, I think I’m going to become a loyal Liberté fan! The Coconut Méditerranée is amazing! Here’s some info about the yogurt… then I’ll get back to the muffins!

Liberté is not just made. It is crafted, by hand, to be the absolute best. In true artisan fashion, Liberté Méditerranée yogurt is made using whole milk and cream to achieve a silky texture in seven different rich, deep flavors. The six flavors of Liberté Greek yogurt are hand nurtured using skim milk to create a smooth, creamy, protein-rich yogurt that’s perfectly balanced and (surprise!) fat free. Each Liberté variety is punctuated with real fruit to up the taste even more in these natural, indulgent treats.

Double Blueberry Walnut Muffins | The Pajama Chef

Liberté is new to the US yogurt scene, but has a long history in Canada so I found a recipe for Raspberry Coconut Muffins on their website and modified it based on what I had on hand. I was so pleased with these muffins that they might become my basis for other yogurt muffins in the future! You can definitely modify this recipe based on the fruit, yogurt, and nuts of your choice. I usually don’t add nuts to muffins, but the toasted walnuts in these were excellent. When I baked them last Sunday afternoon, they made my whole kitchen smell absolutely divine, and then they stayed fresh all week long for a lunchbox addition. Yum-o! Can’t wait to make some more. Hope you enjoy! 🙂

Double Blueberry Walnut Muffins [adapted from Liberté]
click to print

Ingredients:

  • 1 cup walnuts
  • 1/4 cup canola oil
  • 2 eggs
  • 1 carton Liberté Blueberry Greek Yogurt [5.3 ounces]
  • 2/3 cup milk
  • 1 teaspoon vanilla
  • 1 cup whole wheat flour
  • 1 cup all-purpose flour
  • 1/2 cup sugar
  • 1 tablespoon baking powder
  • 1 teaspoon baking soda
  • 1 cup blueberries [fresh or frozen]

Directions:

Preheat oven to 350 degrees. Place walnuts on a cookie sheet and toast in preheated oven for 8-10 minutes, stirring halfway through. Watch carefully to make sure they don’t burn! Set aside to cool, then increase oven temperature to 400 degrees. Line muffin tins with paper liners or grease with cooking spray.

In a small bowl, whisk together oil, eggs, yogurt, milk, and vanilla. In a larger bowl, stir together flours, sugar, baking powder, and baking soda. Fold wet ingredients into the dry ingredients, stirring until just moistened.

Chop cooled walnuts, then gently fold walnuts and blueberries into batter. Spoon into muffin cups, filling 2/3 of the way. Bake for 14-16 minutes, or until a toothpick inserted in the center comes out clean.

Time: 40 minutes.

Yield: 16 muffins.

Disclosure: I am a BzzAgent and received free coupons to try out Liberté. All opinons are my own. Thanks to BzzAgent and Liberté for a great experience!

Breakfast, Muffins, Recipes

Applesauce Muffins

Sometimes simple recipes, though delicious, get overshadowed by fancy recipes or decadent recipes. Know what I mean? This is a bad habit that I have… talking up the really yummy and impressive stuff… that then pushes the simple recipes to the back burner, where they sit and sit and sit. And then I don’t blog about them, for months and months. Like these Applesauce Muffins that I made…. last summer.

Applesauce Muffins | The Pajama Chef

Sure, we ate them up in a matter of days. I don’t even think they saw the freezer. For all the muffins I make, that’s saying something. Usually at least one or two gets frozen for lunches or snacks. But no, these muffins, in all their plain glory, were enjoyed in record time. I just didn’t bother to blog about them for months. Sad day. But they are here now!

Applesauce Muffins | The Pajama Chef

No idea why that was, as they are utterly delicious. Each bite is nutty and soft, sweet with hints of applesauce and rich brown sugar. Chewy from the oats and healthy from the whole wheat flour. Satisfying as breakfast with a bit of butter and jam, and savory enough to serve with soup at dinner. Pretty versatile and excellent anytime. One of my favorite parts? They’re made with pantry ingredients, so I can make them anytime. Another favorite part? The topping! Who doesn’t love a muffin with a little streusel topping. Yum! Don’t neglect them as I have! They are great! Enjoy! 🙂

Applesauce Muffins

  • Servings: 12 muffins
  • Print

from fearless homemaker

Ingredients:

  • 1 1/2 cups quick-cooking oats
  • 1 1/4 cups whole wheat flour, sifted 
  • 1/2 cup brown sugar, packed
  • 1 teaspoon baking powder
  • 3/4 teaspoon baking soda
  • 3/4 teaspoon cinnamon
  • 1/2 teaspoon nutmeg
  • 1 1/2 cups unsweetened [natural] applesauce
  • 3 tablespoons canola oil
  • 1 egg white

for topping

  • 1/4 cup quick-cooking oats
  • 1 tablespoon brown sugar, packed
  • 1/4 teaspoon ground cinnamon
  • 1 tablespoon butter, melted and cooled 

Directions:

Preheat oven to 400 degrees. Line muffin tin with paper liners or spray with cooking spray.

In a large bowl, stir together oats, flour, brown sugar, baking powder, baking soda, cinnamon, and nutmeg. In a small bowl, whisk together applesauce, oil, and egg. Fold wet ingredients into dry, then spoon into muffin cups.

Prepare the topping by stirring together oats, brown sugar, and cinnamon in a small bowl. Drizzle in melted butter then divide evenly on top of batter.

Bake for 16-18 minutes, or until toothpick inserted in center comes out clean.

Breakfast, Granola, Recipes

Peanut Butter Pretzel Granola Bars

So, I used to post once a month on a blog called Today’s Housewife. Last fall, the group decided together to stop posting due the busyness of life and families and such. Though sad, I enjoyed being part of the group. As of early January, the blog was officially taken down. But I don’t want to lose my recipes, so periodically I will be reposting them on here. Enjoy!

~

from April 12, 2012… these still get alot of traffic from my blog, even though the link is broken! and I figured it was high time to have the recipe here too!

I love granola bars. Love them for a snack after a workout, love them as a sweet treat in my brown bag [well, pink and black insulated tote] lunch, love them any time… day or night. But you know what I don’t love? I don’t love that my favorite varieties are sold for at least $1 a piece, and that the cheap kinds taste like cardboard and still run $3 for 8-10. $3 for a mediocre processed, packaged snack that contains tons of chemicals and/or preservatives? No thanks, I’ll make my own.

Peanut Butter Pretzel Granola Bars | The Pajama Chef

I’ve had a few successes in the homemade granola bar department… Chewy Granola Bars–your classic character with dried fruit, nuts, and chocolate chips as mix-ins. Or perhaps, Fruit and Nut Granola Bars are more your thing–they’re a little softer with more variety inside. Lastly, Pumpkin Chocolate Chip Energy Bars–a crispy granola bar with a fall-flavored twist.

Peanut Butter Pretzel Granola Bars | The Pajama Chef

These Peanut Butter Pretzel Granola Bars are different. They’re more substantial. Flavorful and filling, but not heavy and dense. Sweet and salty. Pretty much unbelievable, til you try them. And you should, because they’re made up of mostly pantry ingredients, and take virtually no time to whip up. I promise they’ll make your lunchtime and snacktime fabulous!

Peanut Butter Pretzel Granola Bars [adjusted from How Sweet Eats]

click to print

Ingredients:

  • 1 cup old-fashioned rolled oats
  • 1 cup puffed rice cereal
  • 1 cup crushed salted pretzels
  • 1/4 cup ground flaxseed or wheat germ
  • 1/4 cup packed brown sugar
  • 1/4 cup whole wheat flour
  • 1/2 cup chopped dry roasted or honey roasted peanuts
  • 2/3 cup creamy peanut butter
  • 3 tablespoons butter, melted
  • 2 teaspoons vanilla extract
  • 1/3 cup + 1 tablespoon honey
  • 1/3 cup mini chocolate chips
  • 1/3 cup coconut flakes

Preheat oven to 350 degrees. Grease a 9×13 inch baking pan with cooking spray and set aside.

In a large bowl, stir together dry ingredients: oats, cereal, pretzels, flax/wheat germ, brown sugar, flour, and peanuts. Then, add peanut butter and mix with a spoon or your hands to create a rough “dough.” This should take about 5 minutes.

In a smaller bowl, combine butter, vanilla, and honey. Pour into peanut butter dough and stir to combine completely. Fold in chocolate chips and coconut flakes.

Press dough into prepared pan, then bake for 20-25 minutes or until golden brown. But don’t forget the golden rule of granola–it always hardens as it cools, so don’t overcook it! Let pan cool completely before cutting, refrigerating for an added chill if necessary. I let my granola bars cool overnight before cutting just to be safe.

Time: 40 minutes. [15 minutes active].

Yield: 18 servings.

Linked with: Weekend Potluck.

Breakfast, Pancakes, Recipes

Go-To Pancakes {Repost}

So, I used to post once a month on a blog called Today’s Housewife. Last fall, the group decided together to stop posting due the busyness of life and families and such. Though sad, I enjoyed being part of the group. As of early January, the blog was officially taken down. But I don’t want to lose my recipes, so periodically I will be reposting them on here. Enjoy!

~

from November 10, 2011…

In my house, we love pancakes. Well, let me rephrase that. I love pancakes. My husband tolerates them [and sometimes is in the mood for them]. The cat just tries to steal them. That’s how it goes.I realized today that while I have six different pancake recipes on my blog [update! now it’s 10 wow!], I haven’t yet posted my go-to pancake recipe. This go-to pancake recipe was a conglomeration of several different recipes from the internet and cookbooks that I started making back in the summer of 2009 when Ben and I were first married. I wrote it down in my recipe journal next to the likes of other household classics like my crockpot chunky applesauce.

My perfect, tried & true pancake recipe. Go-To Pancakes are great alone or with your favorite mixins! We make these alllll the time. :)

It’s the perfect tried and true pancake for any variety of mix-ins, and is great solo to allow toppings to shine. Sometimes to fancy it up, I’ll add a little vanilla extract or cinnamon to the mix, but it’s not necessary at all. These pancakes are a hit any way they’re served because they bake up thin with nice crispy edges–everything a pancake should do, in my opinion. I hope you like them as much as we do!

… and I totally should have posted these yesterday, since it was Fat Tuesday. Alas. Hope you enjoy them anyways! 🙂

Go-To Pancakes

  • Servings: 12-14 pancakes
  • Print

Ingredients:

  • 1 1/2 cups flour
  • 3 1/2 teaspoons baking powder
  • sprinkle of salt
  • 1 tablespoon sugar
  • 1 1/4 cup skim milk, at room temperature
  • 1 egg, at room temperature
  • 3 tablespoons butter, melted and cooled [can sub oil too]
  • oil for cooking
  • mix-ins if desired [chocolate chips, blueberries, sliced bananas, chopped apples, etc.]
  • butter and syrup for serving

Directions:

Preheat skillet over medium heat.

In a medium size bowl, mix together flour, baking powder, salt, and sugar. Make a well in the center. Measure out milk in a measuring cup and then add egg. Beat gently with a fork. Add [cooled] butter and stir again. Pour liquid ingredients into well of dry ingredients, then stir gently to combine. Don’t worry if batter is lumpy.

Pour batter onto hot skillet in 1/4 cup increments, topping with mix-ins as desired. Cook for a couple minutes on the first side until bubbles form, then flip and cook on other side until golden brown. Keep warm on a dinner plate covered with an aluminum foil tent until all are prepared, then serve with butter and syrup.

Notes: My “syrup” in the photo is actually leftover raspberry sauce from my Lime Yogurt Cake. It is not 100% necessary to let milk and egg come to room temperature, but it yields better results. Recipe can be easily doubled with good results!