If you love cinnamon rolls, and you love blueberries, you NEED TO MAKE THIS RECIPE! Recipe for Blueberry Sweet Rolls on thepajamachef.com @thepajamachef
Breakfast, Pastries, Recipes

Blueberry Sweet Rolls

If you love cinnamon rolls, and you love blueberries, you NEED TO MAKE THIS RECIPE!

If you love cinnamon rolls, and you love blueberries, you NEED TO MAKE THIS RECIPE! Recipe for Blueberry Sweet Rolls on thepajamachef.com @thepajamachef

Long time no blog. Lots has been going on in my corner of the real world… including a new job (still at my library, just new responsibilities) and the start of marathon training (Rocket City Marathon in December). I know I could blog in the evening but I’ve honestly been more interested in reading a nice book. Currently, The Outsider by Stephen King. Eeeeek! I’m actually typing away at this post during my lunch break. But I’m back, and I bring BLUEBERRY SWEET ROLLS! These are absolutely phenomenal and I hope you can make them before summer is up. If you like cinnamon rolls, and you like blueberries, you will l-o-v-e these blueberry sweet rolls. #promise

If you love cinnamon rolls, and you love blueberries, you NEED TO MAKE THIS RECIPE! Recipe for Blueberry Sweet Rolls on thepajamachef.com @thepajamachef

Homemade cinnamon rolls are my love language. If someone tells me they’re making cinnamon rolls for brunch, and I show up expecting homemade cinnamon rolls and am greeted with their sad canned counterpart… I have to admit I’m a little disappointed. Not that people need to make good food (read: homemade cinnamon rolls) to be my friend exactly, but just that soft, fluffy sweet rolls are absolutely fabulous… and the canned kind are just a little blah. I know people are scared of baking with yeast, but it’s totally doable–and this recipe is a great place to start! For these blueberry sweet rolls, I use the same dough as my Copycat Cinnabon Cinnamon Rolls… and that dough is SO forgiving. I’ve screwed it up more times than I can count. I’ve mismeasured the yeast, added too much flour, forgotten the buttermilk… I could go on. Basically, it takes a lot to mess up that dough, and even if you do, chances are good that your sweet rolls will still bake up soft and tender. And still be easy to roll out. #winning And for the record, if you invite me over, ask ME to make the cinnamon rolls. I’ll be happy to oblige!

If you love cinnamon rolls, and you love blueberries, you NEED TO MAKE THIS RECIPE! Recipe for Blueberry Sweet Rolls on thepajamachef.com @thepajamachefI could eat regular cinnamon rolls year round, but in the summer, I want to add fruit to everything! I mean, I eat copious amounts of fruit every day… so it’s only natural. Peaches! Watermelon! Berries of all types! This time, I loaded up on the blueberries because why not? The sweet blueberry filling I made is good enough to eat with a spoon, but please save some for your sweet rolls. You’ll probably have extra so you can swirl it in your oatmeal, top your ice cream with it, or just enjoy it as is. I added some cinnamon to the blueberry filling because it seemed only natural, but there’s also some cardamom in there to make it extra special. The best part about the blueberry filling is that some of it pools on the bottom of the baking dish as the rolls rise and bake. Yum!! After the rolls are baked up and before you dive in, take a minute to make a super easy cream cheese frosting. I added a bit of lemon juice and lemon zest, and that citrus addition was perfection! I prefer cream cheese frosting on my cinnamon rolls, blueberry or otherwise, but if you want something a little lighter, you could just make a glaze with powdered sugar, cream/milk, and lemon juice. There are recipes online but you could improvise with a cup of powdered sugar, a tablespoon of cream/milk, and a tablespoon of lemon juice and go from there. I highly recommend the cream cheese frosting but if you want something simpler, that glaze would also be fantastic.

If you love cinnamon rolls, and you love blueberries, you NEED TO MAKE THIS RECIPE! Recipe for Blueberry Sweet Rolls on thepajamachef.com @thepajamachef

Oh, and while this post is 100% NOT sponsored, if you’re in Nashville… be sure to check out Mr. Blueberry for the delivery service of your blueberry dreams. I used their luscious Michigan blueberries to make these sweet rolls (and to devour!). The season is almost ending (I think the last delivery is next weekend, August 24-25, 2018). Just FYI, friends! 🙂 Have a great Wednesday!!

one year ago: Mexican Lasagna
two years ago: Awesome Kale Salad
three years ago: Cheesy Veggie Pasta
four years ago: Dulce de Leche Peanut Butter Sandwich Cookies
five years ago: Chocolate Zucchini Muffins
six years ago: Cinnamon Bacon Carbonara
seven years ago (wow!): Maple Pecan Pear Scones

Blueberry Sweet Rolls

  • Servings: 12-15 rolls
  • Print

adapted from my Copycat Cinnabon Cinnamon Rolls

Ingredients:

for dough

  • 3/4 cup water – microwaved for about 15-20 seconds, should feel warm like bathwater, about 105-110 degrees F
  • 2 1/4 teaspoons active dry yeast
  • 1/2 cup sugar, divided
  • pinch of salt
  • 1/4 cup buttermilk [1/4 cup milk + a couple drops of lemon juice/vinegar stirred and left to sit for 5 minutes works great]
  • 1 egg, beaten
  • 1/3 cup canola oil
  • 4 1/2 to 5 cups all-purpose flour

for filling

  • 2 cups blueberries (fresh or frozen)
  • 1/2 cup brown sugar, packed
  • 1 1/2 tablespoons cinnamon
  • 1/2 teaspoon cardamom
  • 2 tablespoons lemon juice
  • 1 tablespoon cornstarch
  • 1/2 teaspoon vanilla
  • 1/4 cup unsalted butter, softened

for frosting

  • 2 ounces cream cheese, softened
  • 3 tablespoons unsalted butter, softened
  • 1 teaspoon vanilla extract
  • 1 teaspoon lemon juice
  • zest of one large lemon
  • 1 – 1 1/2 cups powdered sugar

Directions:

In the bowl of a stand mixer, stir together warm water, yeast, and 1 tablespoon of the sugar. Let rest for 5-10 minutes until yeast starts to bubble. When frothy, add salt, buttermilk, egg, oil, and remaining sugar. Whisk to combine. With a wooden spoon, stir in 2 cups of the flour. Then using a dough hook, add flour in 1/2 cup increments, mixing on low speed until dough begins pulling away from the side of the bowl. When a total of 4 1/2 cups flour have been added, increase speed to medium and knead for 5 minutes. If you need to add an additional 1/2 cup flour, do so during this kneading process. I usually add the extra flour if the dough seems too sticky.

Grease a bowl with cooking spray [you can use the same bowl if you are coordinated enough to grease while the dough is in there/hold it to the side], then allow dough to rise in a warm location, covered with a dish towel, until doubled in size. This should take 1-2 hours.

When dough is almost ready, prepare filling.

In a medium saucepan set over medium-high heat, stir together blueberries, brown sugar, cinnamon, and cardamom. Bring to a boil, then reduce heat to low. Cook for 4-5 minutes, stirring occasionally. In a small bowl, whisk together lemon juice and cornstarch, then pour into blueberry mixture. Cook for another minute or two until mixture begins to thicken. Remove from heat and stir in vanilla. Allow to cool. Mixture will thicken a little more as it cools.

Grease a 9×13 inch baking pan and set aside.

When dough is ready, flour your clean counter top/work surface. Punch down the dough and roll into a large rectangle, about 20×30 inches. Spread butter over dough, leaving a 1 inch margin on all edges.

Next, top with the blueberry filling mixture. You probably won’t use all of it, and if your filling is very runny, you will want to use a slotted spoon to remove excess liquid. I overfilled the rolls so I would recommend starting with 1/3 cup of the filling and adding more from there. Extra filling is great on ice cream or oatmeal, or by the spoonful!

Roll into a tight log, rolling from the long side closest to you. When you are almost to the other end, bring the far long side up and over so the seam is on top. Gently press the exposed edge to the top of the dough to seal.

Divide the log into three sections, then divide each section into four or five rolls depending on how big you want them. Cut with a sharp knife and gently transfer cinnamon rolls to prepared pan. If you lose the filling along the way, just gather it up and sprinkle over cinnamon rolls. Cover rolls with a dish towel and let rise in a warm location for another 1-2 hours, or cover with plastic wrap and place in the refrigerator to bake the next morning [this is what I always do]. For the refrigerator rise, remove from refrigerator and let rest at room temperature for 30 minutes before baking.

When ready to bake, preheat the oven to 350 degrees and bake for 15-17 minutes for 15 rolls or about 18-22 for 12 rolls. Bake until tops begin to brown, but check in the middle to make sure the dough isn’t raw. If they need additional baking time, cover with foil to prevent excess browning.

While rolls bake, prepare frosting. Using a stand mixer, hand mixer, or a whisk, beat together cream cheese and butter until smooth. Add vanilla, lemon juice, and lemon zest, beating until combined. Add powdered sugar gradually, mixing until smooth. In my stand mixer this usually takes about 2-3 minutes. When I make the rolls the night before, I leave the butter and cream cheese on the counter overnight so they are soft in the morning.

When rolls come out of the oven, immediately spread half of the frosting on top. Add additional frosting on individual rolls for serving, or when they have cooled down considerably. Serve warm–they reheat well too!

Cakes, Desserts, Recipes

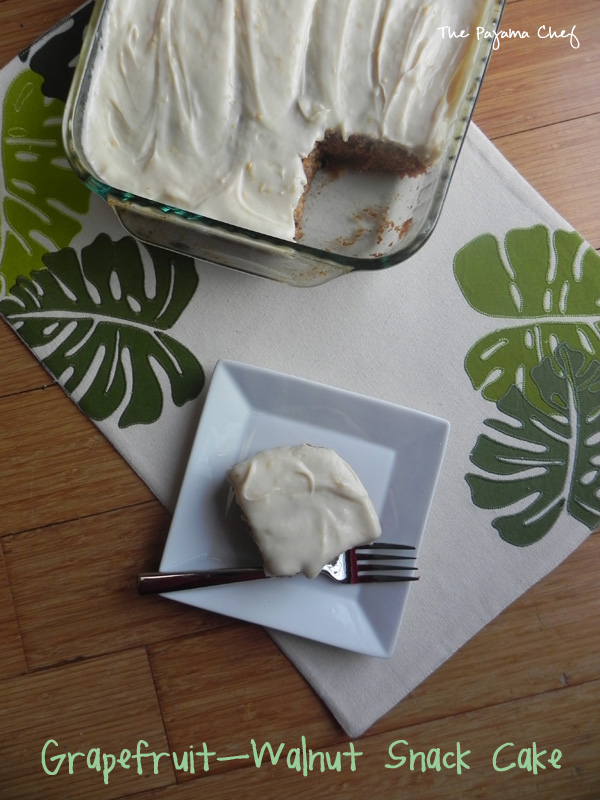
Grapefruit-Walnut Sheet Cake #FreshTastyValentines

Brighten up your Valentine’s Day celebration with this refreshing Grapefruit-Walnut Sheet Cake! It’s even frosted too!

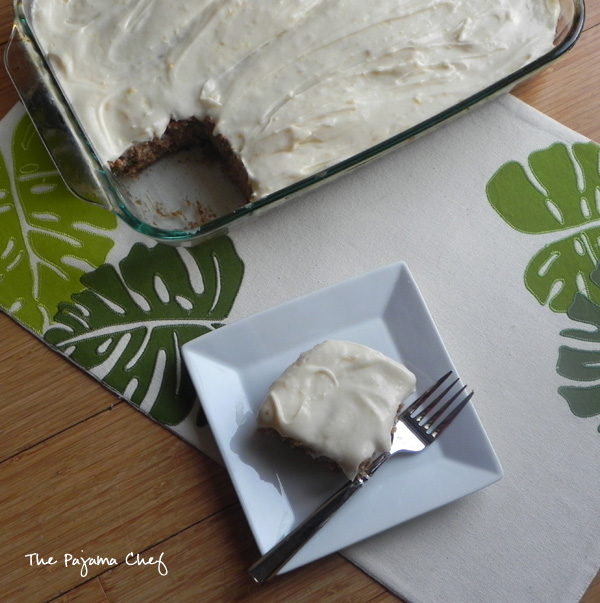
Brighten up your Valentine's Day celebration with this refreshing Grapefruit-Walnut Sheet Cake! You won't want to miss the grapefruit cream cheese frosting! :) #FreshTastyValentines

Winter is made for citrus, is it not? Or citrus is made for winter… no matter how you put it, citrus brings warmth and energy to otherwise dull, cold, dreary days. I know a lot of people associate citrus flavors–lemon, lime, orange, grapefruit–with summer [lemonade sure helps there!] but I’ve always been in the winter=citrus camp. In junior high and high school, we sold citrus fruits in the winter to raise money for orchestra [yup, I was an orch-dork! #Violin #ThenViola]. And, how many classic books talk about children reaching into their stockings on Christmas and being THRILLED to receive an orange? Yup. Winter=citrus. So it was only fitting that my snow day baking last week involved this refreshing Grapefruit-Walnut Sheet Cake.

Brighten up your Valentine's Day celebration with this refreshing Grapefruit-Walnut Sheet Cake! You won't want to miss the grapefruit cream cheese frosting! :) #FreshTastyValentines

This cake reminds me, a little bit, of a classic lemon cake… tangy and sweet all at once, but remixed with the unique floral notes of a grapefruit so you know it’s something special! Since grapefruits have a certain degree of tartness to them, you definitely need the sugar and cinnamon in this recipe to balance out the flavors. This cake uses all of the grapefruit–zest AND juice–to make the grapefruit flavor really stand out.

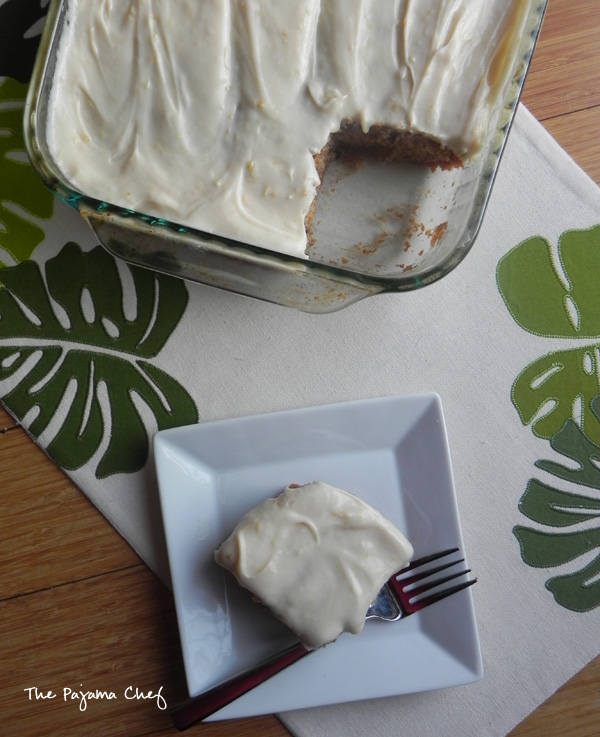
Brighten up your Valentine's Day celebration with this refreshing Grapefruit-Walnut Sheet Cake! You won't want to miss the grapefruit cream cheese frosting! :) #FreshTastyValentines

At first, I wasn’t sure if this would be a good recipe to contribute as part of #FreshTastyValentines [read all about it here–and be sure to enter the giveaway!]. After all, it’s a snack cake–made in a sheet pan–and doesn’t look all that fancy. But then I realized that Ben and I don’t really do fancy. Cozy nights at home are our thing. We’ve been together for eight years, married for nearly seven of them. I’m sure once baby boy comes in May we will look forward to date nights out more than we currently do, but for now, sheet cake in the fridge [that we can snack on all week] is perfectly fine with us! Plus, grapefruit is pink soooo it’s festive enough, right? Another point that tipped the scale towards “recipe for #FreshTastyValentines” was the fact that I used one of our sponsor goodies in the making of this recipe! Duh, better include it. 🙂

https://www.instagram.com/p/BAx6fMpsCPR/

KitchenIQ is one of our fabulous sponsors, and generously sent the bloggers involved in this event a Strawberry Tool [can’t wait to find some good looking strawberries to test out this strawberry slicer!!] and a wonderful Better Zester! This zester was wonderfully easy to use and was so sharp that it hardly took any effort to zest a whole grapefruit. Love it! Thanks for your support in #FreshTastyValentines, KitchenIQ! You can find Kitchen IQ on Facebook, Twitter, and Pinterest… and be sure to enter the giveaway by February 8, 2016 for a chance to win some of their great products. 🙂 I hope you win so you can make this festive grapefruit-walnut snack cake! The grapefruit cream cheese frosting is NOT to be missed. Enjoy!

one year ago: Caesar Salad with Fried Chickpeas
two years ago: Chili Relleno Casserole
three years ago: Baked Jalapeno Popper-Ranch Dip
four years ago: Fried Eggs on Pesto Parmesan Toast
five years ago: Mini Meatloaf

Grapefruit-Walnut Sheet Cake

  • Servings: 18
  • Print

from a magazine… I think Southern Living 🙂

Ingredients:

for cake

  • 1 Ruby Red grapefruit – zest and juice, divided
  • 1 cup butter, melted and slightly cooled
  • 2 cups all-purpose flour
  • 2 cups sugar
  • 1 teaspoon baking soda
  • 1/2 teaspoon cinnamon
  • 1 cup walnuts, coarsely chopped
  • 1/2 cup buttermilk
  • 2 eggs, beaten
  • 1 teaspoon vanilla

for grapefruit cream cheese frosting

  • 1 – 8 ounce package cream cheese, softened [I used the 1/3 less fat variety – Neufchâtel]
  • 4 tablespoons butter, softened
  • reserved grapefruit zest and juice [from cake, above]
  • 1 teaspoon vanilla
  • 12-16 ounces powdered sugar

Directions:

Preheat oven to 375 degrees F. Grease a 9×13 inch pan with cooking spray and set aside.

Begin by zesting and juicing the grapefruit. You’ll need 3 tablespoons zest [this was about 3/4 of the grapefruit zested for me] and 10 tablespoons of juice [the whole grapefruit–I was actually a wee bit short so I added about a teaspoon or two of water and zested the whole grapefruit to make up for it].

In a small bowl, stir together 8 tablespoons of the grapefruit juice with the melted butter and 1/2 cup water. In a large bowl, whisk together flour, sugar, baking soda, and cinnamon. Add butter mixture, 2 tablespoons zest, walnuts, buttermilk, eggs, and vanilla. Stir until just combined. Pour into prepared pan, then bake for 20-30 minutes, or until a wooden toothpick inserted in the center comes out clean. [Original recipe suggested 20-25 minutes bake time; mine took a full 30.]

Cool completely before frosting, at least 1 hour.

When ready to frost, beat cream cheese and butter with an electric mixer for 1-2 minutes until creamy. Add vanilla, 1 tablespoon zest, and 2 tablespoons juice and beat for 30 seconds to blend. Gradually add powdered sugar until desired consistency is reached, beating on low until blended. Frost cooled cake and enjoy! Store covered in the refrigerator.

Be sure to check out all of the other recipes that are part of #FreshTastyValentines today at the linky below! 🙂

Disclosure: I received a complimentary Better Zester! and Strawberry Tool from Kitchen IQ for my participation in #FreshTastyValentines. However, I was not required to write a positive review and I was not otherwise compensated for this post. The thoughts expressed above are entirely my own. Thanks to KitchenIQ for their sponsorship of this event!

Breakfast, Pastries, Recipes

Copycat Cinnabon Cinnamon Rolls #bookclubcookbookCC

Tender, soft, and sweet cinnamon rolls… these basically taste like the famous mall food court treat of my childhood, but they are homemade and actually, pretty easy! 

Tender, soft, and sweet cinnamon rolls... these basically taste like the famous mall food court treat of my childhood, but they are homemade and actually, pretty easy!  #bookclubcookbookCC

This month, as you may remember, was my month to host #bookclubcookbookCC. I chose to have the group read Peace Like a River by Leif Enger and make cinnamon rolls. Though I haven’t quite finished the book yet, I’m loving it so far. The story is just so powerful and the way the Land family is united yet so divided has been incredibly compelling. I can’t wait to finish the book! No spoilers, please. 🙂

Peace Like a River #bookclubcookbookCC

For my recipe this month, I thought about making the provided cookbook recipe for the cinnamon rolls [especially because they call for honey in the dough which I found realllly interesting]. But then I changed my mind and made these Copycat Cinnabon Cinnamon Rolls again instead. I have made them multiple times over the past couple of years for important people in my life when they have come to visit–my sister and brother in law, my college friend, my parents, my Bible study… and okay, okay… for just Ben and I on several occasions. If you come to visit us in Nashville maybe you’ll be lucky enough that I’ll make them for you too! 🙂 And I’m sure you’d love that, because these cinnamon rolls are truly, truly amazing! So I just had to share them with you. I hope you don’t mind, because these are the best cinnamon rolls I have ever made!

Tender, soft, and sweet cinnamon rolls... these basically taste like the famous mall food court treat of my childhood, but they are homemade and actually, pretty easy! #bookclubcookbookCC

So, why are they the best? Cinnamon rolls have the reputation for being tough to make from scratch. You have to use yeast, which scares people. They require a lot of time–make the dough and the filling and the frosting, let them rise twice, bake, frost, etc. Blah! And don’t forget the rolling out process! A challenging prospect if there ever was one. While I can’t say that these cinnamon rolls are quick to make or that they are yeast free, this dough is the softest and stablest yeast dough I have ever worked with! I’m not sure why, but it’s a cinch to roll out every. single. time. It’s incredible. Even the time that I royally screwed up the dough by not adding all the ingredients because I was trying to make the dough while making dinner, Facebook messaging a friend, listening to music, AND emptying the dishwasher. Still, easy to roll out. Winner of a recipe in my book!

Tender, soft, and sweet cinnamon rolls... these basically taste like the famous mall food court treat of my childhood, but they are homemade and actually, pretty easy! #bookclubcookbookCC

The relative ease of making these cinnamon rolls [and yes, I just said ease of making cinnamon rolls. If you can roll out dough without tearing your hair out, cinnamon rolls are easy, imo!] is trumped by how good they taste, and how reminiscent of Cinnabon Cinnamon Rolls these really are. It’s not the dough or the filling or the frosting… but all three in one that makes these treats so special. I haven’t had a Cinnabon in years, though I am tempted nearly every time I visit a mall that has one.

Tender, soft, and sweet cinnamon rolls... these basically taste like the famous mall food court treat of my childhood, but they are homemade and actually, pretty easy! #bookclubcookbookCC

Cinnabons were an integral part of my childhood. My grandpa, who passed away in September, always used to take me to the mall to split a Cinnabon with him when I was growing up. We lived near my grandparents for the first eight years of my life, and he often took care of me while my mom was in grad school and my dad was at work. Even though I haven’t had a Cinnabon with him in many years, almost every time I saw him, and even sometimes on the phone, he would mention this. He loved to reminisce about the activities we did together–everything from Cinnabon trips to feeding the ducks to making up stories together. I know I will always associate cinnamon rolls, and Cinnabon cinnamon rolls to be precise, with my grandpa. Though these past five months of pregnancy have been incredibly happy, they’ve also been filled with a touch of sadness knowing that I never got to tell my grandpa that he was going to be a great grandpa again. The last time I saw him, I was pregnant but didn’t know it yet, and I found out about the baby about a week after the funeral. Someday, a couple years from now, when I make these cinnamon rolls for [or with] our baby boy, I will tell him about his great grandpa and what a wonderful man he was. Even though these aren’t true Cinnabon cinnamon rolls, I think he would approve. ❤

two years ago: Champorado [Filipino Chocolate Rice Pudding]

four years ago: Cranberry Feta Pinwheels
five years ago: Baked Rigatoni with Bechamel Sauce

Copycat Cinnabon Cinnamon Rolls

  • Servings: 12-15 rolls
  • Print

slightly adapted from Culinary Couture

Ingredients:

for dough

  • 3/4 cup water – microwaved for about 15-20 seconds, should feel warm like bathwater, about 105-110 degrees F
  • 2 1/4 teaspoons active dry yeast
  • 1/2 cup sugar, divided
  • pinch of salt
  • 1/4 cup buttermilk [1/4 cup milk + a couple drops of lemon juice/vinegar stirred and left to sit for 5 minutes works great]
  • 1 egg, beaten
  • 1/3 cup canola oil
  • 4 1/2 to 5 cups all-purpose flour

for filling

  • 2/3 cup brown sugar, packed
  • 2 1/2 tablespoons cinnamon
  • 1 1/2 tablespoons cornstarch
  • 1 teaspoon vanilla
  • 1/4 cup unsalted butter, softened

for frosting

  • 2 ounces cream cheese, softened
  • 3 tablespoons unsalted butter, softened
  • 1 teaspoon vanilla extract
  • 1 teaspoon lemon juice
  • 1 – 1 1/2 cups powdered sugar

Directions:

In the bowl of a stand mixer, stir together warm water, yeast, and 1 tablespoon of the sugar. Let rest for 5-10 minutes until yeast starts to bubble. When frothy, add salt, buttermilk, egg, oil, and remaining sugar. Whisk to combine. With a wooden spoon, stir in 2 cups of the flour. Then using a dough hook, add flour in 1/2 cup increments, mixing on low speed until dough begins pulling away from the side of the bowl. When a total of 4 1/2 cups flour have been added, increase speed to medium and knead for 5 minutes. If you need to add an additional 1/2 cup flour, do so during this kneading process. I usually add the extra flour if the dough seems too sticky.

Grease a bowl with cooking spray [you can use the same bowl if you are coordinated enough to grease while the dough is in there/hold it to the side], then allow dough to rise in a warm location, covered with a dish towel, until doubled in size. This should take 1-2 hours.

When dough is almost ready, prepare filling. Stir together brown sugar, cinnamon, cornstarch, and vanilla in a small bowl and set aside. Also, grease a 9×13 inch baking pan and set aside.

When dough is ready, flour your clean counter top/work surface. Punch down the dough and roll into a large rectangle, about 20×30 inches. Spread butter over dough, leaving a 1 inch margin on all edges. Top with filling mixture. Roll into a tight log, rolling from the long side closest to you. When you are almost to the other end, bring the far long side up and over so the seam is on top. Gently press the exposed edge to the top of the dough to seal.

Divide the log into three sections, then divide each section into four or five rolls depending on how big you want them. Cut with a sharp knife and gently transfer cinnamon rolls to prepared pan. If you lose the filling along the way, just gather it up and sprinkle over cinnamon rolls. Cover rolls with a dish towel and let rise in a warm location for another 1-2 hours, or cover with plastic wrap and place in the refrigerator to bake the next morning [this is what I always do]. For the refrigerator rise, remove from refrigerator and let rest at room temperature for 30 minutes before baking.

When ready to bake, preheat the oven to 350 degrees and bake for 15-17 minutes for 15 rolls or about 18-22 for 12 rolls. Bake until tops begin to brown, but check in the middle to make sure the dough isn’t raw. If they need additional baking time, cover with foil to prevent excess browning.

While rolls bake, prepare frosting. Using a stand mixer, hand mixer, or a whisk, beat together cream cheese and butter until smooth. Add vanilla and lemon juice, beating until combined. Add powdered sugar gradually, mixing until smooth. In my stand mixer this usually takes about 2-3 minutes. When I make the rolls the night before, I leave the butter and cream cheese on the counter overnight so they are soft in the morning.

When rolls come out of the oven, immediately spread half of the frosting on top. Add additional frosting on individual rolls for serving, or when they have cooled down considerably. Serve warm–they reheat well too!

Cakes, Desserts, Recipes

Chocolate Chip Zucchini Cake

This is the BEST zucchini cake I have ever had! And it doesn’t even have frosting. Crazyyy!

Chocolate Chip Zucchini Cake - a great summer dessert with some chocolate for good measure | thepajamachef.comI never had zucchini anything until I met Ben. He opened up a whole world to me! Zucchini muffins, bread, cookies, pasta, cake… well, I guess he opened up basically a whole new world of sweets [with the addition of some veggies so you can pretend to be a little healthier]. HA! The first summer after we were married, we were served zucchini cake for dessert by some of our new church friends. This chocolate zucchini cake was amazing… and had the best, thickest chocolate frosting ever. It was positively scrumptious!

Chocolate Chip Zucchini Cake - a great summer dessert with some chocolate for good measure | thepajamachef.comProblem was… every time I made zucchini cake after having hers, I wanted layer upon layer of chocolate frosting. But sometimes that’s too much work. Or you don’t want to wait for the cake to cool completely before that. Or you want to be able to eat the cake for breakfast. Or ___ [insert other “problem” here]. SIGH. But guess what guys?!? Once I discovered THIS cake, my problems were solved. Hallelujah!

Chocolate Chip Zucchini Cake - a great summer dessert with some chocolate for good measure | thepajamachef.comThis zucchini cake, aptly named Chocolate Chip Zucchini Cake, is equally chocolately yet requires not one layer of chocolate frosting because of the abundance of chocolate chips used to top this masterpiece. Genius, I say! Alright, so there aren’t mountains of chocolate chips on top of this cake, but there ARE enough to enjoy in just about every bite. The middle pieces have more so I recommend eating those yourself. Or, you know, not being selfish like me and sharing with those you love. I’m so nice! Each bite though, no matter if it comes from the side or the middle, is unbelievably soft and melts in your mouth. Buttermilk in cakes is fabulous, I think! It also has a teensy bit of warm spices to intensify the chocolate flavor even more. Hope you enjoy this cake as much as we did… and don’t forget to eat your veggies! 🙂

one year ago: Dark Chocolate Chunk Peanut Butter Blondies – with vegan and gluten free options!
two years ago: Eggplant Potato Frittata
three years ago: Baked Flounder
four years ago: Lavender Lime Scones
five years ago: Tasty Corn

Chocolate Chip Zucchini Cake

  • Servings: 18
  • Print

from What Megan’s Making

Ingredients:

  • 2 1/2 cups all-purpose flour
  • 2 tablespoons unsweetened cocoa powder
  • 1 teaspoon baking soda
  • 1/2 teaspoon baking powder
  • 1/2 teaspoon cinnamon
  • 1/4 teaspoon ground cloves
  • 1/2 cup unsalted butter, softened
  • 1 3/4 cups sugar
  • 1/2 cup canola oil
  • 2 eggs
  • 1 teaspoon vanilla
  • 1/2 cup buttermilk
  • 2 cups peeled, shredded zucchini [1 medium]
  • 2 cups semi-sweet chocolate chips

Directions:

Preheat oven to 350 degrees. Grease a 9×13 inch pan with cooking spray and set aside.

In a medium-sized bowl, whisk together the flour, cocoa powder, baking soda, baking powder, cinnamon, and cloves.

In the bowl of a stand mixer, cream together the butter and sugar. Beat in the oil, eggs and vanilla. Add the flour mixture to the creamed mixture alternately with the buttermilk. Stir in the zucchini. Pour into prepared pan. Sprinkle with chocolate chips.

Bake for 45-50 minutes or until a toothpick inserted in the center comes out clean. Cool on a wire rack. Enjoy! This is also great with ice cream.

Breakfast, Recipes, Scones

Peach Cobbler Scones

These Peach Cobbler Scones are flaky and tender… the epitome of summer, with a sprinkling of cinnamon sugar on top. 🙂

Peach Cobbler Scones | thepajamachef.comYes, I know that says Peach Shortbread Scones. They are really Peach Cobbler Scones. Details, details… the DETAIL that is important is how excellent these scones are, no matter what they are called. 🙂 To say that I loved these scones is an absolute understatement. I LOVED these scones. Sorry for shouting, it’s true though.

Peach Cobbler Scones | thepajamachef.comI made these scones at the tail end of summer last year, with the last of the impossibly delicious and super fresh Georgia peaches that come into Nashville by the truckload. I don’t think I’ve had a bad peach since moving south. But a bad apple? By the dozen, unfortunately. But this isn’t apple season… it’s peach season! So let’s celebrate with these scones. 🙂 I waited patiently to share them with you, but now I’ll have to make another batch with the first peaches of the year.

Peach Cobbler Scones | thepajamachef.comThese scones are such a treat, and a wonderful way to enjoy fresh peaches. Normally fruit scones can be difficult to work with because the juices soak into the pastry dough, but this time the fruit is layered between the dough, cobbler style. Hence the name, ha. The dough bakes up around the peaches, creating a delicious pillowy effect. A dusting of cinnamon sugar completes these tasty treats. When you make them, be sure to use good peaches. There’s not much added sugar so the sweetness is totally fruit-driven. Enjoy!

one year ago: Tabbouleh
two years ago: Italian Chicken & Veggie Couscous Bowls
three years ago: Orange-Glazed Chicken Stir-Fry
four years ago: Strawberry Chocolate Coconut Pancakes

Peach Cobbler Scones

  • Servings: 8
  • Print

from Tracy’s Culinary Adventures

Ingredients:

  • 3 cups all-purpose flour
  • 1/4 cup sugar
  • 1 tablespoon baking powder
  • 1/2 teaspoon baking soda
  • 3/4 cup cold unsalted butter, cut into 1/4-inch pieces
  • 1 large egg
  • 3/4 cup cold buttermilk + extra for brushing
  • 1 teaspoon vanilla extract
  • 1 1/2 ripe peaches, thinly sliced – can leave skin on or peel it off
  • 1 tablespoon sugar
  • 1/4 plus 1/8 teaspoon ground cinnamon

Directions:

Preheat oven to 400 F. Line a baking sheet with parchment paper or a silpat.

Whisk the flour, sugar, baking powder, and baking soda in a large bowl. Cut in butter with pastry blender or two knives until mixture resembles coarse crumbs [butter pieces shouldn’t be larger than a pea]. In a measuring cup or small bowl, use a fork to beat together thee egg, 3/4 cup buttermilk, and vanilla. Pour into the bowl with the dry ingredients and use a fork to gently mix until dough comes together.

Turn dough out onto a floured countertop. Gently knead a few times to bring dough together, then press into a 12×10 inch rectangle. Brush the long half of the dough with buttermilk, then place peach slices in a single layer over the buttermilk-brushed dough. Fold the opposite side of the dough and place on top of peaches to cover completely, then press edges gently to close. Cut dough into eight equal pieces and transfer to the prepared baking sheet.

Refrigerate scones for at least 20 minutes if they are soft, then combine sugar and cinnamon. Brush top of scones with buttermilk and then sprinkle with cinnamon sugar. Bake for 16-18 minutes, or until golden brown and the edges don’t appear wet/gooey. Cool on a wire rack for 5-10 minutes before serving.

Unbaked scones can be frozen until ready to bake, just add a few minutes to baking time. Scones are best within two days of baking, but refrigerate any leftovers and they’ll last a little longer. 🙂