Cakes, Desserts, Recipes

Chocolate Covered Strawberry Cake

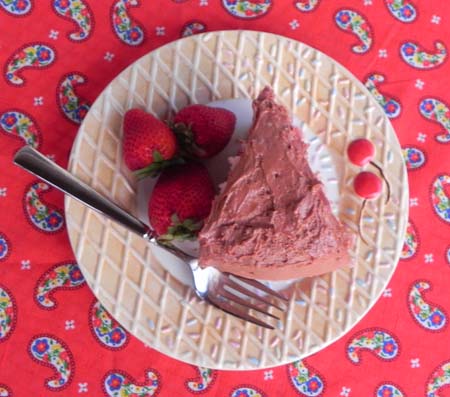
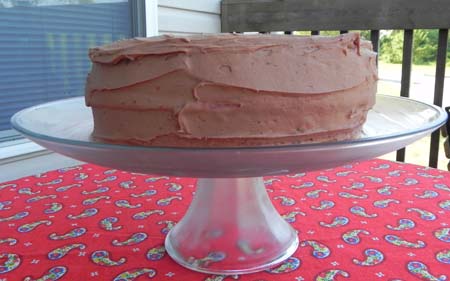
Fresh strawberry cake from scratch… no Jello, artificial flavorings, or anything fake! This cake is delicious and easier than you would think! Top it with a rich chocolate frosting and you have Chocolate Covered Strawberry Cake that everyone will want an extra slice…or two…or three of!

Fresh strawberry cake from scratch... no Jello, artificial flavorings, or anything fake! This cake is delicious and easier than you would think! Top it with a rich chocolate frosting and you have Chocolate Covered Strawberry Cake that everyone will want an extra slice...or two...or three of!

On Halloween, a Dairy Queen opened about five minutes from our house. Dangerous! Before that, we had to drive a decent distance to reach one. Some of the folks in our area were upset, saying the DQ would “ruin” the area with another fast food area. Ruin the area? Ummm, no! Ruin people’s diets, more likely! Haha. Is there anything more delicious than a Blizzard or a dipped cone? I don’t think so… unless it’s this Chocolate Covered Strawberry Cake!

Fresh strawberry cake from scratch... no Jello, artificial flavorings, or anything fake! This cake is delicious and easier than you would think! Top it with a rich chocolate frosting and you have Chocolate Covered Strawberry Cake that everyone will want an extra slice...or two...or three of!

Now I realize that Chocolate Covered Strawberry Cake and Dairy Queen don’t really relate to many of you. But for longterm DQ lovers like me, do you remember the Chocolate Covered Strawberry Blizzard? I used to get them all the time in college and then they took them off the menu. It was a very sad day. Some stores would make them, and others wouldn’t, which made NO sense to me because it’s just strawberries [that they already have from the sundaes!] and chocolate [like chips/shavings OR that dipped cone topping…yum!]. Yum and yum. It’s so basic, but so good, ya know?

Fresh strawberry cake from scratch... no Jello, artificial flavorings, or anything fake! This cake is delicious and easier than you would think! Top it with a rich chocolate frosting and you have Chocolate Covered Strawberry Cake that everyone will want an extra slice...or two...or three of!

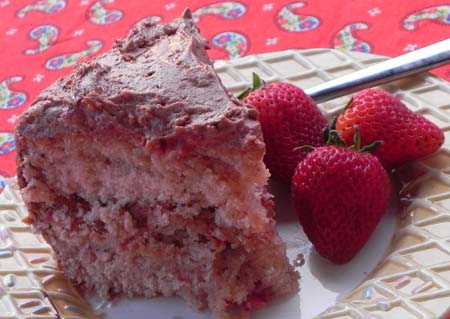
Now, I haven’t been to my local DQ [I just got chills typing that, you guys…yay!] yet to see if they’ll make me my favorite Blizzard, but right now I have this cake and the world is a-okay. You can make this fresh strawberry cake with fresh or frozen strawberries, making it a great year-round treat. There’s absolutely nothing fake or artificial in this cake, just lots of pure strawberry goodness! If you want more of a pink/red color, you’ll have to use a little food coloring but I was happy with the color of my cake without that. The strawberry cake is light and fluffy, and when combined with the rich chocolate frosting is absolutely heavenly! I hope you enjoy this cake as much as I did!

one year ago: Pumpkin Cranberry Bread
two years ago: Cranberry and Cream Cheese Muffins
three years ago: Pumpkin Graham Muffins
four years ago: Pollo alla Poggia Alloro {A Family Farm in Tuscany}
five years ago: Homemade Maple & Brown Sugar Almond Butter
six years ago: Pumpkin Soup and Homemade Croutons

Chocolate Covered Strawberry Cake

  • Servings: 12
  • Print

for Fresh Strawberry Cake

for Chocolate Frosting

Ingredients:

for cake

  • 24 ounces very ripe strawberries, hulled – or frozen strawberries work too!
  • 1-2 teaspoons sugar, optional
  • 1/4 milk, at room temperature
  • 6 large egg whites, at room temperature
  • 2 teaspoons vanilla extract
  • 2 1/4 cup cake flour, sifted
  • 1 3/4 cup sugar
  • pinch of salt
  • 4 teaspoons baking powder
  • 12 tablespoons unsalted butter, at room temperature
  • red or pink food coloring, if desired

for frosting

  • 3 cups powdered sugar [plus up to an extra 1/2 cup as needed]
  • pinch of salt
  • 8 ounces cream cheese, softened
  • 12 tablespoons unsalted butter, at room temperature
  • 9 ounces bittersweet chocolate, melted
  • 6 ounces milk chocolate, melted
  • 8 ounces sour cream

Directions:

If using frozen strawberries [I did!], set in a fine strainer placed over a bowl. Let rest until thawed, tossing occasionally to remove excess juices. Reserve liquid for another use or discard as desired.

If using fresh strawberries, hull and toss with 1-2 teaspoons sugar. Let rest at room temperature for an hour or two, until juicy.

Place strawberries in a food processor and pulse. Reserve 3/4 cup puree for the cake. Use the rest for something else–I stirred mine into plain yogurt. Yum!

Preheat oven to 350 degrees F. Grease and flour two 8 or 9 inch round baking pans. Mine are 9 inches. If desired, you can also grease pan, line with parchment circles, then grease and flour again.

In a medium bowl, whisk together 3/4 cup strawberry puree, 1/4 cup milk, egg whites, and vanilla.

In the bowl of a stand mixer, combine flour, sugar, baking powder, and salt. While mixer is running on low, add butter. Mix until moist crumbs form.

Add strawberry puree mixture to bowl of stand mixer. Beat on medium speed for about a minute, then turn off mixture. Scrape sides and stir together by hand for about 30 seconds. Add a drop or two of food coloring if desired–original recipe said that batter won’t get pinker so add food coloring if you want more of a pink/red color!

Divide batter between prepared pans. Smooth tops with a rubber spatula, then bake for 22-25 minutes, or until a toothpick inserted in the center comes out clean. I usually start checking around 18 minutes and cover with foil if top is browning too much.

When finished, let cake rest in pan for 10-15 minutes before turning out onto wire rack to cool completely.

Meanwhile… make that frosting!

In a small bowl, mix 3 cups powdered sugar, cocoa, and salt. With an electric mixer, combine cream cheese and butter until smooth and fluffy.

Add cocoa mixture to cream cheese concoction in 1/3 cup increments, mixing until fully incorporated. Pour in the chocolate [it helps to melt it in a glass measuring cup with a spout] while mixer is running on low, then add sour cream and beat until combined, scraping the sides as necessary. If desired, add additional powdered sugar to reach desired consistency.

Frost the cake once cooled–first between the two layers, then on top and sides. Some people use the extra strawberry puree in between the layers but I didn’t do that. Check out original recipe for more details! Enjoy!

P.S. I stored the leftovers in the fridge due to the frosting. It’s great cold!

Cookies, Desserts, Recipes

Chocolate Biscotti for #Choctoberfest

Deep, dark, rich chocolate biscotti studded with dark chocolate chunks and topped with crunchy almonds! Thank you to Imperial Sugar for providing the product used in this recipe! All opinions are my own.

Deep, dark, rich chocolate biscotti studded with dark chocolate chunks and topped with crunchy almonds! Thank you to Imperial Sugar for providing the product used in this recipe! All opinions are my own. #sponsored #Choctoberfest

Last recipe for #Choctoberfest! Be sure to enter the giveaway now if you haven’t already! You don’t want to miss this. 🙂 These past two weeks have been so fun and so delicious! I’ve shared Old-Fashioned Chocolate Cobbler, Banana Espresso Chocolate Crumb Cake, Salted Caramel Mocha Overnight Oats… and now, to end the week, some tasty Chocolate Biscotti!

Ben loves it when I make biscotti. Those crunchy little biscuit-cookie hybrids are the perfect excuse to eat cookies for breakfast! 🙂 I know that breakfast cookies are a thing… but they sound a little weird to me, if I’m being honest. But biscotti on the other hand? Sign me up! They’re just so exotic and fancy that I can’t resist them!

Deep, dark, rich chocolate biscotti studded with dark chocolate chunks and topped with crunchy almonds! Thank you to Imperial Sugar for providing the product used in this recipe! All opinions are my own. #sponsored #Choctoberfest

In my past biscotti dealings I’ve stuck with more neutral flavors: pumpkin and almond. This time though, I went all out: chocolate biscotti that’s been amped up with vanilla and almond extracts for maximum flavor, dark chocolate chunks that melt just a bit when you dunk that baby in your coffee [ohhh yeah], AND topped it all off with sliced almonds and a bit of sea salt. This biscotti is a chocolate lover’s dream!! It’s perfect for dipping in your morning [or afternoon or evening] coffee, but kiddos would love it dipped in milk or even hot chocolate for a double dose of chocolately deliciousness!

Deep, dark, rich chocolate biscotti studded with dark chocolate chunks and topped with crunchy almonds! Thank you to Imperial Sugar for providing the product used in this recipe! All opinions are my own. #sponsored #Choctoberfest

To make this biscotti, I used Imperial Sugar. Imperial Sugar served as the Gold Sponsor of #Choctoberfest this year. They were generous enough to send me 40 pounds of granulated sugar, plus a silicone baking mat and a cute apron to use during my #Choctoberfest baking. You can find Imperial Sugar on Pinterest, Facebook, Instagram, Twitter, and Youtube. What I love about Imperial Sugar, aside from their excellent sugar products, is that they are based in the southeast… so they are somewhat of a local company for me in Nashville. Fun! It’s be a great time baking with Imperial Sugar and chocolate over the past couple weeks with #Choctoberfest. I hope you’ve enjoyed it too! Happy weekend! 🙂

two years ago: Pumpkin Chocolate Chip Cookies
four years ago: Mom’s Lasagna
five years ago: Pumpkin Brownies
six years ago: Pumpkin Chicken Tacos, or My Misadventures with Spicy Food

Chocolate Biscotti

  • Servings: 30
  • Print

from David Lebovitz

Ingredients:

  • 2 cups [280 grams] all-purpose flour
  • 3/4 cups [75 grams] good cocoa powder
  • 1 teaspoon baking soda
  • 1/4 teaspoon salt
  • 3 large eggs, at room temperature if you can [I forgot and all was well!]
  • 1 cup [200 grams] granulated sugar – I used Imperial Sugar
  • 1 teaspoon vanilla extract
  • 1/4 teaspoon almond extract
  • 3/4 cup dark chocolate chunks – any kind of chocolate chips would work too
  • ~1/3 cup toasted and sliced almonds
  • sea salt, for sprinkling – optional

Directions:

Preheat oven to 350 degrees F. Line a large baking sheet with a silpat or parchment paper.

In a small bowl, stir together flour, cocoa powder, baking soda, and salt.

In a medium bowl, beat together eggs, sugar, vanilla extract, and almond extract. Mix dry ingredients into the wet ingredients, then fold in chocolate. Batter will be thick! Use a mixer if you like.

Divide batter in  half, and shape each half into a log the length of the baking sheet. Press almonds into the log, gently flattening log into more of a rectangular shape. Sprinkle with sea salt if desired.

Bake for 25 minutes, then remove from oven and let cool for 15 minutes. Then, remove logs to a cutting board. Using a serrated knife, slice into 1/2 inch thick pieces, about 15 per log. Place cut-side down on baking sheet and return to oven. Bake for 20-30 minutes, until the biscotti feels mostly firm. They will harden further as they cool, so you can error on the side of caution for baking time.

Cool completely on a cooling rack before storing in an air-tight container. Serve with a dunking beverage–coffee, hot cocoa, or milk. Enjoy!

For more chocolate, click on the link below!

Desserts, Other, Recipes

Old-Fashioned Chocolate Cobbler for #Choctoberfest

Wonderfully rich, this old-fashioned chocolate cobbler will be your chocolate dessert of choice this winter! It is so easy and so ooey gooey–chocolate lovers won’t be able to get enough!! Thank you to Barlean’s for providing the product used in this recipe! All opinions are my own.

Wonderfully rich, this old-fashioned chocolate cobbler will be your chocolate dessert of choice this winter! It is so easy and so ooey gooey--chocolate lovers won't be able to get enough!! Thank you to Barlean’s for providing the product used in this recipe! All opinions are my own. #sponsored #Choctoberfest

You guys. This dessert. It is ahhhh-mazing! It is phenomenal! It is seriously a MUST MAKE. It’s like brownies and chocolate lava cake got together and had a baby and THIS is the result. Old-Fashioned Chocolate Cobbler is to die for! I didn’t know chocolate cobbler was a thing–but it is–and it is so worth it! I’m thankful for Choctoberfest’s role in bringing this dessert into my life.

Wonderfully rich, this old-fashioned chocolate cobbler will be your chocolate dessert of choice this winter! It is so easy and so ooey gooey--chocolate lovers won't be able to get enough!! Thank you to Barlean’s for providing the product used in this recipe! All opinions are my own. #sponsored #Choctoberfest

Have you heard about Choctoberfest? It is this fun blogging event I’m participating in this week and next. Through next Friday, October 21, you should go here to enter an awesome giveaway for an assortment of chocolate products from our wonderful sponsors, including Barlean’s–this great company with a mission to be a “Pathway to a Better Life.” As part of their sponsorship of this event, they sent me some tasty products to try–Barlean’s Greens Powder – Chocolate Silk FlavorEssential Woman Omega Swirl Chocolate Mint Flavor, and Barlean’s Butter Flavored Organic Coconut Oil. So far I have only used the greens powder–you can mix it into milk to drink hot or cold, like chocolate milk or hot cocoa… or use it as a healthier cocoa powder substitute which is what I did below! I can’t wait to bake with the chocolate mint swirl [can you say, Christmas cookies anyone?] and with the butter flavored coconut oil. Perfecto! So fun to try new-to-me healthier versions of products I already use. 🙂 Though I received these products for free, I was not compensated in any other way and was not asked to provide positive feedback.

Barlean's - a sponsor of #Choctoberfest

What’s so great about this dessert–besides its obvious chocolately goodness is the fact that it is super easy to make. Basically you mix some dry ingredients, some wet ingredients, and then combine. Put in the pan, top with some sugar and cocoa powder, top with hot water [yes, plain ‘ole hot water — but I bet hot coffee would be good too], and bake. Forty minutes later… this lovely dessert is piping hot and ready to go!

Wonderfully rich, this old-fashioned chocolate cobbler will be your chocolate dessert of choice this winter! It is so easy and so ooey gooey--chocolate lovers won't be able to get enough!! Thank you to Barlean’s for providing the product used in this recipe! All opinions are my own. #sponsored #Choctoberfest

The edges are crispy like a brownie, but when you cut into it, all this luscious, rich chocolate rushes out like the filling of a lava cake. #sogood I’ve never had anything like this before. Serve it up with vanilla ice cream, and boy oh boy… you will be sure to enjoy! 🙂

Wonderfully rich, this old-fashioned chocolate cobbler will be your chocolate dessert of choice this winter! It is so easy and so ooey gooey--chocolate lovers won't be able to get enough!! Thank you to Barlean’s for providing the product used in this recipe! All opinions are my own. #sponsored #Choctoberfest

two years ago: Homemade Pumpkin Spice Coffee Creamer
three years ago: Pumpkin Spice Chocolate Chip Cake with Nutella Frosting
four years ago: Apple Peanut Butter Muffins
five years ago: Pumpkin, Sausage, and Spinach Lasagna 
six years ago: Southwestern Pepperjack Baked Penne

Old-Fashioned Chocolate Cobbler

  • Servings: 8
  • Print

from The Kitchn

Ingredients:

  • 1 cup all-purpose flour
  • 3/4 cup granulated sugar
  • 3 tablespoons Barlean’s Greens Powder, Chocolate Silk Flavor
  • 2 teaspoons baking powder
  • 1 teaspoon instant coffee
  • 1/4 teaspoon fine sea salt
  • 1/2 cup milk
  • 6 tablespoons (3/4 stick) unsalted butter, melted and slightly cooled
  • 1 teaspoon pure vanilla extract
  • 1 cup packed brown sugar
  • 3 tablespoons unsweetened cocoa powder
  • 1/2 cup chocolate chips
  • 1 1/2 cups very hot water
  • Vanilla ice cream, for serving

Directions:

Grease an 8×8 inch baking dish or any medium sized casserole dish. I used a 10 inch round casserole dish. Preheat oven to 350 degrees.

Stir together flour, sugar, Barlean’s Greens Powder – Chocolate Silk Flavor, baking powder, instant coffee, and salt in a medium bowl. In a small bowl, whisk together milk, butter, and vanilla. Pour liquid ingredients over the dry ingredients and fold together to combine. It will be a thick batter like brownies!

Transfer to prepared baking dish and smooth out if necessary.

Evenly sprinkle with brown sugar and cocoa powder, then top with chocolate chips. Pour hot water over top and do not stir.

Bake for 40 minutes, until edges are crisp and center is just barely set. Cool for 10-15 minutes before serving warm with ice cream. Enjoy!

Want more chocolate? Click the link below for lots of great new recipes today!

Cakes, Desserts, Recipes

Banana Espresso Chocolate Crumb Cake for #Choctoberfest

This Banana Espresso Chocolate Crumb Cake is just the thing if you want a quick dessert with plenty of delicious fruit and chocolate flavor. The crumb topping makes it extra special!

This Banana Espresso Chocolate Crumb Cake is just the thing if you want a quick dessert with plenty of delicious fruit and chocolate flavor. The crumb topping makes it extra special! #Choctoberfest

I think we need a little dessert around here, don’t you? Most of what I been up to in the kitchen [and sharing on the blog, when I have had the chance] this summer has been savory… dinner, mostly, just to keep us fed amidst the newborn days. But lately I’ve had the urge to bake! I think pregnancy made me into more of a chocoholic than I have ever been before, but I still love me some fruity desserts too. 🙂 The best desserts are those that combine fruit and chocolate into one lovely package… like this banana cake that’s studded with chocolate chips and laced with a little bit of espresso flava! It is absolute PERFECT for Chocotoberfest!

Psssst…. don’t forget to enter the giveaway here. 🙂

This Banana Espresso Chocolate Crumb Cake is just the thing if you want a quick dessert with plenty of delicious fruit and chocolate flavor. The crumb topping makes it extra special! #Choctoberfest

I think that we can all agree that sometimes we buy extra bananas just to have them on hand for baking. Or is that just me? Haha. Anyways, this banana cake is a fabulous way to use up extra bananas languishing on your counter or popped in the freezer. It is a banana cake for people who like bananas–the flavor is definitely present, but if you aren’t the biggest banana fan on earth, don’t worry, as it is also tempered by the rich chocolate and coffee flavors too. There’s something in this cake for everyone! I would be remiss if I didn’t emphasize how perfect the sugary/spicy/salty crumb topping on this cake is also. Don’t omit the salt! It definitely adds a hint of something special to this cake… enjoy!

This Banana Espresso Chocolate Crumb Cake is just the thing if you want a quick dessert with plenty of delicious fruit and chocolate flavor. The crumb topping makes it extra special! #Choctoberfest
two years ago: Asian Turkey Meatballs with Carrot Rice
three years ago: Cream of Broccoli Soup with Cheese
four years ago: No Bake Tropical Energy Bites
five years ago: Garlicky Pasta with Fresh Tomatoes and Basil
six years ago: Pillow Cookies

Banana Espresso Crumb Cake

  • Servings: 12
  • Print

from The Sweets Life

Ingredients:

  • 3-4 mashed ripe bananas, approximately 1 1/2 cups
  • 1/4 cup light brown sugar, firmly packed
  • 1/2 cup [1 stick] unsalted butter, melted and slightly cooled
  • 1/4 cup half and half
  • 1 large egg
  • 1 1/2 cups all-purpose flour [can use 3/4 cup whole wheat pastry flour & 3/4 cup all-purpose flour if you wish]
  • 1 tablespoon instant coffee [or 1 1/2 packets of Starbucks Via or other packaged instant coffee]
  • 1 1/2 teaspoon baking soda
  • 3/4 cup semi-sweet chocolate chips

for crumb topping

  • 3/4 cup all-purpose flour
  • 1/2 cup light brown sugar, packed
  • 1/4-1/2 teaspoon coarse salt [I used Kosher salt–use 1/4 to 1/2 teaspoon depending on how salty you like things]
  • 1/2 teaspoon ground cinnamon
  • 1/4 cup unsalted butter, melted and cooled

Directions:

Preheat oven to 350 degrees F. Grease a 8×8 or 9×9 square pan with cooking spray and set aside.

In a medium mixing bowl, stir together bananas, sugar, butter, half and half, and egg. In a larger bowl, whisk together flour, instant coffee, and baking soda. Fold wet ingredients into the dry, stirring until just moistened. Gently stir in chocolate chips. Transfer batter to prepared pan.

In another bowl, make the crumb topping by mixing together flour, brown sugar, salt, and cinnamon. Pour melted butter over dry ingredients, then toss with a fork gently until crumbs form. For larger crumbs, toss less. Sprinkle evenly over cake batter.

Bake for 35-45 minutes, or until a toothpick inserted in the center comes out clean and top is golden brown. Do not overbake–sometimes it can be hard to tell with banana baked goods whether they are done or not, so if you are in doubt, take it out and let it cool a little bit and check it a few more times.

For clean slices, cool before cutting. Slices of this cake reheat well in the microwave!

Check out other chocolate recipes of the day for Choctoberfest at the link below!

Desserts, Other, Recipes

SRC: Homemade Magic Shell

Just three ingredients and a few minutes til you have delicious, homemade magic shell… just looking for an ice cream home! 🙂

Just three ingredients and a few minutes til you have delicious, homemade magic shell... just looking for an ice cream home! :)

Hello and welcome to another edition of the Secret Recipe Club! I haven’t been around for a few months, but I’ve had a good excuse in the form of this sweet baby boy. This has been my longest–and only–hiatus from SRC since I joined… but this little guy has been well worth it. 🙂

https://www.instagram.com/p/BJA6HJmAmNS/?taken-by=thepajamachef

Isn’t he cute?!?? I may be a little biased but I think so… he was born in May and is doing great. 🙂 Anyways, I’m happy to be back blogging and back at it with SRC. This month I was assigned to Kirstin’s blog, Loving Life, which is filled to the brim with dozens of easy family recipes. Kirstin lives in the Pacific Northwest with her family, an area of the country that I’m not very familiar with but she did live in Ohio so we have that in common. Woo! It was so hard to choose what to make from the many delcious treats she shares on her blog. This fall I want to make these Pumpkin Chocolate Chip Bars and at Christmas, this Cranberry Apple Casserole will be sure to be on the menu. But for now, I had to go for a summer recipe… and what’s more summery than ice cream?!? Not a whole lot…

Just three ingredients and a few minutes til you have delicious, homemade magic shell... just looking for an ice cream home! :)

Ben and I have been going through half gallons of ice cream like nobody’s business this summer. Seriously. It’s been so hot and I haven’t had much time to bake, so ice cream is an easy and wonderful dessert option. Ben also has an ice cream pocket [a special space in his stomach to store ice cream, duh] and I am developing one, so we don’t mind a bit. Usually, we go for flavors like Peach, French Silk, Moose Tracks, Black Cherry, etc… you know, flavors that don’t really need toppings. But sometimes it’s fun to go for a classic vanilla bean and add toppings to suit your needs. Yes, I said needs. See ice cream pocket above. 🙂 I like adding chocolate chips and a little bit of melted peanut butter, while Ben prefers chocolate sauce or caramel sauce. One topping we almost never have at the house because it’s so dangerous is magic shell. That stuff is FUN to watch harden on your ice cream, isn’t it? I remember when my mom bought it for the first time. We were all in awe! So when I saw that Kirstin had a homemade magic shell recipe, I had to try it out. It just takes three ingredients and a few minutes to get to magic shell perfection. I wasn’t sure if it would really work like the store bought stuff, but it DOES! I was so impressed. I know this is a recipe I’ll be making over and over again, and I hope you will too. Thanks, Kirstin! Enjoy!

Just three ingredients and a few minutes til you have delicious, homemade magic shell... just looking for an ice cream home! :)

one year ago: Eggplant Caponata Sandwiches
two years ago: Baked Cauli-Tots
three years ago: Quinoa Black Bean Burritos with Southwest Sauce

four years ago: Summery Squash and Chicken Lasagna
five years ago: Kale Frittata
six years ago: Jambalaya

Homemade Magic Shell

from Loving Life

Ingredients:

  • 1 cup chocolate chips
  • 2 tablespoons coconut oil
  • 2 tablespoons peanut butter

Directions:

Combine all ingredients in a small saucepan set over medium-low heat. Stir constantly until melted, then allow to cool for a few minutes before spooning onto ice cream.

Be sure to check out other SRC recipes at the link below!