Main Dishes, Recipes, Sandwiches and Wraps

Eggplant Caponata Sandwiches

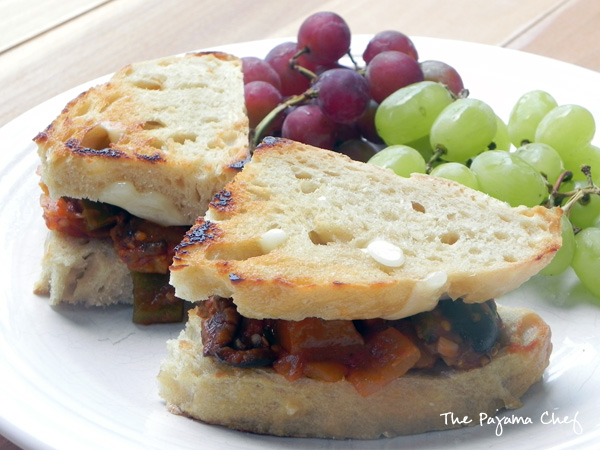
A hot vegetarian sandwich that is more flavorful than you ever could imagine! 

Eggplant Caponata Sandwiches | thepajamachef.com #summer #meatless #recipe

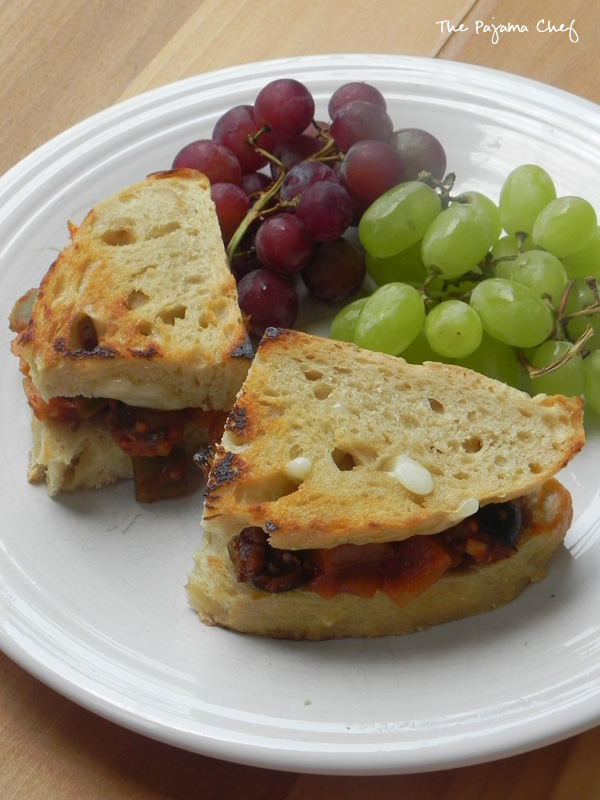
Eggplant… in a sandwich? Umm, is that for serious? That was Ben’s reaction, pretty much verbatim when I told him I was making these sandwiches with–you guessed it–a cache of farmer’s market goodies. Eggplant, bell peppers, onion, mushrooms, garlic, oregano, basil cooked in a rich tomato sauce. The result is an intensely flavorful sauce that is absolutely incredible on a good, thick baguette with some melty cheese. Mmmm! And oh? If you encounter any doubters when making this recipe, the smell alone should be enough to sway them. 🙂

Eggplant Caponata Sandwiches | thepajamachef.com #summer #meatless #recipe

Truthfully I hadn’t ever heard of eggplant caponata before finding this recipe, but it sounded kind of Italian sooo I put my librarian hat on and found out it’s a traditional Sicilian dish. It’s always made with eggplant and usually is made with a sweet and sour sauce seasoned with vinegar and olives or capers. You can serve the caponata on bread like I did, or over pasta. This made a huge batch so I served some sandwich-style, more over pasta, and some actually over rice. We eat a lot of rice in this house so it was a natural choice.

Eggplant Caponata Sandwiches | thepajamachef.com #summer #meatless #recipe

I’m not really the meatball sub type, but honestly, this reminded me of a vegetarian meatball sub. It’s hearty and tomato-y, with lots of great flavors and a hearty texture. This is definitely a great meatless dish to try if you like eggplant, or even if you want to introduce it to your family. I can’t tell you how much we enjoyed this saucy goodness [and#thatmeltycheese] for dinner for dayyys on end. I know you’ll ❤ it too!

one year ago: Baked Cauli-Tots
two years ago: Quinoa Black Bean Burritos with Southwest Sauce
three years ago: Summery Squash and Chicken Lasagna
four years ago: Watermelon Coolers
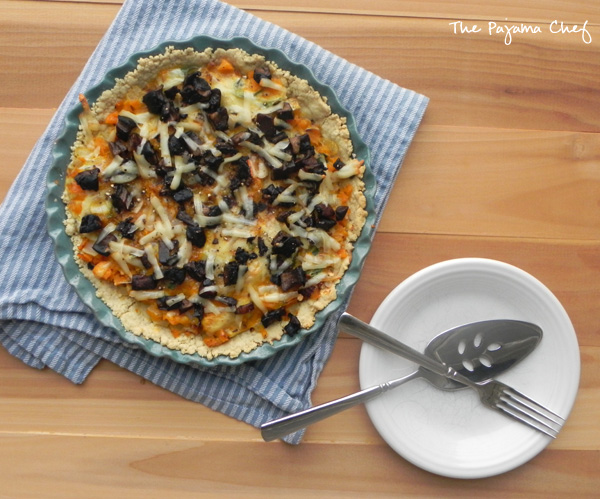
five years ago: Tomato Pie

Eggplant Caponata Sandwiches

  • Servings: 6-8
  • Print

from The Sweets Life

Ingredients:

  • 1/3 cup olive oil
  • 1 medium eggplant, peeled and cubed – about 4 cups
  • 1/2 green bell pepper, diced
  • 1 small onion, diced
  • 4 ounces white mushrooms, chopped
  • 3 cloves garlic, minced
  • salt & freshly ground black pepper
  • 1/2 cup black olives, pitted and sliced
  • 1 – 6 ounce can tomato paste
  • 3 tablespoons red wine vinegar
  • 1 1/2 teaspoon sugar
  • 1/2 teaspoon dried oregano
  • baguette, sliced into small pieces, to serve
  • shredded mozzarella, to serve
  • fresh basil, to serve

Directions:

Heat oil in a large pot set over medium heat. When hot, add eggplant, bell pepper, onion, mushrooms, and garlic. Season with salt and pepper, and cook for about 10-12 minutes, until veggies are soft.

Stir in olives, tomato paste, red wine vinegar, sugar, and oregano. Taste and season again as desired. Reduce heat to low, then cover and cook for 30 minutes. Stir occasionally, adding a little water [1-2 tablespoons] if mixture gets too thick or sticks to the bottom of the pan.

Allow caponata to cool for about 20 minutes, then spoon onto slices of baguette, top with mozzarella, and broil until cheese melts. Top with basil and serve immediately. Caponata also freezes well, or can be served over rice or pasta.

Beans, Main Dishes, Recipes

Costa Rican Rice and Beans with Fried Eggs

Take an easy, frugal, staple meal up a notch with some new seasonings and a couple fried eggs. Great for dinner, lunch, OR breakfast!

Costa Rican Rice and Beans with Fried Eggs | thepajamachef.comBen and I eat rice and beans quite a bit. Usually white rice and black beans. Sometimes with a bit of butter, taco seasoning, salsa, veggies, and/or cheese. The combo varies quite a bit. It’s a great dinner that’s cheap, healthy, and fast. Win win win! Sometimes I like to mix it up though, so I’m always on the look out for new variations of this great meal. It seems every culture has their take on this meal… this is Costa Rica’s. I’ve never been there [but would love to go!] so I don’t know how authentic it is… but it is sure delicious!

Costa Rican Rice and Beans with Fried Eggs | thepajamachef.comWhat sets this version of beans and rice apart from the competition is two-fold.

  1. Instead of our usual “burrito bowl” style beans and rice mixture, after all the ingredients are prepped, everything cooks together on the stove for a little bit. This maximizes the flavor… namely the tomato-y sauce with cumin, garlic, and Worchestershire sauce [props to you if you have the authentic Salsa Lizano!]. It is so good, you guys!! This sauce makes the rice and bean mixture almost creamy, and very very flavorful.
  2. The fried egg on top. Ohhh man. Runny yolks + a creamy-esque mixture = heaven!

You’ve gotta try this! SO good. It’s not spicy or anything… just good, rich flavors. Worth the extra work for sure!

one year ago: Easy Crockpot French Dip Sandwiches
two years ago: Kale Pesto Pasta
three years ago: Fresh Tomato and Mozzarella Crostini
four years ago: Brown Sugar Fruit Dip
five years ago: Butterscotch and Chocolate Yellow Cake

Costa Rican Rice and Beans with Fried Eggs

  • Servings: 4
  • Print

from Fine Cooking

  • 1 cup long-grain white rice
  • 1 tablespoon canola oil
  • 1 small yellow onion, diced [about 1 cup]
  • 1/2 medium red bell pepper, diced [about 1/2 cup]
  • 2 large cloves garlic, minced
  • 1/2 teaspoon ground cumin
  • 1/4 cup tomato sauce
  • 15 ounce can black beans, rinsed and drained
  • 3 tablespoons Salsa Lizano; more to taste [or 3 tablespoons Worchestershire sauce + a dash of molasses if you can’t find Salsa Lizano]
  • freshly ground black pepper
  • 8 large eggs [2 per person]
  • 2 tablespoons chopped fresh cilantro

Directions:

Prepare rice according to package directions. You can use water or chicken/vegetable broth for the liquid, whatever you prefer. Keep covered after it is cooked.

While rice is cooking, heat oil in a large skillet over medium heat. Add onion and bell pepper, and cook until soft, about 3-4 minutes. Add the garlic and cook another 30 seconds until fragrant. Stir in cumin and cook another 30 seconds or so. Stir in tomato sauce, mixing until well incorporated. Add black beans and 1 cup of water or broth, stirring until combined. Reduce heat to medium-low then simmer until most of the liquid is reduced, about 4-5 minutes. Fold in rice and mix well, then add Salsa Lizano [or Worchestershire/molasses combo], and season to taste with freshly ground black pepper. Cover and reduce heat to low.

Heat another skillet over medium high heat. Grease with cooking spray, then fry eggs to desired doneness. I like mine over medium, so I crack the eggs in the hot pan, season with salt and pepper, and cook about 3-4 minutes until whites are set, and the edges of the yolks are just beginning to set.

To serve, place a spoonful of rice and beans mixture on a plate or bowl and top with two fried eggs. Sprinkle with cilantro and enjoy!

Chicken, Couscous, Main Dishes, Recipes, Sides, Vegetables

Indian-Style Chicken Curry with Chickpeas and Raisins over Spiced Couscous #bookclubcookbookCC

Fragrant, rich chicken and chickpea curry incorporates great flavors to make an amazing dish! Serve it over spiced couscous for a special treat. 

Indian-Style Chicken Curry with Chickpeas and Raisins over Spiced Couscous | thepajamachef.com #thebookclubcookbookCC

Happy Friday! I joined a new blogging group… the Book Club Cookbook Cooking Crew. And guess what! YOU can join us. Camilla of Culinary Adventures with Camilla organized a group of bloggers to read through some great books and make some great recipes inspired by them. We are using The Book Club Cookbook as our guide and inspiration… you can read more about the club on her blog, but here’s the gist. Each month, one blogger serves as hostess to choose a book and a recipe from the cookbook. From there, we can make the chosen recipes OR draw inspiration from the selected book to create a recipe. Camilla is our July hostess and she chose Jhumpa Lahir’s Interpreter of Maladies for our book of the month, and invited us to make curry and lassis with her. At the end of the month, you can win a copy of the cookbook so you can follow along! Go to Camilla’s blog to enter now! 🙂

On with the recipe though! Have you ever heard of Jhumpa Lahir’s Interpreter of Maladies? I had not, and was surprised when I picked up a copy at my local library. It’s actually a collection of short stories centering on the themes of family, home, marriage, belonging, and more. Many take place in America, but I thought some of the most interesting stories were set in India. You don’t think about adaptations to new life in your own country… this book is just lovely! The first and last stories were my favorites, but they are all good. Have you read this book before? If not, you should pick it up! I highly recommend it.

Food is an integral part to all of the stories, and nearly each one mentioned curry! An Indian classic for sure, with as many variations as there are people. One of the recipes Camilla chose for us to make this month was a hard boiled egg curry. It sounds SO interesting. But Ben hates hard boiled eggs with a passion, so that’s a no go for us [and I don’t think I could eat a whole batch alone]. Instead, chicken curry it is!

Indian-Style Chicken Curry with Chickpeas and Raisins over Spiced Couscous | thepajamachef.com #thebookclubcookbookCC

This is one of my very favorite curry recipes, and actually is the one that made me love Indian food! Ben and I have made this recipe a handful time over the past few years… it is absolutely delightful each time! Every bite is rich and flavorful, and your kitchen will smell absolutely wonderful while you’re cooking. Ginger! Garlic! Garam masala! Mmm, mmm, mmm. The tomato and coconut based curry sauce is fabulous over the chicken and chickpeas and plump, juicy raisins… and the flavors are magnified since it’s not just served over regular ‘ole rice, but instead over a spiced couscous that is just bursting with more raisins and rich spices. Yes, it’s a lengthy recipe with quite a few ingredients… BUT it is oh-so-good. A great dish for company, a great dish to make on a relaxing night at home. It’s just as fantastic as anything you could get at a restaurant, but easy to make at home with accessible ingredients too. Make it this weekend! 🙂 Enjoy!

Indian Spiced Peas | thepajamachef.com

And oh! If you’re looking for an easy side dish to serve with this, try these easy Indian-spiced peas. No real recipe… just mix together a teaspoon or two of coconut oil, a 10 ounce bag of frozen peas, and a teaspoon each of curry powder and garam masala in a skillet. Cook over low heat until hot, then mix in a about a 1/4 cup of coconut flakes. Ahhhmazing! Next time I might toast the coconut to make it even better. Yum!

one year ago: Ginger Ice Cream
two years ago: Mom’s Potato Salad

three years ago: Mediterranean Feta Dip
four years ago: Lemon Crinkle Cookies
five years ago: Big Thumbs Up Bite Size Soft Pretzels –> yes! my blog is FIVE! 🙂

Indian-Style Chicken Curry with Chickpeas and Raisins over Spiced Couscous

  • Servings: 6
  • Print

from Jenna’s Everything Blog – go to either post for great step by step photos if that’s your thing!

Ingredients:

for curry

  • 2 tablespoons curry powder [I used a sweet curry powder]
  • 1 teaspoon garam masala
  • 4 tablespoons canola oil
  • 2 onions, diced
  • 4 cloves garlic, minced
  • 1 tablespoon grated fresh ginger
  • 1 serrano chili, minced – remove seeds to reduce heat… or not, your call
  • 1 tablespoon tomato paste
  • 1 1/4 cups chicken broth
  • 1 – 15 ounce can crushed tomatoes
  • 1 – 15 ounce can chickpeas, drained and rinsed
  • 1 1/2 pounds boneless skinless chicken breasts [I’ve also used chicken thighs]
  • 1/2 cup raisins
  • 1/2 cup golden raisins
  • 1/3 cup coconut milk
  • 1 cup frozen peas
  • 1/4 cup cilantro, chopped

for couscous

  • 1 tablespoon canola oil
  • 1 onion, diced
  • 2 teaspoon garam masala
  • 3 1/2 cups chicken broth
  • 2 tablespoons butter
  • 1/2 cup golden raisins
  • 1/2 cup raisins
  • 1 package Trader Joe’s Harvest Grains Blend [I forget what size it is…about 18 or 20 ounces I think] — can also substitute 1 pound Israeli couscous plus a couple tablespoons quinoa and orzo — or an equivalent amount of rice [I’ve made it all three ways!!]

Directions:

Set a small skillet over medium heat. Pour in curry powder and garam masala, then stir constantly for about 1-2 minutes to toast spices, until fragrant. Remove from heat and transfer to a bowl.

In a Dutch oven or other large pot, heat 3 tablespoons oil over medium high heat. When hot, add onions and season with salt. Stirring occasionally, cook for about 15 minutes until onions are browned and caramelized. If you have you more time, cook the onions on medium-low heat for a longer amount of time to caramelize them more. But either way works!

After onions are cooked to your liking, add garlic, ginger, and chili pepper. Stir and cook for about a minute, then add in toasted spices and tomato paste. Pour in the chicken broth and crushed tomatoes, stirring to mix everything up. Add chickpeas, chicken, and raisins. Make sure the chicken is submerged as much as possible. Bring to a simmer, then cover and reduce heat to medium-low. Simmer for about 15 minutes, until chicken is just about done.

Meanwhile, prepare couscous while chicken is cooking.

In a saucepan, heat oil over medium heat. Add diced onion and cook for about 5-6 minutes, until soft. Stir in garam masala, cooking for about 30 seconds until fragrant. Add chicken broth, butter, and raisins. Stir and bring to a boil. Add couscous [or other grain], bring to a boil again, and cook for about 10-15 minutes until fully cooked. Liquid should be absorbed but exact time depends on what grains you use. Season to taste with salt or additional garam masala then set aside to serve with curry.

When chicken is fully cooked, remove to cutting board and chop it up into bite-sized pieces. If the chicken isn’t fully cooked, it will finish cooking in the sauce.

Return chicken to pot, then stir in coconut milk and peas [if using]. Cook for about 5 minutes, then add in half of the cilantro.

Serve curry over couscous, with additional cilantro on top. Enjoy!

Main Dishes, Recipes, Turkey

Turkey Sloppy Joes

These turkey sloppy joes are full of great flavors and are super easy to throw together after a long day! Plus, this recipe freezes well so make a big batch to enjoy another time too!

Turkey Sloppy Joes | an easy, healthy meal that everyone will love! | thepajamachef.comSummertime makes me think of sloppy joes. I know they’re stereotypically a “kid food” that comes out of a can. However, I don’t really remember eating them until later in life. I always skipped over them in the lunch line in elementary school, so it wasn’t until I worked at a summer camp in college that I really ate them regularly. At camp, you eat what you get… or you eat PBJs. 🙂 And you’re hungry from being outdoors ALL day long, so you really DO want to eat, no matter what’s on the menu. Those were some of the best summers of my life and I wouldn’t trade them for anything. If you work at camp, you’ll understand I’m sure.

Turkey Sloppy Joes | an easy, healthy meal that everyone will love! | thepajamachef.comAround this time, my mom started making homemade sloppy joes using this recipe from the Neely’s. While I love that recipe, it isn’t quite as good with ground turkey so I started trying other recipes online. And this is a recent one I tried that we LOVED! So of course, I had to share it. 🙂 It’s BBQ sauce based, meaning it tastes like a million bucks with minimal effort [read: no measuring a zillion spices]. Just give this a quick 20 minute simmer after cooking the turkey and veggies, and you are golden! It’s not too sweet, not too tangy… absolutely perfect.

Turkey Sloppy Joes | an easy, healthy meal that everyone will love! | thepajamachef.comI’m not much of a “freezer cooking” kind of girl but I do like to make big batches of our favorite meals and freeze some of it for a future busy night. This recipe freezes great, and is a great one to double! I like to let it cool and pop half into a freezer bag for another time, but something else you could try is portioning it out into smaller tupperware containers that you could grab for a work lunch or single serving dinner. I think I’m too messy of an eater to eat sloppy joes in the middle of the work day, but I really like the idea now so I just might try it! 🙂 Enjoy!

one year ago: BBQ Baked Spaghetti
two years ago: Honey Lemon Thyme Iced Tea
three years ago: Chocolate Chip Banana Pancakes
four years ago: Spiced Waffles

Turkey Sloppy Joes

  • Servings: 6
  • Print

slightly adapted from Ambitious Kitchen

Ingredients:

  • 1 teaspoon olive oil
  • 1 cup sweet yellow onion, diced
  • 1 cup sweet bell peppers [I used red, yellow, and orange mini peppers]
  • 3 garlic cloves, minced
  • 1 pound ground turkey
  • 8 ounces tomato sauce
  • 1/2 cup BBQ sauce [I like Sweet Baby Ray’s]
  • 1 teaspoon Worcestershire sauce
  • 1 teaspoon chili powder
  • 3 tablespoons tomato paste
  • 1 teaspoon hot sauce
  • 1 tablespoon brown sugar
  • freshly ground black pepper
  • red pepper flakes, if desired
  • hamburger buns, for serving
Directions:
In a large skillet set over medium heat, heat olive oil. When it’s hot, add onion and peppers and cook until soft, about 5 minutes. Add the garlic at the end and cook an extra 30 seconds or so, until fragrant. Remove veggies from pan and place in a bowl.
Then, add the turkey to the skillet and cook until no longer pink, breaking it up with a wooden spoon as you go. Drain any grease if necessary. Then add veggies back to the pan, along with the tomato sauce, BBQ sauce, Worcestershire sauce, chili powder, tomato paste, hot sauce, and brown sugar. Stir to combine.
Reduce heat to medium-low, then simmer for 15-20 minutes. Taste and season with red pepper flakes and freshly ground black pepper as desired. Additional brown sugar or even ketchup can be used if the sauce is too tangy/tart. Serve on hamburger buns and enjoy!
This recipe also freezes well!
Main Dishes, Other, Recipes

Butternut Squash and Mushroom Tart

This tart is full of hearty butternut squash and mushrooms, and of course has some cheese and bacon on top for extra deliciousness! 

Butternut Squash and Mushroom Tart | thepajamachef.com

Tarts and quiche are some of my favorite foods! They’re fancier than a regular frittata but almost as easy. The thing is… I like to fill them with things like butternut squash, zucchini, mushrooms, asparagus, and the like. All veggies that while Ben tolerates, he doesn’t really like. Soooo when I know I’ll have an evening to myself, this is just the sort of dish I like to make. Cooking for one only has to be a bore if you let it! Though, I must say, I don’t cook for one very often these days so when I do it’s kind of a novelty. But back to this tart!

Butternut Squash and Mushroom Tart | thepajamachef.comA slice of this tart is pretty much the best thing ever. Though it has a lot of steps, the work goes quickly and when it’s done, you get to eat! 🙂 I used the crust the recipe suggested, and it’s pretty basic with the twist of using olive oil for the fat and seasoning just with salt and pepper. You could certainly use your favorite tart/pie crust though. This crust was super flavorful and once it was topped with the filling it was just perfect! I loved that the cheese was spread out throughout the tart, not just on top, but next time I will probably mix together all the veggies and the bacon with the eggs, and top with cheese for simplicity’s sake.

Butternut Squash and Mushroom Tart | thepajamachef.com

I enjoyed this tart for dinner, but the leftovers were equally fabulous for breakfast and lunch, so make it anytime you please! Enjoy! 🙂

one year ago: Oatmeal Fudge Bars
two years ago: Lemon Pasta Salad
three years ago: Pineapple-Apricot Teriyaki Chicken
four years ago: Sweet and Tangy Pork Chops with Pineapple

Butternut Squash and Mushroom Tart

  • Servings: 8
  • Print

from Cooking Light

Ingredients:

for crust

  • 5.6 ounces all-purpose flour [about 1 cup + 2 tablespoons]
  • 1/4 teaspoon kosher salt
  • 1/4 teaspoon freshly ground black pepper
  • 1/4 teaspoon baking powder
  • 1/4 cup extra-virgin olive oil
  • 3 tablespoons ice water
for filling
  • 3 cups cubed and peeled butternut squash
  • 2 tablespoons extra virgin olive oil, divided
  • 3/4 cup diced onions
  • 2/3 cup [2.5 ounces] swiss or Gruyère cheese, divided
  • 2 large eggs
  • freshly ground black pepper
  • 1 1/2 ounces pancetta or 2 strips bacon, chopped
  • 5 ounces sliced mushrooms [shiitake is preferred but any will work]
  • 1/4 cup white wine or chicken stock

Directions:

Preheat oven to 425 degrees. Grease a 9 or 10 inch pie pan coated with cooking spray. Begin by making the crust.

In a food processor, combine flour, salt, pepper, and baking powder and pulse until combined. In a measuring cup, whisk together oil and water. With processor running, slowly pour in oil mixture. Process until dough is just barely crumbly. Press dough into an even layer on bottom and sides of pie pan. Place in preheated oven and bake for 10 minutes.

Next, make filling. Place butternut squash into food processor [no need to clean first!] and pulse for about 1 minute to finely chop squash.

Heat a large skillet over medium heat. Add 1 tablespoon oil to pan. When hot, saute squash and onion for 7-9 minutes, stirring constantly.

Meanwhile, in a large bowl, stir together 1/3 cup cheese, eggs, and pepper. When squash is cooked, fold in with egg mixture. Evenly spread over pre-cooked crust, then return to oven for 9 minutes.

Using the same skillet as before, set over medium-high heat, cook pancetta or bacon until it starts to brown [about 1 minute for pancetta, more for bacon]. Add oil if necessary. Add mushrooms and reduce heat to medium, then saute for 5-6 minutes until browned. Season with pepper to taste, then add wine/stock and turn heat to high. Cook, stirring constantly, for 1-2 minutes until liquid cooks down.

Spread mushroom mixture over egg mixture, then top with remaining cheese. Return to oven and bake for 4-5 minutes until cheese melts. Cut into wedges and serve immediately.