These healthy, flavorful granola bars are full of that wonderful chocolate peanut butter goodness that EVERYONE knows and loves. And they can be made in ten minutes, perfect for any busy schedule… even that of a new mama. 🙂

Hi guys! Another new recipe! Who am I?!? I just had to take some of my free time to share this no bake granola bar recipe with you… because frankly, I’m obsessed with them. I’ve made two batches in just as many weeks… and eaten almost all of them myself! 🙂 You know what else I’m quickly becoming obsessed with? Babywearing! Having two hands to use during baby naps [that he prefers to take on me or on Ben] is priceless. I have a Baby K’Tan and it’s purple and fabulous. I can even cook while wearing it! Well, cooking is a bit of a stretch, but I definitely can make really easy recipes as long as they don’t involve putting something in the oven or any potential splatters from the stovetop. Paranoid, safety conscious new mom here! Probably for a good reason, but still.

Anyways, back to this deliciousness! And no, I’m not talking about this cute ONE MONTH old baby here. Though he IS delicious and adorable, huh? What do you think I should call him on the blog? Due to his privacy and not wanting to make more of an online trail for him in the future than necessary, I don’t want to share his full name here. Before he was born, we joked around that his name would be “Volde,” as in Voldemort so his current Instagram hashtag is #BabyVolde. We might stick with that, or we might adapt one of his [many] family nicknames. Most of them have to do with foxes, because we chose woodland animals as his nursery theme. Gah, I way overthink EVERYTHING. Haha.

This cutie has his eyes open more and more these days… he’s so fun! Moving on… no good transition, but I gotta get moving as naptime will be coming to a screeching halt any minute now. 🙂 These granola bars. They are no bake, amazingly delicious, and SO simple to throw together. Since I made my first batch, I’ve eaten one just about every day. Err, night. Middle of the night feedings make me hungry! Or maybe it’s just being up in the middle of the night that makes me hungry. Either way, I learned very early on in this little one’s life that I needed a healthy snack to eat in the middle of the night when I was up with the babe. Granola bars are the easy choice, right?
For a couple weeks I was buying [or sending Ben to buy] the more wholesome granola bars from the grocery store… but then I felt like baking. So I decided to make my own using healthy ingredients that I had on hand! Some oats, Rice Krispies cereal, nuts, honey, peanut butter, and chocolate later, these babies were born. I was a little unsure of how they would turn out using natural peanut butter as the base, but I’m happy to report that they stick together just fine if you store them in the refrigerator. Score! They do get a little melty at room temperature, but I’m sure you can eat them quickly enough to remedy that problem. I know I sure do! The classic combo of peanut butter and chocolate is one that I don’t tire of easily. Reminds me of eating candy, so much so that I have to stop myself from setting the baby down partway through a feeding to go get another granola bar. No joke. These granola bars are that good! With that in mind, it’s probably for the best they need to hang out in the fridge so they last a little longer. I bet they would freeze well too, though I haven’t tried that yet. Hope you can make these granola bars soon–you won’t regret it! Enjoy!
one year ago: Cherry Chipotle Chicken Salad with Cherry Lime Salsa
two years ago: Dark Chocolate Double Coconut Macaroons
three years ago: Pretzel Rolls
four years ago: Orange Glazed Chicken Stir Fry
five years ago: Strawberry Chocolate Coconut Pancakes
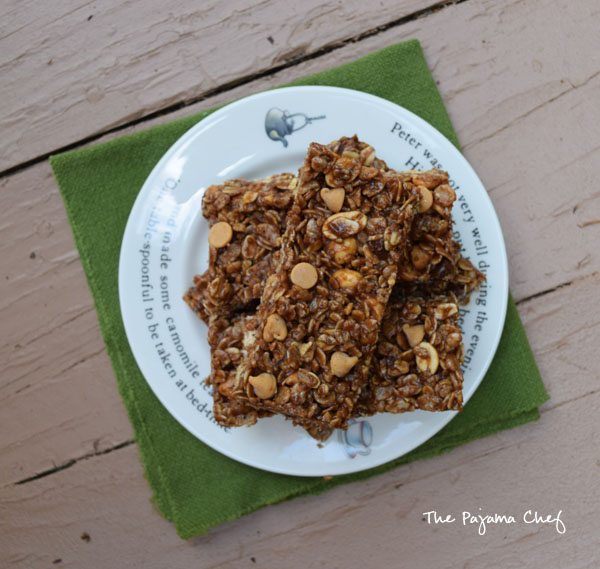
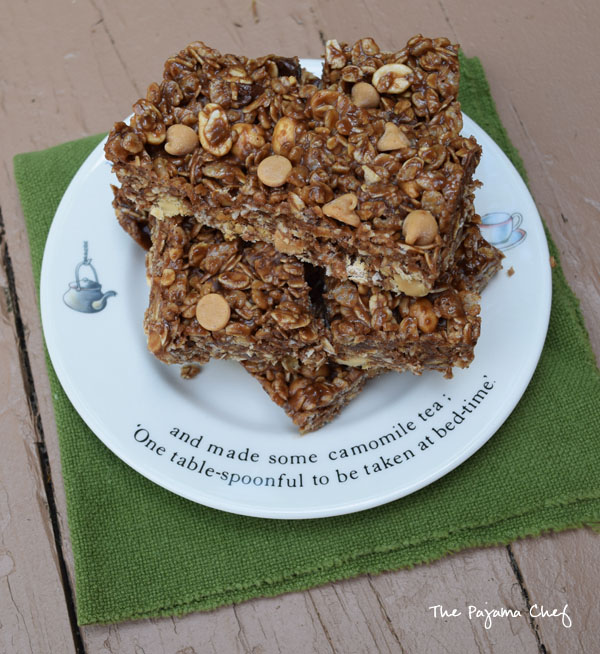
No Bake Chocolate Peanut Butter Granola Bars
from It’s Just Laine
Ingredients:
- 1 cup peanut butter – I used natural creamy
- 3/4 cup honey – I used mostly honey but a little maple syrup because I ran out
- 3 tablespoons coconut oil
- 2 tablespoons cocoa powder [dark chocolate if you have it]
- 1 teaspoon vanilla extract
- 2 cups old fashioned oats
- 2 cups Rice Krispies cereal
- up to 2 cups of mix-ins–I’ve been using the following:
- 1/2 cup peanuts
- 1/2 cup Reese’s chips
- 1/4 cup chocolate chips
Directions:
Grease a 9×13 pan with cooking spray and set aside.
In a small saucepan, melt together peanut butter, honey, coconut oil, and cocoa powder over low heat. No need to boil, just heat until melted together. Remove from heat and stir in vanilla. This step can also be done in the microwave if desired–just mix in a bowl and heat on 50% power until melted. For me, this was about 45 seconds.
In a large mixing bowl, stir together oats and Rice Krispies. Pour peanut butter mixture on top and stir to combine. Fold in mix-ins, then transfer to prepared pan. Use a sheet of wax paper or a spatula to press down and flatten. Cover and refrigerate at least an hour, or up to overnight to set.
After bars have set, cut as desired. Store in the refrigerator or freezer, especially during warm/humid months.