 Week of January 28
Monday: Stuffed Potato Skins with Avocado Cream
Tuesday: Sesame Chicken
Wednesday: leftovers
Thursday: Black Beans & Rice
Friday: Sweet Potato Chile Mac
Saturday: leftovers
Sunday: Super Bowl! apps & desserts 🙂

where the secret ingredient is love
Week of January 28
Monday: Stuffed Potato Skins with Avocado Cream
Tuesday: Sesame Chicken
Wednesday: leftovers
Thursday: Black Beans & Rice
Friday: Sweet Potato Chile Mac
Saturday: leftovers
Sunday: Super Bowl! apps & desserts 🙂
So, I was really sad earlier in the week because I thought the Super Bowl was this Sunday and that I wasn’t going to have time to share a couple awesome party recipes with you! Turns out I was mistaken and it is actually a week from Sunday so I am golden! You’d think with a sports fanatic for a husband I’d be up on my sports dates, but that is not always the case. Alas. Like any good food blogger, my only concern with the Super Bowl [or other sporting events like it] is the food. Sometimes that means making elaborate, over the top awesomeness… other times, it means making really simple things that are just so amazing you wonder why you’ve never thought of them before now.
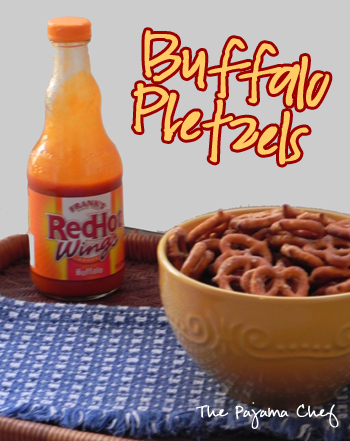
These Buffalo Pretzels fall into the latter category. I mean, really… they just look like plain ‘ole boring pretzels. But take one bite and you realize they are actually little bites of spicy goodness… all the flavors of buffalo wings with a fraction of the work and no mess! These pretzels are coated in a ranch dressing-laced buffalo wing sauce [I used bottled, but if you wanna get fancy you could make your own] then baked down, Chex Mix style. After making these pretzels, I have visions of other saucy baked pretzels treats in my future. Sriracha Pretzels? Sweet and Sour Pretzels? Some sort of sweet and spicy ginger pretzels? Oh man, I’m excited now! [But don’t ask me to google it. I’m sure someone else has already stolen my ideas and I don’t want to be sad, not on a Friday. :)]
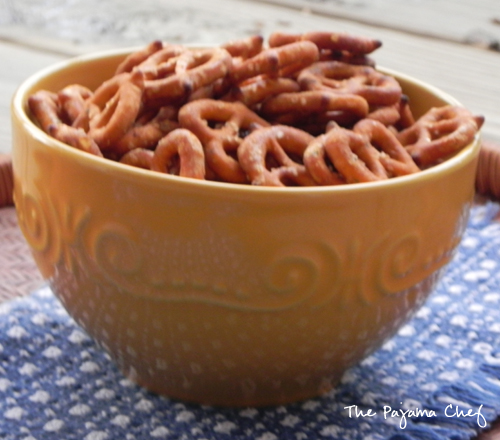
But anyway… I can’t say enough great things about these Buffalo Pretzels! They are the perfect party snack… simple, quick, addicting, flavorful. Everyone will love them, guaranteed! Plus, you can make ’em in advance, because they last at least a week when stored in a ziploc bag or sealed container… that is, if you can stope eating them! Enjoy! 🙂
Buffalo Pretzels [from A Taste of the Best]
click to print
Ingredients:
Directions:
Preheat oven to 250 degrees. Grease two large baking sheets well, or cover with parchment paper.
Place half of the pretzels in a large bowl and set aside. In a measuring cup, whisk together butter, ranch seasoning, celery salt, and buffalo wing sauce. Pour half of the sauce over the pretzels [use the measuring cup to gauge this], then toss to coat. Pour onto one of the prepared baking sheets and spread out evenly, in one layer if possible. Repeat with remaining ingredients.
Place pans in the oven and bake for 15 minutes, then stir each sheet and switch positions in the oven. Repeat until pretzels have absorbed all of the sauce. For me, this was about 30 minutes of baking total. Original recipe called to bake for 60 minutes, so just follow your instincts with your oven. Cool on baking sheets before transferring to a bowl or storage container.
Time: 35-65 minutes.
Yield: 12 cups pretzels.
Notes: These are not spicy, but they are pretty salty. I think the celery salt could be cut down or eliminated with no real damage to the flavor. I made 4 batches for an event expecting 120 people, and this was more than enough.
This recipe is linked up with: Weekend Potluck.
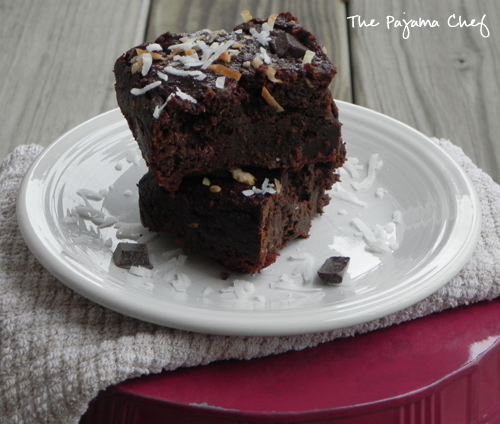
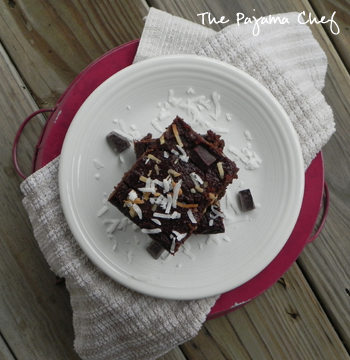
Would you like a rich, chocolately, fudgy bar for breakfast? They have a hint of cinnamon and cayenne reminiscent of the fancily flavorful Mexican Hot Chocolate that is so addicting once you get past the fact that you’re drinking something with a little heat. I bet you’ll love them.
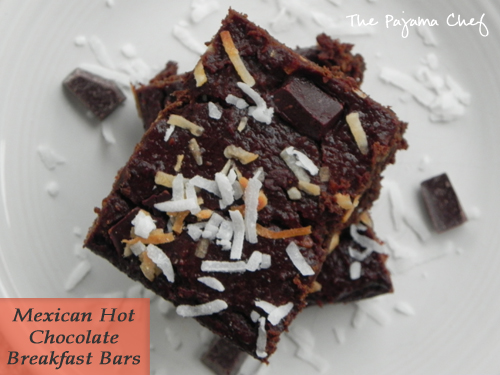 But…… I know, I know. Chocolate for breakfast is everyone’s dream. Emphasis on dream, not reality. Especially in near brownie form, complete with chocolate chunks and coconut flakes. Perfecto! Nah, you say. No can do. Welllll, what if I told you they were healthy. What if I told you they were healthy without seeming healthy. What would you say then? I hope you’re in. I hope you’re game. Because these Mexican Hot Chocolate Breakfast Bars are secretly healthy. Made with a base of [gasp] sweet potatoes and black beans, this is one breakfast treat that anyone can get into eating.
I don’t usually calculate nutrition stats for my recipes, but I did for this one and discovered that each bar is 247 calories each, with 6 grams of fat. Thanks to the sweet potato and black beans, each serving has as much protein as an egg [6 grams] and as much potassium as a small banana [300 milligrams]. Add in the 6 grams of fiber and high amounts of vitamin A, this is a breakfast to be proud of. Unfortunately, the sugar content [29 grams] is higher than many breakfasts, but there are a couple ways this could be lowered–by using less honey or unsweetened versus sweetened coconut [or even subbing nuts for coconut altogether]. But that stat aside, I [the non-nutritionist, dietitian, and professional that I am] feel pretty good about eating this for breakfast. A bit indulgent, yes, but homemade, nutrient rich, tasty, and satisfying. Paired with a piece of fruit or some skim milk to round out the meal, these bars are really filling. Seriously… for the girl who usually eats a midmorning snack, a couple days when I ate one of these for breakfast at 8 am after a workout with a piece of fruit I wasn’t hungry until 1 pm. CRAY cray!
But don’t just take my word for it. Nutrition and all that boring info aside, I’m guessing you might be a bit hung up on the sweet potato/black bean base. I have two words: don’t. worry. I promise. Pinky swear, in fact. No one will be able to tell.
Case in point: the whole time I made these, Ben was playing video games in another room. True to routine, after they were baking, I visited him with the batter spoon for a test taste. Mum was the word, and he licked the bowl with a vengeance. They were pulled out of the oven and set on a cooling rack next to an assortment of clean dinner and baking dishes air-drying on a towel. Ben said they looked like brownies, and that he was looking forward to a breakfast treat. He even tried a piece that had cracked off the top and said it was delicious. Still, I said nothing. It was only when we had gotten into bed that I fessed up. What can I say… I can’t go to bed in deceit. Without batting an eye [at least, I think so… it was dark], Ben just laughed. He’s used to my kitchen games by now. And then, the next morning he took one to work for breakfast, along with a few others for his co-workers to try. That night, he came home with rave reviews. If that’s not an awesome testimony, then I don’t know what is.
I mean, I FINALLY tricked my husband into eating [and loving] something secretly healthy. I mean, I did here, so it’s been done before. But I failed here, and also have failed with a smattering of other dishes over the years. Believe me, Ben eats plenty of healthy foods, but when it comes down to it, he would choose a rich, chocolately brownie over a bowl of sweet potatoes. Who wouldn’t? But why should you have to choose? If no one can tell, then I say game on and serve a secretly healthy Mexican Hot Chocolate Breakfast Bar in the morning. You won’t regret it…. especially if you heat ’em up for about 20 seconds before enjoying. Melty chocolate in the morning is the bestttt!
heavily adapted from Eliza’s Edibles
Ingredients:
Directions:
Preheat oven to 350 degrees. Thoroughly grease and “flour” [using cooca powder] a 9×9 pan.
Add black beans and honey to a food processor and process until smooth, taking care to scrape the sides periodically to eliminate unsightly black bean chunks. Then chop sweet potato into small chunks and add to food processor along with the buttermilk, egg, peanut butter, and vanilla. Process again until everything is fully combined and very smooth. Mixture will be thick but not heavy.
In a small bowl, stir together cocoa powder, flours, baking powder, cinnamon, and cayenne pepper.
Transfer black bean mixture from food processor into a large bowl, then fold dry ingredients in. Stir until well combined, then add chocolate chunks and coconut flakes.
Spoon batter into prepared pan, then top with extra chocolate chunks and coconut flakes. Bake for 40-45 minutes, covering with foil for the last 10 minutes or so to ensure coconut on top toasts, not burns. Test with a toothpick to ensure bars are done, then cool completely before cutting. Keep refrigerated.
Week of January 21
Monday: Roasted Chicken & Potatoes
Tuesday: Shrimp & Grits
Wednesday: Mushroom & Wild Rice Soup
Thursday: leftovers
Friday: grilled cheese & tomato soup
Saturday: with family
Sunday: breakfast for dinner

Before we get into the nitty gritty of this tutorial, let’s talk about why food bloggers should have a Recipe Index. [If you want an example, my Recipe Index is located along the top of my blog, and when you click on it, you are directed here.] It’s a requirement for membership in the Secret Recipe Club, and was something I didn’t quite understand at first when I was first looking to join about a year after starting my blog. However, I have since found that it’s incredibly helpful for many reasons, both for you and your readers. But it can be confusing, time consuming, and challenging to create.
Here are a few reasons why I think having a Recipe Index is super important:
I know there are many other reasons why a Recipe Index is VIP. But I’ve been wordy enough. Let’s get to the how to, shall we?
The following tutorial for creating a Recipe Index is for WordPress blogs. My blog is created using the free WordPress [dot com, not self-hosted–dot org], but I believe that the basic administrative software that runs both the free and paid versions looks the same.
Before you begin: In order to use this method to create a Recipe Index, your recipes must be organized using Categories in either list or dropdown format. If you are using a Category Cloud, I suggest that you go to the Widgets section [under the Appearance option on the left menu] and create a Categories area. You can always remove that after you have initially established your Recipe Index. If you don’t organize your blog with Categories [i.e. Appetizers, Beverages, etc.] but rather use those terms [Appetizers, Beverages] as tags, you can adapt this tutorial but the process will not be exactly the same.
Step 1: Have two tabs open in your browser. The first should be your blog homepage. The second should be your Dashboard.
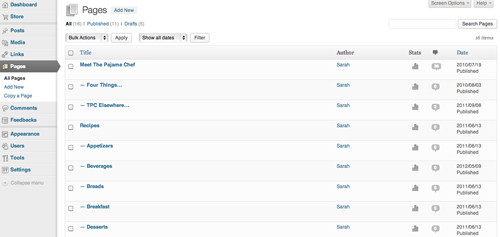
Step 2: When logged into Dashboard, click on the Pages option on the left menu. That will redirect you to the main Pages page.

Click on ‘Add New’ and create a new page called Recipes.

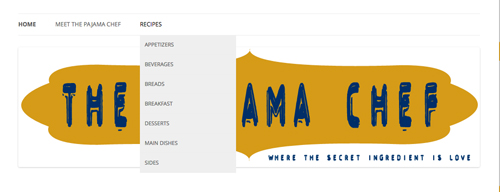
Step 3: Go to your blog homepage, and look at your Categories. Mine are organized as Appetizers, Beverages, Bread, Breakfast, Desserts, Main Dishes, and Sides.
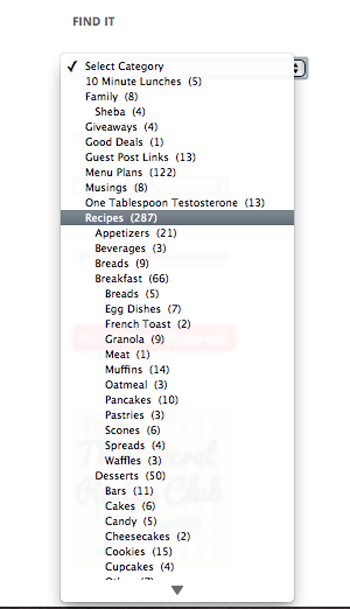
Within those categories I have subcategories [i.e. Egg Dishes within Breakfast], but we’ll come back to that later. After the Recipes page has been created, it should show up on your homepage like this.
 Obviously the exact placement varies due to your theme, but you get the idea.
Step 4: Next, go back to your Dashboard, then go to the Pages option, ‘Add New’–just like in Step 2. This time, create a page for each category [Appetizers, Beverages, etc.–use the categories you have created for your own blog]. Except this time, after you have typed the category name in the ‘Enter title here’ section, go over to Page Attributes on the right. Click on the ‘Parent’ dropdown box and then on Recipes.

This will create a menu hierarchy, which makes your Appetizer page appear underneath the Recipe tab when it is highlighted by a reader [instead of creating another tab along the top of your blog].
Step 5: Repeat Step 4 with all your Categories that you have used for Recipes in the past. They should automatically populate the menu like mine has in the above image, and should appear on the Dashboard side in a hierarchy, too.
Step 6: Go back to the original Recipe page you created. Type the names of each Category you chose, and then create links to the new pages for them. Alternatively, you can create images and then link the images like I did, but to begin, using text will be simpler.

Step 7: The rest of this process is the most time consuming, and unfortunately there is really no simple fix, so I suggest to go about this in a systematic way over time. It’s a good activity to do while you’re watching TV, as it doesn’t require a great deal of concentration. This is the time when you need to type in all the names of your recipes, using your Category drop down that you were looking at in Step 3 to help compile the index. I use different methods for Categories with and without subcategories.
Step 8: Maintenance. This is very important! Now that you see how long it takes to prepare a Recipe Index, you’ll want to maintain it. I try to update mine every week when I do my menu plan, so that I never get too far behind. If I go longer than a week or so, then I tend to use my method in Step 7 to determine which posts are missing from the index.
~
If you’ve never used Categories, my best advice for replicating this with tags is to think about your process for creating the tags. Are the tags ingredients? Types of foods [muffins, cookies, chicken dishes, etc.]? Recipe sources? Once you know how you created your tags, brainstorm a way to corral all those recipes into a list and adapt my method to fit your organization system. The process might have to look a little different, especially since tags don’t have drop down menus, and not all tags show up on tag clouds, but you can do it. You might have to do it from within the Dashboard but where there’s a will, there’s a way. [Category and Tag lists are within the Posts section on Dashboard, by the way.] It might take time, but do it a little a time and it’ll get done, I promise!
I hope this tutorial for creating a Recipe Index is helpful. Please let me know in the comments or by email [pajamachef at gmail dot com] if you have questions, suggestions, or if I have omitted something important. I usually do recipes, not tutorials so that is entirely possible. This post was just something requested within the Secret Recipe Club group on Facebook, and since I love organization [I’m a librarian, after all]… I jumped at the chance to write down my process. I am also happy to help you think through ways to organize your recipes, so feel free to contact me about that too.
Good luck and Happy Recipe Indexing!! 🙂
for those of you on Blogger, check out Sarah’s post over at Fantastical Sharing of Recipes. 🙂


