Beef, Main Dishes, Recipes

Oven Baked Tacos

You’ll love these crispy, melty baked tacos! The filling is made from both beef and beans, so it’s extra delicious! 🙂

You'll love these crispy, melty baked tacos! The filling is made from both beef and beans, so it's extra delicious! :)

What’s better than–and easier than–regular tacos? Oven tacos! I’m totally serious! These have been a thing for a few years now, so you may have already seen them before. But if you haven’t tried them yet, you should. ASAP. They’re a great way to make tacos for a crowd and in general, they’re just a great change up from regular taco night. Plus, it’s also fun to make homemade crispy taco shells! Though it involves being extra careful when you’re working with hot oven racks, I bet kids would LOVE to watch corn tortilla shells transform into crispy shells. 🙂 I mean… I do, so what kid wouldn’t? Haha.

You'll love these crispy, melty baked tacos! The filling is made from both beef and beans, so it's extra delicious! :)

I’ve made this recipe as written below a handful of times, but I’ve always thought about how I could switch up the filling but keep the concept the same. I haven’t ventured very far yet–just subbing black beans from refried beans, but that’s a tasty start! I think these tacos would be great with shredded chicken, carnita meat, fajita veggies, pinto beans, or any other filling your little taco-loving heart desires! No matter how you make it, this dish is a favorite. It’s hard to decide what the best part of these tacos are–the crisp homemade shells, the bubbly and melty cheese, or the flavorful beef and bean filling… but I do know that these tacos have been part of our regular taco rotation for a couple years now so I hope you try them! If you need any sides for taco night, why not try my Mexican RicePerfect Black Beans, or this yummy Guacomole Salsa? Enjoy!

You'll love these crispy, melty baked tacos! The filling is made from both beef and beans, so it's extra delicious! :)

one year ago: Turkey Sloppy Joes
two years ago: BBQ Baked Spaghetti
three years ago: Honey Lemon Thyme Iced Tea
four years ago: Chocolate Chip Banana Pancakes
five years ago: Spiced Waffles

Oven Baked Tacos

  • Servings: 8-10 tacos
  • Print

from Macaroni & Cheesecake

Ingredients:

  • 8 to 9 corn tortillas [or for an easier twist, premade hard taco shells]
  • 1 pound lean ground beef
  • 8 ounces refried beans [from half of a 15 ounce can]
  • 8 ounce can tomato sauce
  • 1 1/2 tablespoons taco seasoning  [about half of a store-bought packet]
  • 1 1/2 cups shredded cheese
  • taco toppings – chopped lettuce, avocado, tomatoes; sour cream; cilantro; etc.

Directions:

Begin by making the crispy taco shells. Preheat oven to 375 degrees. In batches, microwave tortillas in a damp dishtowel or paper towel, if you prefer, for about 20-30 seconds until tortillas are pliable. Coat on each side with cooking spray, then lay on a cutting board or plate. When all are ready, open oven and carefully pull out the top oven rack partially. Drape tortillas over rungs so they are hanging upside down and forming that hard taco shell shape. If you prefer, you can remove the rack before you preheat the oven so you can do this step with a cool oven rack and just slide it back in. I found it easier to do it this way personally though. Bake for about 6-8 minutes, until crispy, then carefully remove from the oven with tongs and allow to cool on a cooling rack.

Adjust oven temperature to 400 degrees, then spray a 9×13 inch baking dish with cooking spray.

Meanwhile, brown ground beef in a large skillet. Remove grease, then stir in tomato sauce, refried beans, and taco seasoning. Heat on medium-low for a few minutes to heat through.

Remove pan from heat and fill each cooled taco shell with the meat mixture. Stand each filled shell up in prepared pan. Sprinkle everything with cheese, then bake for 10-12 minutes, until cheese melts. Serve with desired toppings and enjoy!

Note:

To reheat and retain the crispy shell, heat leftovers at 350 degrees for about 10 minutes, checking carefully so nothing burns.

Appetizers, Recipes

Homemade Jerky #bookclubcookbookCC

Did you know you could make jerky in the oven, without a dehydrator? Well, you can…and it’s so easy and delicious! 

Homemade Beef Jerky... easy, tasty, & delicious! #bookclubcookbookCC

I used to think beef jerky was gross and smelled terrible, but nearly seven years married to Ben has changed my taste a wee bit. 🙂 Once in awhile, it absolutely hits the spot! [But I still think it smells bad.] Ben loves it so much that he often chooses it as a road trip snack, or I’ll buy him a bag of something interesting if I come across it somewhere. A few years ago, I stumbled upon the perfect Christmas gift for him… beef jerky seasoning/cure blends so he could make it for himself! And it’s been fun to see him experiment with homemade jerky ever since!

Homemade Beef Jerky... easy, tasty, & delicious! #bookclubcookbookCC

That’s why I immediately thought about sharing our his method of jerky making for this month’s edition of #bookclubcookbookCC! Ashley at Cheese Curd in Paradise is our hostess, and her book choice was The Killer Angels by Michael Shaara. This book is supposed to be an excellent Civil War historical fiction novel–it is now on my list to read, though I didn’t get to it this month. [Psst… if you’re reading this post on February 29th, be sure to scroll to the bottom of this post to enter the giveaway. I’m behind this month so it’s only live until 6pm Pacific time today!]

Homemade Beef Jerky... easy, tasty, & delicious! #bookclubcookbookCC

Even if you haven’t heard of this book, it inspired the early 1990s movie version of Gettysburg, a film my sister and I absolutely dreaded our dad watching while we were growing up. It was two VHS tapes long and just seemed to drag ON and ON and ON. 🙂 Since dried beef was common food fare for Civil War soldiers, I wanted to share our homemade beef jerky method with you today in honor of #bookclubcookbookCC! I’ve never tried Civil War era beef jerky, but from my internet research it seems pretty bad. Hopefully this version will be a little more palatable. 🙂

Homemade Beef Jerky... easy, tasty, & delicious! #bookclubcookbookCC

When you read through the recipe below, you’ll notice that it takes a LONG time to make beef jerky. A minimum of 24 hours and really, for good beef jerky, more than 48. Most of the time is spent marinating the meat in the fridge. Ben has some purchased seasoning/cure mixes that he has used and recommended [link in recipe], but he has also experimented with his own blends too–but he didn’t write down what he did so I can’t share them with you. In the recipe, I do link to another blog post I found online with a few seasoning suggestions so you can check those out if you prefer to not purchase seasoning. After this, you’re ready to cook the meat. Since we don’t have a dehydrator, we use our oven set at a very low temperature and keep it propped open just a bit for ventilation. From what I’ve read, this isn’t authentic beef jerky since it isn’t really completely dried/smoked and it does cook a little, but it’s pretty darn good. The whole cooking process can take up to 5 hours, so this isn’t a process to start later in the evening. The longer you cook it, the drier the meat becomes… and as it cools, it will dry out even more. When at home, we keep our jerky in the fridge to keep it fresher longer [obviously not the traditional method], but it will last at room temperature or outdoors for a few days if you want to take it camping or on other outdoor adventures. Supposedly this method of cooking jerky makes it last for 1-2 months, but ours gets eaten wayyy before then so I can’t say for sure. Ha!

Homemade Beef Jerky... easy, tasty, & delicious! #bookclubcookbookCC

Ben has made it to keep around the house as a snack, but also for family get togethers and a camping trip. It is so tasty and fun to make! I think it would be a great family project–just make sure to not eat the whole batch during the cooking process! Enjoy! 🙂 Thanks, Ashley, for hosting this month and inspiring me to share this awesome treat with everyone!

Homemade Beef Jerky... easy, tasty, & delicious! #bookclubcookbookCC

one year ago: Freezer Breakfast Burritos
two years ago: Spicy Chicken, Spinach, and Corn Enchiladas
three years ago: Italian Sausage and Red Rice
four years ago: Sausage, Apple, and Egg Casserole
five years ago: Roasted Vegetable Lasagna

Homemade Jerky

  • Print

Method from Two Dogs in the Kitchen

Ingredients:

  • 2-4 pounds beef, in cuts like london broil, bottom round, eye of round, flank steak, etc. – you want a lean, tender cut
  • seasoning blend – we used this one from Nesco. You can also make your own… with any flavors/seasonings you like! There are several recipes here, but I haven’t tried them. From my research, you will want to use 1 tablespoon of salt for each pound of meat to help cure the jerky.

Directions:

Begin a day or two before you want to cook your jerky. Two days before is better, if you can swing it. You’ll want to start by trimming any extra fat off your beef, then cutting the meat into thin strips about 1/8-1/4 inch thick. If you cut against the grain it will be more like regular beef jerky, but if you with the grain, it will be more lean in texture and appearance. Place in a large bowl, toss with seasonings of your choice, and then cover well with plastic wrap [tuck in so it doesn’t dry out]. Refrigerate for 24-48 hours.

When ready to cook, preheat oven to 200 degrees F. Remove meat from marinade/seasoning. If your mixture has any liquid, just shake it off but you don’t need to pat it dry or anything. Now you have some options….

You have two cooking methods options:

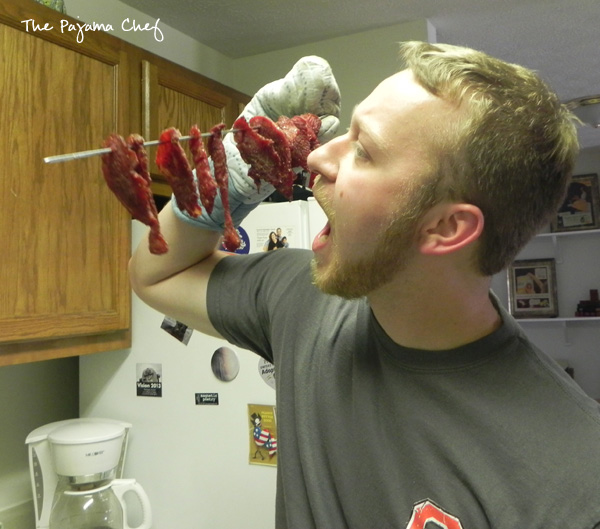
  1. Thread strips onto kebab skewers and place directly on oven racks that have been sprayed with cooking spray. You’ll have to space them out to go in between the slats, and line the bottom of your oven [before preheating] with foil to avoid a big mess. This is a quicker cooking process, and helps cook the meat evenly but it’s a little trickier to set up.
  2. Place strips about 1/4 inch apart on cookie sheets lined with aluminum foil that has been sprayed lightly with cooking spray. Much easier, but may take a little longer to cook.

Bake for 45 minutes, being sure to place a dish towel in the oven door for slight ventilation.

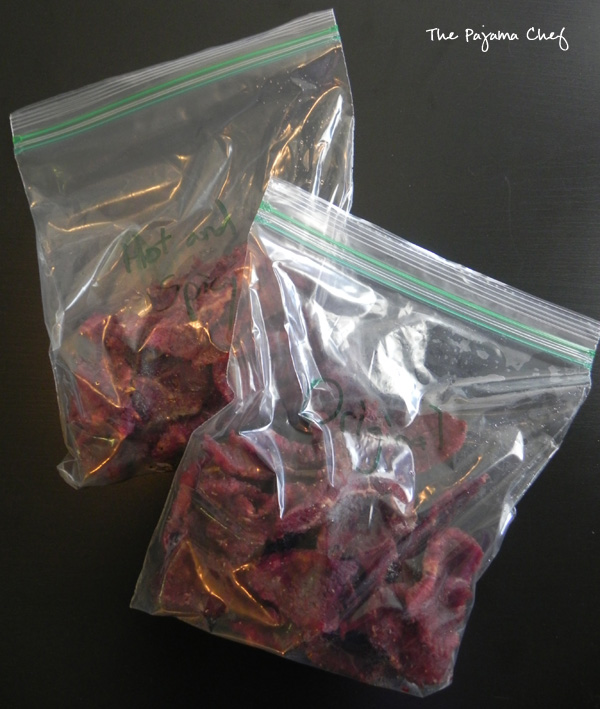
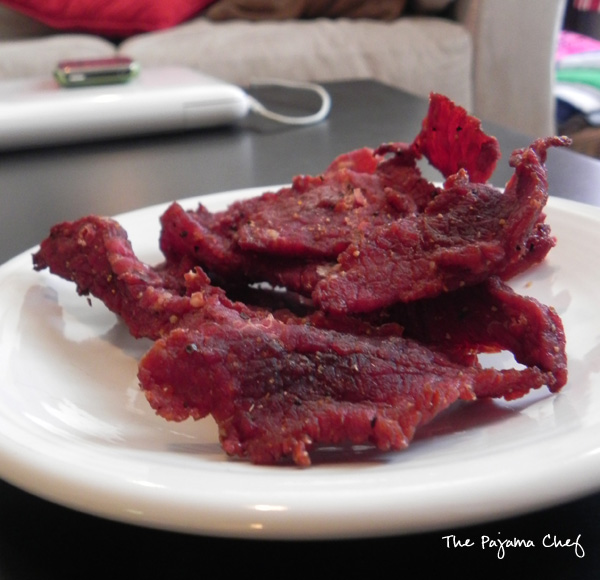
After 45 minutes, check meat every 20 minutes until meat is done. Each slice will take different amounts of time to cook based on its size and thickness. It should take between 2 and 5 hours total for all the meat to cook, depending on how chewy you want it. When it comes out of the oven, it should be darker in color and slightly dry to the touch, but it will harden/dry more as it cools. When each slice is cooked, allow to cool completely on a cooling rack, patting any grease off with a paper towel. Store in an airtight container or ziploc bag. We keep it in the fridge for safe keeping over 1-2 months [not that it lasts that long!] but it’ll last a few days at room temperature. The better dried it is, the longer it’ll last on the counter without spoiling. We feel it’s better to be safe than sorry, but it’s ultimately your choice. Enjoy!

Giveaway
This month Ashley at Cheese Curd in Paradise, this month’s host, is giving away a copy of the book.* Enter to win a copy of the cookbook so you can join us in future months, if you wish!
One of our lucky readers – US and Canada only! – can enter to win a copy ofThe Book Club Cookbook, Revised Edition: Recipes and Food for Thought from Your Book Club’s Favorite Books and Authors by Judy Gelman and Vicki Levy Krupp, courtesy of Tarcher-Penguin. Giveaway runs from February 1st till February 29th at 6 o’clock PM, Pacific time. Please see terms and conditions in the rafflecopter widget below. Many thanks to Tarcher Books. You may find Tarcher: on the web, on Facebook, on Twitter, and on Pinterest.

a Rafflecopter giveaway
https://widget-prime.rafflecopter.com/launch.js

*Disclosure: Ashley received a complimentary copy of The Book Club Cookbook, Revised Edition: Recipes and Food for Thought from Your Book Club’s Favorite Books and Authors by Judy Gelman and Vicki Levy Krupp as an opportunity to give a copy away. Opinions are our own. We received no further compensation for our posts.
Beef, Main Dishes, Recipes, Soups

Amish Cheeseburger Soup

A cheesy, creamy, and hearty soup… if you haven’t had cheeseburger soup before, you are in for a treat!

Amish Cheeseburger Soup on thepajamachef.comI know January is supposed to be all about healthy recipes and “cutting back.” That’s not exactly my philosophy though. I don’t say this to be all holier than thou or anything, and I don’t think I’m being naive/blind, but I don’t think I really indulge to levels of epic proportions during the holiday season. I’ve never been able to eat and eat and eat beyond the point of fullness, and if I did, it won’t be on traditional holiday fare [it would be on some sort of baked pasta :)]. So while I’m all for a reset in January of healthy habits, I’m still all about moderation and enjoying all food all year round. Hence a cheesy, comforting soup in January. 🙂

Amish Cheeseburger Soup on thepajamachef.com

There’s honestly not too much to say about this soup… it’s like a cheeseburger in a bowl, minus the bun of course! LOL. Plenty of cheese, sour cream, hamburger meat, potatoes, and some veggies to thicken it up! I did healthify the original recipe by using real cheese instead of Velveeta, but feel free to use either to suit your family’s preferences. Ben and I loved every bowl of this soup! I will be honest, it’s not one I’d make every week or even every month, but it is a hearty, comforting meal on occasion. It would be a wonderful addition for a soup potluck–it’s definitely different from anything anyone else would bring, I’m sure! Enjoy! 🙂

one year ago: Healthy Tropical Banana Muffins
two years ago: Cranberry Steel Cut Oats with Caramelized Pears
three years ago: Mexican Cornbread Pot Pie
four years ago: Lasagna Soup
five years ago: Whole-Wheat Corn Bread

Amish Cheeseburger Soup

  • Servings: 10
  • Print

adapted from 4 Little Fergusons

Ingredients

  • 1 pound ground chuck
  • 8 tablespoons butter, divided
  • 1 1/2 cups carrots, diced [about 3-4 carrots]
  • 1 1/2 cups celery, diced [about 4 stalks]
  • 1 small onion, diced
  • 1 teaspoon dried parsley
  • 1 teaspoon dried basil
  • freshly ground black pepper
  • 6 cups chicken broth
  • 8 cups potatoes, peeled and cubed [about 2 pounds]
  • 1/2 cup all-purpose flour
  • 3 cups skim milk, room temperature
  • 16 ounces extra sharp cheddar cheese, grated
  • 16 ounces sour cream

Directions:

In a large stockpot set over medium heat, melt 2 tablespoons butter. Add carrots, celery, and onion and saute for 8-10 minutes until soft.

Meanwhile, in a separate skillet, cook ground chuck through. Drain off fat and set aside.

When vegetables are cooked, season with parsley, basil, and pepper, then add chicken broth and potatoes. Cover and reduce to a simmer, cooking until potatoes are soft and tender.

While potatoes are cooking, in a separate saucepan set over medium-low heat, melt the remaining butter. When melted, slowly whisk in flour to make a roux. Constantly stir for 1 minute, until bubbly. Slowly pour in room temperature milk, stirring continually until mixture thickens. If you use skim milk this may take longer but it will happen. Then pour in potato mixture along with ground chuck and shredded cheese. Reduce heat to low and cook until everything is incorporated and cheese is melted.

Off heat, stir in sour cream. Cover and let rest for a few minutes, then season with additional herbs or pepper.

Note: I think it’d be great to add some diced tomatoes to the soup next time!

Beef, Main Dishes, Recipes

Beef Stroganoff #bookclubcookbookcc

Tender strips of beef are sauteed with mushrooms and butter, then tossed in a creamy sauce and served over egg noodles for the ultimate family meal… comfort food at its finest! 

Beef Stroganoff - a hearty, creamy, delicious family dinner via thepajamachef.com #bookclubcookbookCCWhen I think of family meals, beef stroganoff is one of THE meals that come to mind. Growing up, my mom served beef stroganoff fairly often and I’ve had it a time or two at friends’ houses also. Though it’s not the most glamourous dish, there’s no denying that it is delicious. If you aren’t familiar with the deliciousness that is beef stroganoff, all you need to know is beef + mushrooms + onions + sour cream = amazingness. Sour cream haters like my husband still love this dish because the sour cream is just used to thicken and add creaminess to the stock-based gravy. And though I am not a fan of traditional gravy, in this dish I love it! The mushrooms help too. 🙂

There are many versions of beef stroganoff [and like the name suggests it has a Russian heritage], and I’ve read in a cookbook before that this became a popular dish in the post WWII era. In some ways it reminds me of other classic family dishes from that era like Swedish meatballs, porcupine meatballs, or even meatloaf and mashed potatoes. Can you really go wrong with a meaty dish served with rice or noodles and a creamy sauce? No, I didn’t think so. 🙂 Comfort food heaven! If you need any further confirmation that beef stroganoff is a comfort food thing, look no further than the Hamburger Helper aisle at the grocery store. If they have a version, you know it’s a thing! [I’ve never tried that version but I have no doubt that mine is better!]

Beef Stroganoff - a hearty, creamy, delicious family dinner via thepajamachef.com #bookclubcookbookCCThough we regularly eat beef stroganoff at home, I made this batch special for this month’s edition of #bookclubcookbookcc, a cooking project I’m a part of this year. This month, Wendy at A Day in the Life on the Farm was our hostess and she selected Julia Glass’ Three Junes. Though I didn’t make a recipe discussed in the book OR Wendy’s suggested recipe [a very delicious looking white chocolate pumpkin mousse]. I was inspired by the numerous family meals that accompanied events in the life of one family over [you guessed it] three Junes. And what better way to celebrate family than with a delicious family meal? I hope you enjoy this dish as much as we did. Though this isn’t the beef stroganoff I grew up with [I still need to make and share that recipe], this version of beef stroganoff is so good and is sure to be a family favorite! Don’t forget to scroll down past the recipe for the giveaway. You could win a copy of the The Book Club Cookbook so you can join us in this project in the future, if you wish!

one year ago: Pumpkin Quinoa Oatmeal Bake
two years ago: Skinny Southwest Chicken Dip
three years ago: Mexican Rollups
four years ago: Butternut Squash Mac & Cheese
five years ago: Asian Chicken Bowls

Beef Stroganoff

  • Servings: 6
  • Print

from Jenna’s Everything Blog

Ingredients:

  • 1/4 cup canola oil, divided
  • 1 1/2 pounds sirloin steak tips
  • freshly ground black pepper
  • 16 ounces white mushrooms, sliced
  • 1 medium yellow onion, minced
  • 2 tablespoons flour
  • 1 teaspoon tomato paste
  • 2 1/3 cups low sodium chicken broth
  • 1 1/2 tablespoons dark brown sugar [or light brown with a splash of molasses]
  • 2/3 cup sour cream
  • 2 teaspoons lemon juice
  • handful of parsley, minced
  • cooked egg noodles, for serving

Directions:

In a large skillet, heat 1 tablespoon oil over medium heat. While oil is heating up, cut beef into bite-size chunks and season with pepper. Working in two batches, brown each side of the beef [about 3 minutes per side]. Beef doesn’t have to be cooked all the way through. When done, place in a bowl and set aside. Add a little more oil halfway through if necessary.

Next, add mushrooms and onion to the pan along with a little more oil. Cook until soft, about 6-8 minutes. Whisk in flour and tomato paste. Stir constantly for 30 seconds, then slowly pour in chicken broth. Add the brown sugar and the reserved beef. Stir together and reduce heat to low, then simmer uncovered for 30-35 minutes.

Meanwhile, cook 16 ounces of egg noodles according to package directions. When simmer time is done, stir in sour cream, lemon juice, and parsley. Serve over noodles. Enjoy!!

Giveaway
This month Wendy at A Day in the Life on the Farm, this month’s host, is giving away a copy of the book.* Enter to win a copy of the cookbook so you can join us in future months, if you wish!
One of our lucky readers – US and Canada only! – can enter to win a copy ofThe Book Club Cookbook, Revised Edition: Recipes and Food for Thought from Your Book Club’s Favorite Books and Authors by Judy Gelman and Vicki Levy Krupp, courtesy of Tarcher-Penguin. Giveaway runs from October 1st till October 31st at 4 o’clock PM, Pacific time. Please see terms and conditions in the rafflecopter widget below. Many thanks to Tarcher Books. You may find Tarcher: on the web, on Facebook, on Twitter, and on Pinterest.
*Disclosure: Wendy received a complimentary copy of The Book Club Cookbook, Revised Edition: Recipes and Food for Thought from Your Book Club’s Favorite Books and Authors by Judy Gelman and Vicki Levy Krupp as an opportunity to give a copy away. Opinions are our own. We received no further compensation for our posts.
Beef, Main Dishes, Recipes

SRC: Crockpot Barbacoa

Try this easy crockpot barbacoa for your next taco night! It sure tastes great. 🙂

Crockpot Barbacoa - an easy way to fancy up your next taco night! Find the recipe on thepajamachef.com #secretrecipeclub #src

It was a little surprising that I picked this recipe for this month’s edition of the Secret Recipe Club. Sure, I love Mexican food. That shouldn’t be a surprise to anyone who has ever met me. The surprising part is that I don’t think I’ve ever had barbacoa, except in one or two bite tastes from my husband’s Chipotle burrito. What can I say? Pork or chicken or even–GASP–vegetarian > beef almost allll of the time in my life. But when I was selecting a recipe to make this month from Sashi’s blog, Get off the Couch and Cook, I was feeling like pulling my crockpot out of hibernation. Sashi has tons of other great recipes on her blog, but I must have been in a savory mood when perusing her blog because everything I seriously considered making was a dinner recipe! Hoisin Pulled Pork, Bean and Potato Tacos, Slow Cooked Pulled Pork… they all sounded amazing, as did the barbacoa. And honestly, I planned to make Sashi’s pulled pork, but the grocery store foiled me! There was nary a big hunk ‘o pork in sight, so beef it was. 🙂

Crockpot Barbacoa - an easy way to fancy up your next taco night! Find the recipe on thepajamachef.com #secretrecipeclub #src

I have to admit, that when reading SRC posts I don’t always click over to the original recipe but if you have a sense of humor, you should definitely read Sashi’s barbacoa post. It is hilarious! Especially the part about how she likes her meat… err, men. 😉 I think Sashi and I would get along well, especially since her husband sounds a lot like mine–he even contributes to her blog, OTT style, and his nickname on the blog is Mr. Onion-Hater! Ben hates onions too, though I think his tolerance of them is a wee bit higher. She doesn’t live all that far away, relatively, as I’m in Nashville and she’s in the Atlanta area. Fun times!

Crockpot Barbacoa - an easy way to fancy up your next taco night! Find the recipe on thepajamachef.com #secretrecipeclub #src

But anyway, back to the beef! This crockpot barbacoa isn’t exactly authentic since it’s cooked indoors in the crockpot [hence the name] instead of over an open fire, but it sure is easy and tasty! The only changes I made to Sashi’s original recipe was to reduce the amount of spice with the chipotle peppers in adobo sauce. I used two to her four, and that was plenty spicy for me. No burn but enough heat. This was a great meal to make on a lazy Saturday to enjoy during a football game. True to Chipotle, I served our barbacoa in soft tortillas with cilantro lime rice, guac, and loads of toppings. I know this will be a repeat meal at our house, and we’ll be devouring the leftovers for dayyys! Hope you try this out too! 🙂

Crockpot Barbacoa - an easy way to fancy up your next taco night! Find the recipe on thepajamachef.com #secretrecipeclub #src

one year ago: Pumpkin Bagels
two years ago: Pumpkin Spice Chocolate Chip Cake with Nutella Frosting
three years ago: Chicken Enchiladas with Green Chili Sour Cream Sauce 
four years ago: Pumpkin Brownies
five years ago: Cran-Tan-Oat Scones

Crockpot Barbacoa - an easy way to fancy up your next taco night! Find the recipe on thepajamachef.com #secretrecipeclub #src

Crockpot Barbacoa

  • Servings: 8
  • Print

from Get off the Couch and Cook

Ingredients:

  • 3-4 pound beef chuck roast
  • 1 cup chicken broth
  • 1/4 cup lime juice [about 2 limes]
  • 1/4 cup apple cider vinegar
  • 2-4 chipotle peppers in adobo sauce, minced
  • 4 cloves garlic, minced
  • 1 tablespoon dried oregano
  • 1 tablespoon ground cumin
  • 1/2 teaspoon ground cloves
  • freshly ground black pepper
  • tortillas, for serving
  • rice, for serving [stir in some lime juice, chopped cilantro, butter, and a little garlic after the rice is cooked for a cilantro lime rice knockoff]
  • lettuce, tomatoes, guacamole/avocados, shredded cheese, sour cream, etc. for topping as desired

Directions:

Place the beef chuck roast in the bottom of a large crockpot. Pour chicken broth, lime juice, and apple cider vinegar over beef. Spread chipotle peppers and garlic on beef, then sprinkle with oregano, cumin, cloves, and freshly ground black pepper. Use the back of a spoon to rub seasoning into meat, then cover and cook for 6-8 hours on low or 3-4 hours on high.

When beef is fully cooked, remove from crockpot and place on a large rimmed baking sheet or dish. Trim fat as necessary, then shred with two forks. Return meat back to crockpot and stir to redistribute the juices.

Serve barbacoa in tortillas with rice and other desired toppings. Enjoy!

Be sure to check out other recipes from the SRC this week here: